Video Kit Installatiehandleiding
|
|
|
- Greta Verstraeten
- 6 jaren geleden
- Aantal bezoeken:
Transcriptie

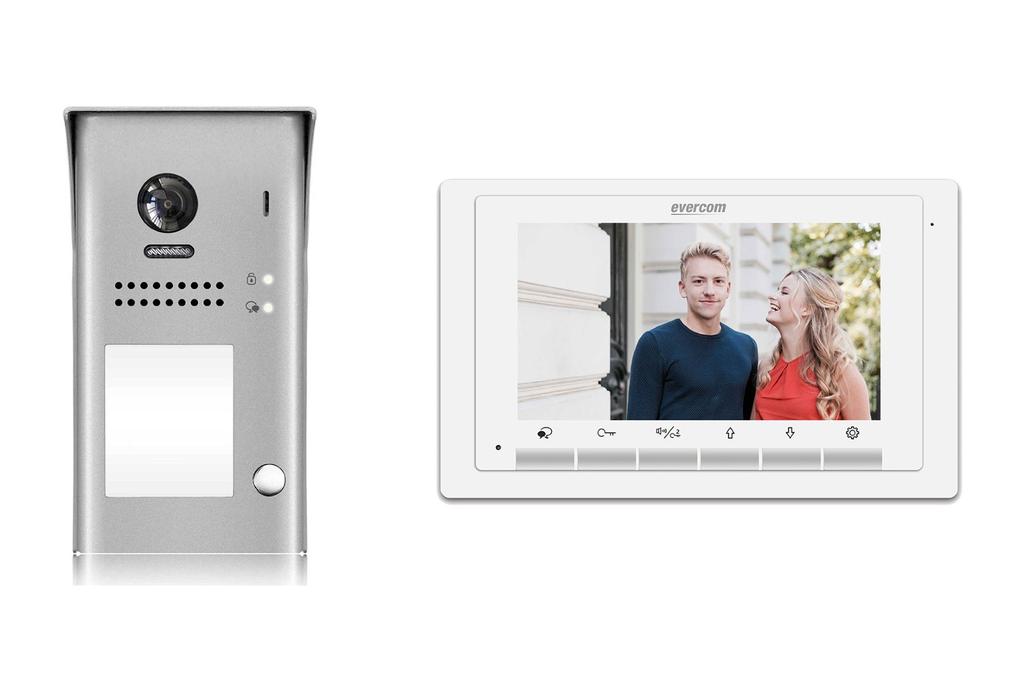


1 Video Kit Installatiehleiding Evercom DPOK + DM - tot beldrukkers V.0
2 Inhoudsopgave. Buitenpost - Onderdelen en functies. Buitenpost - Bevestigen. Instructie deuropener tijd. Bedrading. Overige informatie 6 Opgelet: Laat de installatie, de configuratie, de inbedrijfstelling en het onderhoud door gekwalificeerd personeel verrichten.
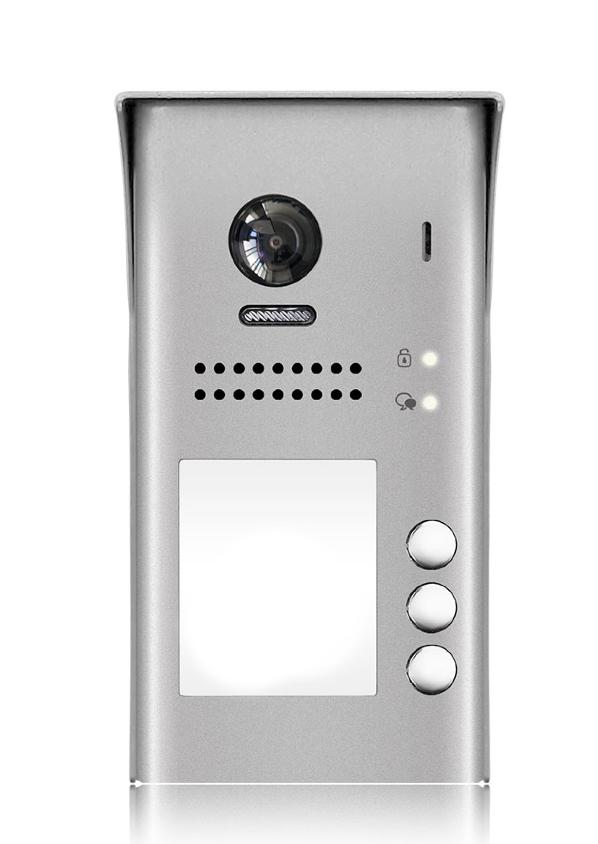
3 . Buitenpost - Onderdelen en functies Surface mounted [0] [] [] [9] [8] [7] [] [] [] [6] [] [] [] Microfoon Naamplaat 9 Camera Bevestiging Flush mounted voor montage Ontgrendel indicator 6 Frontpaneel 0 Regenkap Bel indicator PARTS AND FUNCTIONS 7 Speaker Uitsparing voor bevestiging Beldrukker 8 LED-Lamp Aansluiting Terminal description Deuropener jumper Lock Control Jumper L L Hoofd aansluiting [] Verbind met de buslijn, non polariteit. PL Externe power input PIR Bewegingsdetector aansluitpunt PIR Motion Detector Connect Port S+ Deuropener stroom output (+) S- Deuropener stroom (-) output. [] Microphone [] UOCK indicator [] CALL indicator [] Call button [] Nameplate [6] Front panel [7] Speaker [8] Night view LED Evercom DPOK + DM - tot beldrukkers Pagina van 7 Lock Control Jumper: To select the lock type. +V GND PIR L L PL S+ S- [9] Camera lens Motion Detector Connect Port: To connect external PIR motion detector. Hoofd aansluiting Main Connect Port Connect deze aan de deuropener input (alleen als de deuropeners vanaf de buitenpost gevoed worden. Wanneer de deuropener extern [0] gevoed Rainy wordt, cover de S- niet gebruiken. Zie H. [] Mounting hook [] Connection port [] Screw hole [] Mounting box
4 Mounting. Buitenpost - Bevestigen The installation height is suggested to ~60cm. Surface mounted PARTS AND FUNCTIONS Stappenplan bevestigen buitenpost aan de w Mounting The distance between the top of main unit rain cover should be not less than mm. mm RTS AND FUNCTIONS The installation height is suggested to ~60cm. Sluit de kabel aan op de juiste manier. Zie H. Surface mounted ounting FUNCTIONS The distance between the top of main unit rain cover should be not less than mm. mm nstallation height is suggested to ~60cm. Gelieve gaten in de muur te boren welke overeenkomen met de uitsparing van de face mounted. Connect theregenkap. cable correctly. Bevestig vervolgens de regenkap en de buitenpost (zonder frontpaneel).. Drill holes in the wall to match the size of screw stoppers,then attach the rainy c NS main unit to the wall, the distance between the top of main unit rain cover shou t is suggested to ~60cm.. Connect the cable correctly. less than afst tussen de bovenkant vanrainy de cover buitenpost en de regenkap mag niet langer. Drill holes in the wall tomm. match De the size of screw stoppers,then attach the The distance between the top of main unit rain cover should be not less than mm. mm d main unit to the wall, the distance the top of main unit rain cover should be not zijnbetween dan mm! less than mm.. Install the name plate.. Install the name plate.. Attach the front panel to the main unit.. Attach the front panel to the main unit. The distance between the top of main unit rain cover should be not less than mm. o ~60cm.. Use the special screwdriver the screws to fix the panel. onnect the cable correctly. mm. Use the special screwdriver the screws to fix the panel. rill holes in the wall to match the size of screw stoppers,then attach the rainy cover Plaats de naamplaatjes. unit to the wall, the distance between the top of main unit rain cover should be not Flush mounted than mm. Flush mounted stall the name plate. etween n unit should n mm. ach the front panel to the main unit. correctly. se the special screwdriver the screws to fix the panel. mm wall to match the size attach the het rainyfrontpaneel. cover of screw stoppers,then Bevestig the distance between the top of main unit rain cover should be not sh mounted ate. nel to the main unit. ewdriver the screws to fix the panel. e size of screw stoppers,then attach the rainymonteer cover de schroef aan de onderkant van de monitor.. Drill hole in the wall to cover matchshould the size e between the top ofa main unit rain be of notmounting box,then attach the mounting box to the wall. Leader (ACDB_MLEADER_CLASS). Loosen the high screws to install the name plate.. Connect the cable correctly. unit. the front panel to the mounting box,then use the special screwdriver the screws to e screws to. fixattach the panel. stoppers,then attach the rainy cover fix the panel. op maininunit cover should ill of a hole thefinish wallrain to the sizebeofnot mounting box,then attach the mounting box to the. thematch installation. * The camera angle view of surface mount model may be less than 700. osen the high screws to install the name plate. - onnect the cable correctly. he panel. tach the front panel to the mounting box,then use the special screwdriver the screws to. Drill a hole in the wall to match the size of mounting box,then attach the mounting b wall. e panel. wall the size of mounting box,then attach the mounting box to the nish to thematch installation.. Loosen the high screws to install the name plate. camera angle view of surface mount model may be less than 700. rews to install the name plate. correctly. Evercom DPOK + DM - tot beldrukkers. Connect the cable correctly. Pagina van 7. Attach the front panel to the mounting box,then use the special screwdriver the s fix the panel. nel to the mounting box,then use the special screwdriver the screws to e size of mounting box,then attach the mounting box to the on.
5 . Instructie deuropener tijd Omdat de fabrieksinstelling van de deuropener op één seconde is afgesteld, dient bij installatie dit geconfigureerd te worden. Het is hiervoor noodzakelijk om het frontpaneel te demonteren. Nr. Instelling Keuze Fabrieksinstelling Uitleg Deuropener tijd tot 99 seconden seconde De tijdsduur van de deuropener bij activatie. Stap In stby klik drie keer op KEY_SET - De LED_UOCK indicator is aan. - De LED_TALK indicator is uit. - De speaker geeft twee keer een geluid LED_UOCK LED_NAME RF CARD LED_TALK KEY_SET KEY_ KEY_ KEY_ KEY_ Stap Klik op KEY_ en blijf deze indrukken. De tijd vererd naarmate u de KEY_ ingedrukt blijft houden. - De LED_UOCK indicator is aan. - De LED_TALK indicator is uit. - De speaker geeft steeds een geluid bij elke seconde. - De LED_NAME blijft aan, totdat u klaar bent. - Als u binnen 0 seconden niks onderneemt, stopt het systeem automatisch de instellingen modus. - Wanneer u klaar bent met instellingen klik twee keer op KEY_SET. Evercom DPOK + DM - tot beldrukkers Pagina van 7

6 . Bedrading. Deuropener extern gevoed Voor gebruik van een deuropener welke extern wordt gevoed, zie het aansluitschema. De volgende punten van van belang: Haal Take de off jumper the jumper vanaf De interne relais is beperkt tot 0Vac A or Vdc A. L L PL S+ S- De jumper dient te worden gedemonteerd, voordat u de deuropener aansluit. POWER SUPPLY LOCK Evercom DPOK + DM - tot beldrukkers Pagina van 7

7 RF CARD RF CARD RF CARD RF CARD RF CARD RF CARD RF CARD. Aansluiten één beldrukker Evercom DM Code = DIP6 = ON Evercom DOPC 00~0VAC 00~0VAC Evercom DPOK L L DIP Switches ON DIP 6 WIRING WIRING BUS L L PL S+ S- - + Connecting Multi Monitors The door station work in Stard mode in this situation. Refer to Page 9 in detail. The door station is also Connecting compatible Multi with Monitors other monitors which are provided by our company.. Basic Aansluiten IN-OUT Wiring + in Stard beldrukkers Mode Zie. ing Basic One-to-one =on To monitors DOPC Basic IN-OUT Wiring in Stard Mode DIP = ON Code=, DIP6=on (Slave ) DIP = ON Code=, DIP6=off (Slave ) DIP6 = OFF DIP Code=, = ON DIP6=off (Master) 00~0VAC DIP6 = ON DIP = ON DIP6 = OFF DIP6 = OFF DIP = ON Code=, DIP6=off (Slave ) 00~0VAC The door station is also compatible with Let op: other monitors which are provided by our company. The De door laatste station monitor is also compatible welke u aansluit with dient Please set door station into other DIP6 group monitors op calling ON which te staan. are provided by our Code=, DIP6=on company. mode (Slave ) if there is more than monitors in st door station villa(refer nd to door Page station 9) Please rd set door door station station into th group door station calling ID=0 ID= mode if there ID=is more than monitors ID= in Distributor is unnecessary in full audio villa(refer to Page 9) system, IN-OUT mode is recommended. Distributor is unnecessary in full audio Code=, DIP6=off system, IN-OUT mode is recommended. For (Slave the ) last monitor connected to the system, DIP6 should set to ON. For the last monitor connected to the system, DIP6 should set to ON. Code=, DIP6=off L L PL S+ S-(Slave ) L L PL S+ S- L L PL S+ S- L L PL S+ S- 00~0VAC Code=, DIP6=off (Master) SCU GSM TPS QSW 00~0VAC A B C D witches DIP Optional functional module 6 DBCA Optional functional module - SCU camera module(max.) Zie. OFF GSM module(mobile phone transfer) SCU camera module(max.) + TPS module(pbx transfer) GSM module(mobile phone transfer) ON ation work in Stard mode in this situation. QSW image Refer quad to splitter Page module 9 TPS in module(pbx detail. transfer) Evercom DPOK + DM - tot beldrukkers QSW image quad splitter module Impedance Pagina van 7 ation is also compatible with other monitors which are provided by our company. switch ID=0 SCU GSM TPS QSW BUS L L PL S+ S- ID=0 ID=0
8 . Overige informatie. Waarschuwingen Waarschuwingen Maak het apparaat schoon met een zachte katoenen doek, gebruik geen organische of chemisch schoonmaakmiddel. Gebruik indien nodig een beetje water of verdund zeepwater om het stof schoon te maken. Het toestel is weerbestendig. Spuit echter niet met hoge druk water op de buitenpost. Te veel vocht kan problemen met het apparaat veroorzaken. U dient de juiste adapter gebruiken welke wordt geleverd door de fabrikant of is goedgekeurd door de fabrikant. Let op de stroomvoorziening binnen de producten, verwijs de service alleen aan een getraind en kwalificeerde professional.. Specificaties Specificaties Voeding DC V Stroom gebruik Stby: 0,8W In werking: W Camera Deuropener stroom toevoer - intern gevoeld Bevestiging Kleurencamera CMOS.0 Mega Pixel /.7 inch Fisheye camera 70 graden breed Vdc, 80mA Opbouw Temperatuur -0 tot + Bescherming Bedrading Afmetingen DPOK (BHD) Afmetingen DM (BHD) IP -draads, non-polarity 90 X 76 X 7 in mm 0 X 0 X 7, in mm Evercom DPOK + DM - tot beldrukkers Pagina 6 van 7
 Kabel A B IM B 6 IM Tweedraads")
9 RF CARD. Kabelgebruik Basic IN-OUT Wiring Mode Afsten bij type kabel (meter) Kabel A B IM B 6 IM Tweedraads x0,7mm Tweedraads xmm B A Evercom DPOK + DM - tot beldrukkers Pagina 7 van 7
Video Kit Installatiehandleiding
 Video Kit Installatiehandleiding V.0 Inhoudsopgave. Buitenpost - Onderdelen en functies. Buitenpost - Bevestigen. Instructie deuropener tijd. Bedrading. Overige informatie 7 Opgelet: Laat de installatie,
OUTDOOR HD BULLET IP CAMERA PRODUCT MANUAL
 OUTDOOR HD BULLET IP CAMERA PRODUCT MANUAL GB - NL GB PARTS & FUNCTIONS 1. 7. ---- 3. ---- 4. ---------- 6. 5. 2. ---- 1. Outdoor IP camera unit 2. Antenna 3. Mounting bracket 4. Network connection 5.
OUTDOOR HD DOME IP CAMERA PRODUCT MANUAL GB - NL
 OUTDOOR HD DOME IP CAMERA PRODUCT MANUAL GB - NL GB PARTS & FUNCTIONS 2. ---- 1. ---- 3. ---- 7. ---------- 5. 4. 6. 1. Outdoor IP camera unit 2. Antenna 3. Mounting bracket 4. Network connection 5. Power
2 Draads videofoon systeem. Drukknop: Gebruikshandleiding
 2 Draads videofoon systeem Drukknop: Gebruikshandleiding 1 2 Inhoudsopgave 1. Onderdelen en fucties:... 4 2. Aansluitingen:... 4 3. Specificaties:... 5 4. Plaatsing:... 5 Monteren zonder regencover...
PIR DC-SWITCH. DC Passive infra-red Detector. Model No. PDS-10 GEBRUIKSAANWIJZING/INSTRUCTION MANUAL
 PIR DC-SWITCH DC Passive infra-red Detector Model No. PDS-10 GEBRUIKSAANWIJZING/INSTRUCTION MANUAL Please read this manual before operating your DETECTOR PIR DC-Switch (PDS-10) De PDS-10 is een beweging
FACILA DP091, DP092. Buitenpost opbouw met camera. Montage- en gebruikershandleiding
 FACILA DP091, DP092 Buitenpost opbouw met camera Montage- en gebruikershandleiding Inhoud 1. Voorzorgsmaatregelen... 2 2. Gebruik volgens de voorschriften... 3 3. Omschrijving... 3 4. Installatie... 4
HANDLEIDING - ACTIEVE MOTORKRAAN
 M A N U A L HANDLEIDING - ACTIEVE MOTORKRAAN MANUAL - ACTIVE MOTOR VALVE Model E710877 E710878 E710856 E710972 E710973 www.tasseron.nl Inhoud / Content NEDERLANDS Hoofdstuk Pagina NL 1 ALGEMEEN 2 NL 1.1
FACILA DP091, DP092. Buitenpost opbouw met camera. Montage- en gebruikershandleiding
 FACILA DP091, DP092 Buitenpost opbouw met camera Montage- en gebruikershandleiding Inhoud 1. Voorzorgsmaatregelen... 2 2. Gebruik volgens de voorschriften... 3 3. Omschrijving... 3 4. Installatie... 4
Alistair LED stairwell luminaire Handleiding Alistair (UC03 sensor)
") Alistair LED stairwell luminaire Handleiding Alistair (UC03 sensor) Let op: Als het flexibele draad van dit licht beschadigd is, dient het te worden vervangen door iemand van de technische service, of
Alistair LED stairwell luminaire Handleiding Alistair (UC03 sensor) Let op: Als het flexibele draad van dit licht beschadigd is, dient het te worden vervangen door iemand van de technische service, of
Alistair LED stairwell luminaire Handleiding Alistair (Emergency UC03 sensor)
") Alistair LED stairwell luminaire Handleiding Alistair (Emergency UC03 sensor) Let op: Als het flexibele draad van dit licht beschadigd is, dient het te worden vervangen door iemand van de technische service,
Alistair LED stairwell luminaire Handleiding Alistair (Emergency UC03 sensor) Let op: Als het flexibele draad van dit licht beschadigd is, dient het te worden vervangen door iemand van de technische service,
Installatiehandleiding en gebruiksaanwijzing Audiofoon (ref )
") Installatiehandleiding en gebruiksaanwijzing Audiofoon (ref. 34813) FR 1 IEIDING Lees de instructies aandachtig door voor u het apparaat gebruikt. Hartelijk dank voor het aanschaffen van dit product. Dit
Installatiehandleiding en gebruiksaanwijzing Audiofoon (ref. 34813) FR 1 IEIDING Lees de instructies aandachtig door voor u het apparaat gebruikt. Hartelijk dank voor het aanschaffen van dit product. Dit
INSTALATIEGIDS VIDEOWALL
 INSTALATIEGIDS VIDEO 1. Bereken de hoogte van de rails door te meten hoeveel lager het onderste scherm zal uitkomen. Je kan dit meten aan de achterkant van de display, waar de beugels op gemonteerd zijn.
SPX Model A-360 Azimuth Antenna Rotor Model 1 & 2
 Gauke Boelensstraat 108 NL-9203 RS Drachten The Netherlands Tel: +31 (0) 512 354 126 GSM: +31 (0) 650 882 889 Fax: +31 (0) 847 187 776 www.rfhamdesign.com E-mail: info@rfhamdesign.com Model A-360 Azimuth
Installatiehandleiding en gebruiksaanwijzing Videofoon (réf )
") Installatiehandleiding en gebruiksaanwijzing Videofoon (réf. 34844) 1 IEIDING Lees de instructies aandachtig door voor u het apparaat gebruikt. Hartelijk dank voor het aanschaffen van dit product. Dit
Installatiehandleiding en gebruiksaanwijzing Videofoon (réf. 34844) 1 IEIDING Lees de instructies aandachtig door voor u het apparaat gebruikt. Hartelijk dank voor het aanschaffen van dit product. Dit
FACILA DP093. Buitenpost inbouw met camera. Montage- en gebruikershandleiding
 FACILA DP093 Buitenpost inbouw met camera Montage- en gebruikershandleiding Inhoud 1. Voorzorgsmaatregelen... 2 2. Gebruik volgens de voorschriften... 3 3. Omschrijving... 3 4. Installatie... 4 4.1 Camerahoek
Limpid Light. design Esther Jongsma & Sam van Gurp, Montagehandleiding / Assembly Instructions
 Limpid Light design Esther Jongsma & Sam van Gurp, 05 Montagehandleiding / Assembly Instructions GELEVERD MATERIAAL / SUPPLIED MATERIAL A. A. B. B. C. D. E. F. G. G. H. I. J. K. / / ophanging / suspension:
videofoon (bedraad) gebruikershandleiding
 gebruikershandleiding") videofoon (bedraad) gebruikershandleiding dank dat u ons produkt aangeschaft heeft om optimaal gebruik te kunnen malen van deze Videofoon adviseren wij u deze handleiding nauwkeuring door te lezen Inhoud
videofoon (bedraad) gebruikershandleiding dank dat u ons produkt aangeschaft heeft om optimaal gebruik te kunnen malen van deze Videofoon adviseren wij u deze handleiding nauwkeuring door te lezen Inhoud
Installatiehandleiding en gebruiksaanwijzing Videofoon (ref , 34802)
") Installatiehandleiding en gebruiksaanwijzing Videofoon (ref. 34801, 34802) FR 1 IEIDING Lees de instructies aandachtig door voor u het apparaat gebruikt. Hartelijk dank voor het aanschaffen van dit product.
Installatiehandleiding en gebruiksaanwijzing Videofoon (ref. 34801, 34802) FR 1 IEIDING Lees de instructies aandachtig door voor u het apparaat gebruikt. Hartelijk dank voor het aanschaffen van dit product.
AVAX Lusgevoede brandalarm elementen
 990-095, Issue 1 Maart 2006 AVAX Lusgevoede brandalarm elementen Analoge adresseerbare audio visuele alarm elementen Sectie: Intelligent/Addressable Devices Eigenschappen Gemeenschappelijke aansluitsokkel
Alistair LED stairwell luminaire Handleiding Alistair (UC03 sensor)
") Alistair LED stairwell luminaire Handleiding Alistair (UC03 sensor) Let op: Als het flexibele draad van dit licht beschadigd is, dient het te worden vervangen door iemand van de technische service, of
Alistair LED stairwell luminaire Handleiding Alistair (UC03 sensor) Let op: Als het flexibele draad van dit licht beschadigd is, dient het te worden vervangen door iemand van de technische service, of
FACILA DP094. Buitenpost inbouw met camera. Montage- en gebruikershandleiding
 FACILA DP094 Buitenpost inbouw met camera Montage- en gebruikershandleiding Inhoud 1. Voorzorgsmaatregelen... 2 2. Gebruik volgens de voorschriften... 3 3. Omschrijving... 3 4. Installatie... 4 4.1 Camerahoek
videofoon type Spiegel (bedraad) gebruikershandleiding
 gebruikershandleiding") videofoon type Spiegel (bedraad) gebruikershandleiding dank dat u ons produkt aangeschaft heeft. om optimaal gebruik te kunnen malen van deze Videofoon adviseren wij u deze handleiding nauwkeurig door
videofoon type Spiegel (bedraad) gebruikershandleiding dank dat u ons produkt aangeschaft heeft. om optimaal gebruik te kunnen malen van deze Videofoon adviseren wij u deze handleiding nauwkeurig door
Handleiding EL500SE. rev.0110
 Handleiding EL500SE rev.0110 eldrukker aansluiting edrading beldrukkers.en EL51SE. Plug het beldrukker aansluitkabeltje in connector CN van de EL500SE microprocessor, deze kabel heeft 10 gekleurde aders
Installatiehandleiding en gebruiksaanwijzing Videofoon (ref )
") Installatiehandleiding en gebruiksaanwijzing Videofoon (ref. 34800) FR 1 IEIDING Lees de instructies aandachtig door voor u het apparaat gebruikt. Hartelijk dank voor het aanschaffen van dit product. Dit
Installatiehandleiding en gebruiksaanwijzing Videofoon (ref. 34800) FR 1 IEIDING Lees de instructies aandachtig door voor u het apparaat gebruikt. Hartelijk dank voor het aanschaffen van dit product. Dit
Flybye. Ernst Koning, Montagehandleiding / Instruction manual
 Flybye Ernst Koning, 2018 Montagehandleiding / Instruction manual GELEVERD MATERIAAL / MATERIALS SUPPLIED A. B. C. D. E. F. G. A. B. C. D. E. F. G. H. H. lichtbuis / lighting tube plafondkap / ceiling
Rhythm of Light. Susanne de Graef, Montagehandleiding / Instruction manual
 Rhythm of Light Susanne de Graef, 2016 Montagehandleiding / Instruction manual GELEVERD MATERIAAL / SUPPLIED MATERIAL B. C. D. A. E. F. A. B. C. D. E. F. armatuur / fixture fitting lange staalkabels (3)
2-Wire Video Intercom Bundle. Gebruikershandleiding
 2-Wire Video Intercom Bundle Gebruikershandleiding INHOUD 1 Beschrijving... 3 1.1 Binnen Station... 3 1.2 Buiten Station... 3 1.3 Video/Audio Verdeler... 4 2 Installatie... 4 2.1 Systeem Opbouw... 4 2.2
PANEELRADIATOR - Type PR Handleiding. PANEL RADIATOR - Type PR Manual
 Fax. +31 (0)227-549 150 Website: www.sinusjevi.com PANEELRADIATOR - Type PR Handleiding PANEL RADIATOR - Type PR Manual Page 2 of 8 Page 3 of 8 Technische informatie Spanning: 230 of 400 Volt Vermogen:
Video Intercom Systeem
 Video Intercom Systeem VC-105 buiten unit INSTALLATIE HANDLEIDING 2 Functies Nachtzicht LED verlichting Kleuren CCD camera Luidspreker Montagebehuizing / regenschild Beldrukknop Microfoon Meegeleverde
SPX AX-400 Azimuth & Elevation antenna rotator Model 1 & 2
 Gauke Boelensstraat 108 NL-9203 RS Drachten The Netherlands Tel: +31 (0) 512 354 126 GSM: +31 (0) 650 882 889 Fax: +31 (0) 847 187 776 www.rfhamdesign.com E-mail: info@rfhamdesign.com SPX AX-400 Azimuth
KIT1SEK KIT VIDEOFOON PROGRAMMATIE HANDLEIDING
 KIT1SEK KIT VIDEOFOON PROGRAMMATIE HANDLEIDING 1. Specificaties 1.1 Binnenpost (SEM7) Scherm 7 TFT LCD Resolutie 800x3 (RGB) x 480 pixels Materiaal ABS / Aluminium Bekabeling 2 draden Voeding 24 Vdc Verbruik
Settings for the C100BRS4 MAC Address Spoofing with cable Internet.
 Settings for the C100BRS4 MAC Address Spoofing with cable Internet. General: Please use the latest firmware for the router. The firmware is available on http://www.conceptronic.net! Use Firmware version
2006 Volkswagen Jetta TDI
 Door handle and door lock, assembly overview The illustration shows the left side. The right side is derived accordingly from this. Fig. 99: Door Handle And Door Lock, Assembly Overview 1 - Cable For disengaging
FACILA DP098 DP099. Buitenpost met camera en codeklavier. Montage- en gebruikershandleiding
 FACILA DP098 DP099 Buitenpost met camera en codeklavier Montage- en gebruikershandleiding Inhoud 1. Voorzorgsmaatregelen... 3 2. Gebruik volgens de voorschriften... 3 3. Omschrijving... 4 4. Installatie...
EM6250 Firmware update V030507
 EM6250 Firmware update V030507 EM6250 Firmware update 2 NEDERLANDS/ENGLISH Table of contents 1.0 (NL) Introductie... 3 2.0 (NL) Firmware installeren... 3 3.0 (NL) Release notes:... 5 1.0 (UK) Introduction...
Handleiding AT1G Toegangscontrole Module. rev ver1
 Handleiding AT1G26-200 rev.0914 Toegangscontrole Module ver1 PRODUCT SPECIFICATIE Modelen, AT1G26-200 ver1 en AT1G34-200 Opbouw Antivandaal Geborsteld aluminium behuizing Tot 200 gebruikerscodes 100 Mil.
Cód Digitale Repeater RD-PLUS/UNO SE. Instructie Handleiding. TRD-PLUS/UNO SE NL rev.0111
 Cód. 5011601 Digitale Repeater RD-PLUS/UNO SE ON ON Instructie Handleiding ON TRD-PLUS/UNO SE NL rev.0111 INTRODUCTIE Allereerst willen wij u hartelijk bedanken voor en feliciteren met de aanschaf van
1.PRODUCTAFBEELDING MET UITLEG 3 2.IN GEBRUIK NEMEN EN MONTAGE VAN HET SCHERM 4 3.DE MONTAGE VAN DE DEURBEL 6 4.DE DEURBEL VAN STROOM VOORZIEN 7
 GEBRUIKSAANWIJZING 2 INHOUDSOPGAVE 1.PRODUCTAFBEELDING MET UITLEG 3 2.IN GEBRUIK NEMEN EN MONTAGE VAN HET SCHERM 4 3.DE MONTAGE VAN DE DEURBEL 6 4.DE DEURBEL VAN STROOM VOORZIEN 7 5.AANSLUITEN VAN DE EXTERNE
1/6 MINI HANDSFREE WIFI KIT MET QUADRA, SBTOP AWARDS KIT VIDEO QUADRA AUDIO- EN VIDEODEURINTERCOM OVERVIEW 8451V
 1/6 AWARDS OVERVIEW 2/6 KIT PRODUCT KIT PRODUCT 4893M QUADRA DEURSTATION MET DRUKKNOPPEN. 2 DRAAD BELANGRIJKSTE KENMERKEN - 4893M Type: Monoblock-deurstation Type behuizing: Alluminium gegoten Audio/videosysteem:
KLEURENVIDEOFOON. Type: ASPEKTO. Handleiding
 KLEURENVIDEOFOON Type: ASPEKTO Handleiding Inhoud Eigenschappen 3 Buitenpost 3 Binnenpost 4 Installatie 5 Aansluitschema 7 Gebruikershandleiding 8 In de verpakking 8 Waarschuwing 9 2 Eigenschappen Anti-vandaal
Alle teksten en afbeeldingen in deze handleiding zijn auteursrechtelijk beschermd en intellectueel eigendom van ENTRYA BVBA.
 FACILA DP132(R) 2 Inhoud 1. Voorzorgsmaatregelen 3 2. Gebruik volgens de voorschriften 3 3. Voorwoord 3 4. Omschrijving 4 5. Opbouwmontage 6 6. Inbouwmontage 8 7. Hoofdmenu 10 8. Installateursmenu 11 9.
Video intercomsysteem
 Video intercomsysteem Inhoud Pag. 03) Technische specificaties Pag. 04) (Vervolg) Technische specificaties 2-Draads systeem Pag. 05) IT-OUT201/1; opbouw buitenpost IT-OUT201/2; opbouw buitenpost Pag. 06)
AT1G26-200. rev.0110. Toegangscontrole Module AT1G26-200. Handleiding. thinks outside the box!
 AT1G26-200 rev.0110 Toegangscontrole Module AT1G26-200 Handleiding PRODUCT SPECIFICATIE Modelen AS-626M-200, AS-626S-200, AS-634-200, AT1G26-200 Opbouw Antivandaal Geborsteld aluminium behuizing Tot 200
+31 76 3333 999 support@paxton-benelux.com. Technische ondersteuning is beschikbaar van: maandag t/m vrijdag van 08:30-17:00 (CET)
") 12/06/2014 Ins-30202-NL Net2 Entry - Monitor Paxton Technische support +31 76 3333 999 support@paxton-benelux.com Technische ondersteuning is beschikbaar van: maandag t/m vrijdag van 08:30-17:00 (CET)
12/06/2014 Ins-30202-NL Net2 Entry - Monitor Paxton Technische support +31 76 3333 999 support@paxton-benelux.com Technische ondersteuning is beschikbaar van: maandag t/m vrijdag van 08:30-17:00 (CET)
A-04 vier keer Serie 100 video
 A-0 vier keer erie 100 video A B C V1 M1 V M V M V M 1A 1B 1V 1 V M econdary Digitale bus E- 1 1 B1 B A B C V1 M1 V M V M V M 1A 1B 1V 1 V M rincipal Jumpers instellen op twisted pair. Twisted-air ( )
1.UITLEG VAN HET PRODUCT 3 2. PRODUCTAFBEELDING MET UITLEG: 5
 GEBRUIKSAANWIJZING INHOUDSOPGAVE 1.UITLEG VAN HET PRODUCT 3 2. PRODUCTAFBEELDING MET UITLEG: 5 3.HET MONTEREN EN AANSLUITEN VAN DE DEURBEL OP STROOM 6 3.1 Deurbel krijgt spanning via batterijen 6 3.2 Deurbel
GEBRUIKSAANWIJZING OPERATING INSTRUCTION
 LED PRODISC II + LED PRODISC II MINI + LED PRODISC II MAXI GEBRUIKSAANWIJZING OPERATING INSTRUCTION 4000944x 4000945x 4000940x 4000941x 4000946x 4000947x Prodisc II Mini Prodisc II Mini + Microwave sensor
FACILA FP025/FP025A. Binnenpost handenvrij met monitor. Montage- en gebruikershandleiding
 FACILA FP025/FP025A Binnenpost handenvrij met monitor Montage- en gebruikershandleiding Inhoud 1. Voorzorgsmaatregelen... 2 2. Gebruik volgens de voorschriften... 3 3. Omschrijving... 3 4. Installatie...
LED BAR SERIE PLUG & PLAY SYSTEEM LED BAR SERIES PLUG & PLAY SYSTEM PROLUMIA
 PLUG & PLAY SYSTEEM PLUG & PLAY SYSTEM LED BAR SERIE LED BAR SERIES De krachtige LED Bar serie combineert een strakke vormgeving met een uitstekende lichtopbrengst. Meerdere LED Bar modules kunnen eenvoudig
AKTIEVE MOTORKRAAN - ACTIVE MOTORVALVE
 AKTIEVE MOTORKRAAN - ACTIVE MOTORVALVE HANDLEIDING - MANUAL V1.2 Membraan afsluiter Membrane valve Naald afsluiter Needle valve Inhoud / Content NEDERLANDS Hoofdstuk Pagina NL 1 ALGEMEEN 2 NL 1.1 De aktieve
Evercom Modern design innovatieve technieken eenvoudige bediening
 Evercom Modern design innovatieve technieken eenvoudige bediening Evercom DM1 evercom.nl Evercom DPAZ DPA DPM evercom.nl Evercom.nl Binnentoestellen 7 inch Evercom DM1 7 inch 16:9 kleurenscherm Eenvoudige
Montagehandleiding: doucheset
 Montagehandleiding: doucheset Installation manual: showerset 0 6 5 7 8 9 0 8 9 7 5 6 Controleer voor installatie of alle onderdelen aanwezig zijn. Check if all parts are present before installation. 5
VZ-107W Achteruitrijcamera set
 VZ-107W Achteruitrijcamera set Gebruikshandleiding INHOUD SET 1. 1 X CCD Camera 2. 7 TFT LCD Colour Monitor 3. Kabelbosje met 2 Camera Inputs 4. Monitor afstandbediening 5. Monitor bracket 6. Gebruikershandleiding
C8CCTVKITP2TB. Professionele 8-kanaals CCTV Surveillance Kit. Highlights. Specifications
 Professionele 8-kanaals CCTV Surveillance Kit De Conceptronic Professional 8-Channel CCTV Surveillance Kit biedt een ideale manier voor het bewaken van grote huizen of gebouwen voor situaties die bewaking
Procedure Reset tv-toestellen:
 Procedure Reset tv-toestellen: Volgende procedure is te volgen wanneer er een tv-toestel, op een van de kamers niet meer werkt. TV Re-installation Factory Default Her-installeren van de TV Fabrieksinstellingen
Kleurenvideofoon. Montagehandleiding. Inhoudsopgave
 Kleurenvideofoon Montagehandleiding Inhoudsopgave Kenmerken 1 Buitenpost 1 Binnenpost 2 Installatie 3 Aansluitschema 5 Bedieningsinstructies 6 Leveringsomvang 6 Waarschuwingen 7 Kenmerken 1. Binnenpost
Function checklist for the ML-350 or XL-350 with a print set. Missing loop.
 Function checklist for the ML-350 or XL-350 with a 260217 print set. Below mentioned check-point should resolve function problems of the lift systems. Missing loop. When a lift is connected to an external
Introductie HD-SDI CCTV
 Introductie HD-SDI CCTV Introduction Wat is HD-SDI? Waarom HD-SDI? Wat kan HD-SDI voor mij betekenen? What is HD-SDI? HD-SDI = High Definition Serial Digital Interface Digital interface die standaard coaxkabel
PLUS & PRO. Addendum installatie aanvullende MID 65A kwh-meter - Addendum installation additional MID 65A kwh-meter SET
 PLUS & PRO Addendum installatie aanvullende MID 65A kwh-meter - Addendum installation additional MID 65A kwh-meter 1 Aansluiten MID 65A kwh-meter Adres instellen MID 65A kwh-meter Maxem kan verschillende
Installatiehandleiding Way Kit Verzie V3.0
 De Way Kit van Fermax is een Plug & Play kit. De huisstations zijn reeds voor geprogrammeerd op het deurstation. 1. Monitor onderdelen en functies: 2. Deurstation onderdelen en functies: - JP/LK : jumper
SPID Azimuth antenna rotator Type: RAK
 Gauke Boelensstraat 108 NL-9203 RS Drachten The Netherlands Tel: +31 (0) 512 354 126 GSM: +31 (0) 650 882 889 Fax: +31 (0) 847 187 776 www.rfhamdesign.com E-mail: info@rfhamdesign.com SPID Azimuth antenna
ATP2S200. rev Toegangscontrole Module. Handleiding. thinks outside the box!
 ATP2S200 rev.0110 Toegangscontrole Module ATP2S200 Handleiding PRODUCT SPECIFICATIE Model ATP2S200 Opbouw Slagvast polycarbonaat Met braille tekens op de toetsen Van achteren (backlite) aangelichte toetsen
Handleiding GuardCam-LED
 Handleiding GuardCam-LED Stap 1. Plaatsen / verwijderen SD kaart Stap 2. Installeren GuardCam LED Stap 3. Monteren GuardCam LED Stap 4. Aanpassen instellingen Stap 5. Instellen datum, tijd en video mode
PLL CIRCUIT. 2.4 GHz MIC BUILT-IN LCD TFT VID-TRANS300 VID-TRANS310 VID-TRANS320 NIGHT VISION IR LED NEDERLANDS PAN & TILT GEBRUIKSAANWIJZING UNIT
 VID-TRANS300 VID-TRANS310 VID-TRANS320 2.4 GHz LCD TFT RC UNIT PAN & TILT NIGHT VISION IR LED 3 CHANNELS PLL CIRCUIT MIC BUILT-IN OBSERVATION & SECURITY GEBRUIKSAANWIJZING NEDERLANDS Systemen: VID-TRANS300
G55 Multichannel Eindversterker 3.995,00 5x 100Watt continu vermogen aan 8 Ohm, gebrugd 2x 500Watt aan 8 Ohm
 1/5 Componenten Audio Core 200 Stereo DSP Loudspeaker Controller 1.295,00 Audio Inputs: 2x S/PDIF coaxial digital, 2x 3.5mm analogue/digital optical, 1x Mini-DIN for i80, 2x analogue stereo RCA type, 1x
Remote sensor series
 Remote sensor series DATASHEET Sensor Partners BV James Wattlaan 15 5151 DP Drunen The Netherlands +1 ()1-7 9 info@sensorpartners.com sensorpartners.com Sensor Partners BVBA Z.1 Researchpark 1 B-1, Zellik
Zone 1 and zone 2 Zone 21 and zone 22
 s en contactdozen s and sockets Productoverzicht Product overview Omschrijving: Index Elektro produceert een volledige lijn explosieveilige stekkers en contactdozen onder eigen certificaat. Deze worden
256 kb Memory in NMS 8250, 8255 and 8280
 256 kb Memory in NMS 8250, 8255 and 8280 Supplied by Bastiaan Huber, 2001 Converted to PDF by HansO, 2001 Dutch text follows the english text! MEMORY-UPGRADE to 256Kb This description is only for people
Video Intercom Systemen PRODUCTCATALOGUS
 Video Intercom Systemen PRODUCTCATALOGUS It feels like home Viscoo Video Intercomsystemen Maak kennis met het eenvoudigste tweedraads video-intercom systeem Voor u ligt de intercom catalogus van Viscoo
1/7 ENKELVOUDIGE KIT MET QUADRA EN MAXI, S2 AWARDS KIT VIDEO QUADRA AUDIO- EN VIDEODEURINTERCOM OVERVIEW 8461X
 1/7 OVERVIEW 2-draads Simplebus 2 video-deurintercom Kit, bestaande uit: - n 1 opbouw deurstation Quadra art. 4893M - n 1 handsfree kleurenmonitor Maxi art. 6801W - n 1 voedingseenheid art. 1209 - n 1
15.4-Inch TFT LCD. Overhead Monitor
 15.4-Inch TFT LCD Overhead Monitor Gebruikshandleiding Veiligheidswaarschuwingen - Lees de gebruiksaanwijzing voordat u de monitor monteert en/of in gebruik neemt. - Monteer de monitor op een locatie waar
Dockingstation, PoE switches, HDMI oplossingen
 Dockingstation PoE switches HDMI oplossingen Eminent levert in haar lijn Business oplossingen die speciaal geschikt zijn voor het gebruik binnen een MKB / KMO omgeving. Continuity betrouwbaarheid, service
OMSCHRIJVING. De interface heeft de volgende inputs; 1* HDMI input, RGB input, 2* Audio/video input, 1* Front camera input, 1* Rear camera input
 Multimedia HDMI interface Porsche PCM5.0 Art. Nr: IF-PO-P50PHV OMSCHRIJVING Algemeen De NavInc NAVconnect HDMI interfaces biedt de mogelijkheid voor het aansluiten van videobronnen op het originele PCM5.0
Installatiehandleiding
 LC-Products B.V. tel. (+31) 088-8111000 fax. (+31) 088-8111009 email: info@lc-products.nl website: www.lc-products.nl LC-Products B.V. All rights reserved. No part of this publication may be reproduced
AC-239-2 ZONE ALARMCONTROLLER MET DEURBEL HANDLEIDING
 AC-239-2 ZONE ALARMCONTROLLER MET DEURBEL HANDLEIDING Handleiding AC-239 1. Beschrijving Uw AC-239 is een economische en veelzijdige alarmcontroller uitgerust met twee beveiligingszones en ingebouwde deurbel.
WWW.EMINENT-ONLINE.COM
 WWW.EMINENT-ONLINE.COM NL HANDLEIDING USERS MANUAL EM1033 HANDLEIDING NL EM1033 TWEE POORTS AUTOMATISCHE KVM SWITCH INHOUDSOPGAVE: PAGINA 1.0 Introductie.... 2 1.1 Functies en kenmerken.... 2 1.2 Inhoud
IxI-R200+ DIGITALE CONTROLLER. Technische gegevens.
 Technische gegevens IxI-R200+ DIGITALE CONTROLLER Rf-Technologies nv Lange Ambachtstraat 40-9860 Oosterzele - België - Tel. +32 9 362 31 71 - Fax +32 9 362 33 07 - www.rft.be - info@rft.be www.rft.be X7-A
Mobile Watch Snelle Handleiding. Bezoek voor meer informatie
 Mobile Watch Snelle Handleiding Ⅰ. Software installatie - Software download: Zoek voor "360Eye"in de Iphone App Store en installeer de applicatie. Of scan de QR Code aan de rechterzeide. Voor meer details
+31 76 3333 999 support@paxton-benelux.com. Technische ondersteuning is beschikbaar van: maandag t/m vrijdag van 08:30-17:00 (CET)
") 28/10/2014 Ins-30201-NL Net2 Entry - Paneel Paxton Technische support +31 76 3333 999 support@paxton-benelux.com Technische ondersteuning is beschikbaar van: maandag t/m vrijdag van 08:30-17:00 (CET) Documentatie
28/10/2014 Ins-30201-NL Net2 Entry - Paneel Paxton Technische support +31 76 3333 999 support@paxton-benelux.com Technische ondersteuning is beschikbaar van: maandag t/m vrijdag van 08:30-17:00 (CET) Documentatie
Cód. 50121317. Vervang Monitor voor de Shiner 90/HZ/2H TEKNA 90 COLOR/HZ/2H. Installatie Handleiding. TTEKNA 90NL Rev.0112
 Cód. 50121317 Vervang Monitor voor de Shiner 90/HZ/2H. TEKNA 90 COLOR/HZ/2H Installatie Handleiding TTEKNA 90NL Rev.0112 INTRODUCTIE 2 Ten eerste willen wij U bedanken maar ook feliciteren met de keuze
EU Declaration of Conformity and safety instructions EU Conformiteitsverklaring en veiligheidsinstructies
 EU Declaration of Conformity and safety instructions EU Conformiteitsverklaring en veiligheidsinstructies Battery operated UNICOM 300 N51 UNICOM 300 met batterijvoeding N51 Explosion safety instructions
Handleiding voor de installatie van de vleugelhekopener, type 400
 INTRODUCTIE 1.1 Elektrische en mechanische specificatie Spanning toevoer: Batterij: Vermogen: Spanning/vermogen verbruik van de motor Spanning/vermogen verbruik van de lamp: Spanning/vermogen verbruik
L.Net s88sd16-n aansluitingen en programmering.
 De L.Net s88sd16-n wordt via één van de L.Net aansluitingen aangesloten op de LocoNet aansluiting van de centrale, bij een Intellibox of Twin-Center is dat de LocoNet-T aansluiting. L.Net s88sd16-n aansluitingen
WWW.EMINENT-ONLINE.COM
 WWW.EMINENT-OINE.COM HNDLEIDING USERS MNUL EM1016 HNDLEIDING EM1016 USB NR SERIEEL CONVERTER INHOUDSOPGVE: PGIN 1.0 Introductie.... 2 1.1 Functies en kenmerken.... 2 1.2 Inhoud van de verpakking.... 2
Handleiding van de Sanifun Whirlpool douchecabine Osvaldo & Pasquale
 Handleiding van de Whirlpool douchecabine Osvaldo & Pasquale ATTENTION INSTALLERS: These instruc ons must be leō with the customer Last Modified: 23/01/2014 Benodigdheden. Stap 1 Neem de douchebak en verwijder
4-kanaals IP-bewakingskit
 4-kanaals IP-bewakingskit De 4-kanaals IP-bewakingskit van Conceptronic biedt een ideale oplossing voor het bewaken van een woning of een klein bedrijfsterrein wanneer u een professionele bewakingsstandaard
Zone 1 & zone 2 Zone 21 & zone 22
 RVS kast - type INDEX.X Stainless Steel box - type INDEX.X Omschrijving: De Index.X. RVS drukknopkasten zijn leverbaar in 1 gats tot en met 4 gats uitvoering en geschikt voor bedienings- en signaleringscomponenten
Zone 1 and zone 2 Zone 21 and zone 22
 s en contactdozen s and sockets Productoverzicht Product overview Omschrijving: Index Elektro produceert een volledige lijn explosieveilige stekkers en contactdozen onder eigen certificaat. Deze worden
Splicing Procedures 1 Page 1 of 9 Copyright Ford FoMoCo
 Splicing Procedures 1 Page 1 of 9 Copyright Ford FoMoCo Splicing Procedures 2 Page 2 of 9 Copyright Ford FoMoCo Splicing Procedures 3 Page 3 of 9 Copyright Ford FoMoCo Splicing Procedures 4 Page 4 of 9
Luier weegschaal PR C gebruiksaanwijzing PW
 Luier weegschaal PR C 5010 gebruiksaanwijzing 9002 - PW1-0033-0 2006.09 inhoud VEILIGHEID 4 INLEIDING 6 OMSCHRIJVING EN FUNCTIES 6 GEBRUIK 8 1. WEGEN 8 2. TARREREN 8 3. VERANDEREN EENHEID GEW. ( g,, lb,
2000 Volkswagen Passat GLS
 REAR DOOR WINDOW Rear door window, assembly overview Fig. 304: Exploded View Of Rear Door Window 1 - Door Removing and installing: --> Rear door, removing and installing 2 - Spring nut Qty 2 3 - Screw
Interface tussen Stuurbediening en Sony autoaudio
 The information in this document is in Dutch, English version follows later in this document Interface tussen Stuurbediening en Sony autoaudio LET OP! HOEWEL DE UITERSTE ZORGVULDIGHEID IS BETRACHT BIJ
Instructies voor gebruik
 Instructies voor gebruik Introductie van het product..3 Voorzorgsmaatregelen. 3 Inhoud 3 Onderdelen en functies.4 Deurbel installeren 5 Muziek toon..6 App Downloaden 7 Het product is gebaseerd op het Wi-Fi-netwerk
GEBRUIKSAANWIJZING OPERATING INSTRUCTION
 LED ROCKDISC II + LED ROCKDISC II MINI (HALF AFGESCHERMD) (SEMI SHIELDED) GEBRUIKSAANWIJZING OPERATING INSTRUCTION 4000900x 4000901x 4000904x 4000905x 4000910x 4000911x 4000914x 4000915x Rockdisc II Mini
Handleiding WIFI videofoon type WIFI106
 Handleiding WIFI videofoon type WIFI106 Bedankt voor de aankoop van dit draadloos videofoon systeem. Alvorens over te gaan tot de installatie van dit product vragen we u om eerst deze handleiding aandachtig
1/7 KIT MET QUADRA EN ICONA, S2 AWARDS KIT VIDEO QUADRA AUDIO- EN VIDEODEURINTERCOM OVERVIEW 8461I
 1/7 OVERVIEW 2-draads Simplebus video-deurintercom kit, bestaande uit: 1 opbouw deurstation Quadra art. 4893M, 1 voedingseenheid art. 1209 en 1 handsfree kleurenmonitor Icona art. 6601W, 1 inbouwdoos art.
1.UITLEG VAN HET PRODUCT 3 2. PRODUCTAFBEELDING MET UITLEG: 5
 GEBRUIKSAANWIJZING INHOUDSOPGAVE 1.UITLEG VAN HET PRODUCT 3 2. PRODUCTAFBEELDING MET UITLEG: 5 3.HET MONTEREN EN AANSLUITEN VAN DE DEURBEL OP STROOM 6 3.1 Deurbel krijgt spanning via batterijen 6 3.2 Deurbel
1. PRODUCTAFBEELDING MET UITLEG: 3
 GEBRUIKSAANWIJZING INHOUDSOPGAVE 1. PRODUCTAFBEELDING MET UITLEG: 3 2.HET MONTEREN EN AANSLUITEN VAN DE DEURBEL OP STROOM 4 2.1 Deurbel krijgt spanning via batterijen 4 2.2 Deurbel krijgt spanning via