Instructieboekje Bedienungsanleitung Instruction leaflet Livret d'instructions
|
|
|
- Christiaan Bogaerts
- 8 jaren geleden
- Aantal bezoeken:
Transcriptie
1 - 1 - Instructieboekje Bedienungsanleitung Instruction leaflet Livret d'instructions THG12000(RVS) - terrasstraler op gas THG12000 (Edelstahl) - Gas-Terrassenheizstrahler THG12000 (Stainless steel) - Gas-powered patio heater THG12000(INOX) - parasol chauffant à gaz
 - Gas-powered patio heater THG12000(INOX) -")
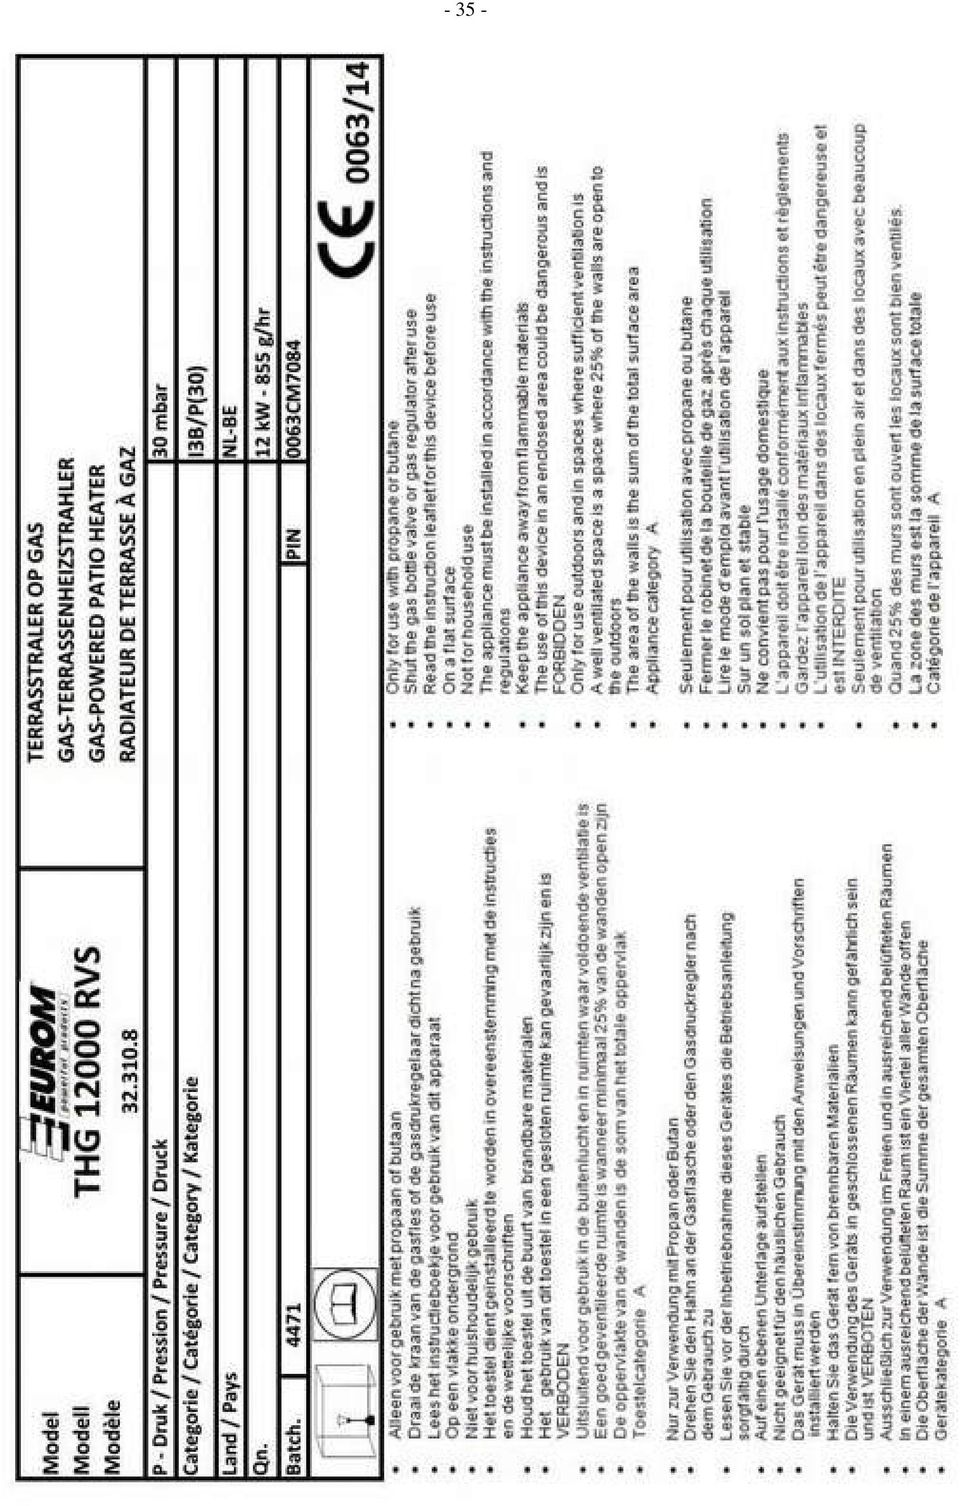
2 - 2 - NL DANK Hartelijk dank dat u voor een EUROM terrasverwarmer hebt gekozen. U hebt daarmee een goede keus gemaakt! Wij hopen dat hij tot uw volle tevredenheid zal functioneren. Om het beste uit uw terrasstraler te halen is het belangrijk dat u dit instructieboekje vóór gebruik aandachtig en in zijn geheel doorleest en ook begrijpt. Schenk daarbij speciaal aandacht aan de veiligheidsvoorschriften: die worden vermeld ter bescherming van u en uw omgeving! Bewaar het instructieboekje vervolgens om het in de toekomst nog eens te kunnen raadplegen. Bewaar ook de verpakking: dat is de beste bescherming voor uw terrasstraler tijdens de opslag buiten het seizoen. BELANGRIJKE VEILIGHEIDSVOORSCHRIFTEN Gebruik alleen propaan- of butaangas Draai de kraan van de gasfles of de gasdrukregelaar dicht na gebruik. Lees het instructieboekje voor gebruik van dit apparaat. Voor gebruik buitenshuis en in ruimten die tijdens het gebruik goed geventileerd worden. Niet voor gebruik in caravans, campers, boten enz. Een goed geventileerde ruimte is wanneer 25% van het oppervlak van de wanden open is. De oppervlakte van de wanden is de som van het totale oppervlak. Gebruik in gesloten ruimtes kan gevaarlijk zijn en is VERBODEN Dit apparaat moet worden geïnstalleerd in overeenstemming met de instructies en volgens de wettelijke voorschriften. Toestelcategorie: A. De ventilatieopeningen in de gasflesbehuizing mogen nooit worden geblokkeerd. Houd ze ook vrij van vuil. Voor het gebruik van gasflessen bestaan wettelijke voorschriften. Installeer en bewaar de gasfles conform deze voorschriften. Gebruik geen ander gas of andere lichtontvlambare vloeistof in de terrasverwarmer dan het door de fabrikant voorgeschreven propaan- of butaangas, in EECgoedgekeurde gascilinders met een veiligheidsventiel. Gebruik nooit een gasfles met een beschadigd oppervlak, ventiel, ring of bodem! Vervang de gasfles buitenshuis, en uit de buurt van vuur, vonken en andere ontstekingsbronnen. Vervang de flexibele slang elke 3 à 4 jaar. Probeer op geen enkele wijze veranderingen aan het apparaat aan te brengen. Verkeerde installatie, onoordeelkundig gebruik, wijzigingen of aanpassingen aan het apparaat kunnen schade of letsel veroorzaken. Fabrikant en importeur aanvaarden hiervoor geen enkele verantwoordelijkheid! Gebruik uitsluitend de regelaar die door de fabrikant wordt meegeleverd, ook bij eventuele vervanging. Het hele gassysteem, slangregulatie, waakvlam en brander moeten voor gebruik, na het verwisselen van de gasfles en verder minstens één maal per maand gecontroleerd worden. Alle lekkagecontroles moeten worden uitgevoerd met een zeepoplossing, nooit met vuur! Neem de verwarmer niet in gebruik voordat alle verbindingen op lekkages gecontroleerd zijn. Rook niet tijdens de controles. Draai het ventiel van de gasfles onmiddellijk dicht als u de geur van gas waarneemt. Gas is lichtontvlambaar, explosief en zwaarder dan lucht, dus het blijft laag hangen. In zijn natuurlijke staat heeft propaangas geen geur; voor uw veiligheid is er een geur aan toegevoegd, te vergelijken met die van verrotte kool. Verplaats de terrasstraler niet terwijl hij in werking is. Draai de gasfles dicht voordat u het apparaat verplaatst en laat de terrasverwarmer eerst afkoelen. Als de terrasverwarmer niet in gebruik is dient de gasfles dichtgedraaid te zijn en de bedieningsknop op UIT (OFF). Controleer regelmatig of de aansluitingen op de gasdrukregelaar passend en in goede conditie zijn.

3 - 3 - Bedieningspaneel, brander en de luchtcirculatiegang moeten regelmatig worden gereinigd. Zorg er wel voor alle voor de reiniging verwijderde (beveiliging) onderdelen terug te plaatsen! Verf vlammenscherm, besturingspaneel of reflectorkap niet. Zorg ervoor dat gasdrukregelaar en slang zich te allen tijde op een zodanige plaats bevinden dat er geen toevallige schade aan kan worden toegebracht en niemand erover kan struikelen. Gebruik de terrasverwarmer uitsluitend voor het doel, waarvoor hij is ontworpen: het verwarmen van een terras of vergelijkbare ruimte. Dus niet om zalen, kassen, bars o.i.d. te verwarmen en niet voor het drogen van textiel of andere vochtige voorwerpen. Houd ontvlambare materialen uit de buurt van de verwarmer. De terrasverwarmer kan intense hitte voortbrengen. Stel mensen (i.h.b. kleine kinderen en ouderen) en dieren niet aan de directe hitte van de terrasverwarmer bloot. Pas ook op voor brand-wonden en kledingschade! Contact met vloeibaar gas kan bevriezingswonden veroorzaken. Kinderen, handelingsonbekwamen, huisdieren enz. moeten goed in de gaten worden gehouden als ze zich in de buurt van de terrasstralen bevinden. Bij stevige wind dienen er maatregelen te worden getroffen tegen omwaaien van de terrasstraler. Bij de volgende verschijnselen dient u de terrasverwarmer onmiddellijk uit te schakelen en na te (laten) kijken: Als de verwarming niet heet genoeg wordt. Als de brander ploppende geluiden maakt tijdens het gebruik (een zacht geluidje tijdens het doven is normaal). Als de vlampunten extreem geel zijn en u gas ruikt. ONDERDELEN EN SAMENSTELLING 1. reflectorkap 2. vlammenscherm 3. brander 4. luchttoevoer 5. bedieningsknop 6. bedieningspaneel 7. ontstekingsknop 8. standaard 9. gasflescontainer 10. containerframe 11. basis

4 - 4 - EIGENSCHAPPEN en SPECIFICATIES Verplaatsbare terras/tuinverwarmer met gasflescontainer Alleen geschikt voor gebruik buitenshuis Warmteafgifte via reflecterende kap Aansluitingen op gastoevoer voorzien van wartelmoeren Gasflescontainer, standaard, bedieningspaneel, brander en vlammenscherm van powdercoating plaatstaal Reflectorkap van aluminium Specificaties: Max. capaciteit Min. capaciteit Brandstof Brandstofverbruik Aansluitdruk Opening brandernozzle Opening waakvlamnozzle Hoogte incl. standaard Doorsnee reflectorkap Watt 5000 Watt Propaan of butaan 450 tot 870 gram per uur 30 mbar 1,7 mm 0,22 mm 2250 mm 813 mm MONTAGE Leg voor aanvang van de montage het volgende gereedschap klaar: Steeksleutel 10, 13 en 17 Verstelbare schroefsleutel 8 inch Waterpomptang Schroevendraaier medium Zeepoplossing voor lekkagetest Controleer aan de hand van de montagebeschrijving of alle onderdelen aanwezig zijn. Stap Plaats de drie gebogen buizen (die samen het containerframe vormen) op de basis, zie tekening 1-2 Gebruik 3 bouten M8 x 16mm om de buizen op de basis te monteren. A = containerframe B = basis C = bout Stap Plaats de standaard met de bevestigingsplaat op de top van het containerframe 2-2 Gebruik 6 bouten M6 x 35mm met moeren om de standaard op het frame te monteren. D = standaard E = moer F = bout

5 - 5 - Stap Plaats de gasflescontainer over het frame G = gasflescontainer Stap Draai de drie pennen (met een sluitring ertussen) met de ene kant vast in de bovenkap van het vlammenscherm 4-2 Controleer of de rubberen gasslang stevig aan de onderkant van de brander gemonteerd is en laat de slang in de standaard zakken. 4-3 Plaats de brander met het bedieningspaneel en het vlammenscherm op de standaard en zet het geheel vast met 4 bouten M6 x 10mm. De 4 bouten moeten eerst verwijderd worden uit de onderkant van de branderkop. 4-4 Draai de drukregelaar (met steeksleutel 17) vast op het uiteinde van de slang. H = sluitring I = schroefdraadpen J = sluitring K = gasinlaat L = wartelmoer M = slang N = bouten Stap Verwijder het blauwe folie van de 3 segmenten en de centrale plaat. 5-2 Zet de 3 segmenten van de reflectorkap met de 9 boutjes, ringen en dopmoertjes aan de centrale plaat en elkaar vast. 5-3 Schuif 3 sluitringen over de pennen op het vlammenscherm en plaats de reflectorkap bovenop de brander, zodanig dat de pennen door de gaten vallen en de kap op de bouten rust. 5-4 Plaats 3 sluitringen over de schroefdraadpennen en zet het geheel vast met 3 vleugelmoeren bovenop de kap. P = dopmoer Q = centrale plaat R = segment S = boutje
 vast op het uiteinde van de slang.")
6 - 6 - Stap Bevestig (indien gewenst) de transportwielen met de beide bouten, de vier ringen en de twee moeren op de basis van de terrasstraler. 6-2 Til de gasflescontainer op en laat deze rusten op het frame. 6-3 Sluit de drukregelaar aan op de gasfles en draai de sluiting stevig aan met een verstelbare schroefsleutel (zie: aansluiten en verwisselen gasfles). 6-4 Plaats de gasfles tussen het frame 6-5 Laat de container weer over het frame zakken T = drukregelaar U = gasfles Uw terrasverwarmer is nu gemonteerd. Voer nu een uitgebreide lekkagetest uit: bestrijk de hele gasroute met de zeepoplossing en stel vast dat nergens gas weglekt. Met name de aansluitpunten zijn risicoplaatsen: intensiveer daar de controles! Pas wanneer u 100% zeker weet dat er nergens gas weglekt, mag u de terrasverwarmer in gebruik nemen. Zie ook het hoofdstuk: Controle op gaslekkage. PLAATS EN PLAATSING De terrasverwarmer is bedoeld voor gebruik buitenshuis. Gebruik hem nooit in ruimtes met explosiegevaar, zoals ruimtes waar gas of andere lichtontvlambare stoffen worden opgeslagen. Zorg te allen tijde voor voldoende luchtventilatie. Zoek een plaats op ruime afstand van brandbare materialen: houd aan de bovenkant minstens 45 cm, en opzij minstens 60 cm vrij. Plaats de terrasverwarmer op een stevige, stabiele, vlakke en horizontale ondergrond. Om de terrasverwarmer tegen stevige wind te beschermen kunt u hem met tentharingen o.i.d. in de grond verankeren. Aan de basis van de terrasstraler kunnen daartoe bevestigingspunten worden aangebracht (meegeleverd). Tentharingen worden niet meegeleverd maar dienen aan de ondergrond te worden aangepast. GAS-EISEN Gebruik uitsluitend propaan- of butaangas. De maximale ingangsdruk van de gasregelaar mag de 10 bar niet overschrijden. Een minimale aanvoerdruk van 28 mbar is vereist. De te gebruiken gasdrukregelaar en slang moeten voldoen aan de wettelijke richtlijnen. De slang dient 150 cm. lang te zijn, geschikt voor propaan/butaan, te voldoen aan de landelijke voorschriften en voorzien te zijn van een schroefkoppeling. De installatie dient conform de wettelijke richtlijnen voor opslag en gebruik van vloeibare petroleumgassen plaats te vinden. Een gedeukte, geroeste of beschadigde gasfles kan gevaarlijk zijn en moet gecontroleerd worden door uw gasleverancier. Gebruik nooit een gasfles met een beschadigd ventiel. Venbind nooit een gastank die niet aan de voorschriften voldoet aan de terrasverwarmer! CONTROLE OP GASLEKKAGE De verbindingen van de terrasverwarmer zijn voor verscheping in de fabriek gecontroleerd op lekkage. Om de mogelijkheid van schade tijdens het transport of door hoge druk, slijtage enz. uit te sluiten dient er tijdens de installatie, na het verwisselen van een gasfles en na een periode van opslag altijd een complete lekkagetest te worden uitgevoerd. Alle lekkagecontroles moeten worden uitgevoerd met een zeepoplossing, nooit met vuur! Rook niet tijdens de controles. Bij gaslekkage (wees alert op de geur!) onmiddellijk het ventiel van de gasfles sluiten en het apparaat ver verwijderen van andere warmtebronnen.

7 - 7 - Voer de controle uit met een volle gasfles. Zet de bedieningsknop in de UIT (OFF) stand. Maak een zeepoplossing van één deel vloeibare zeep en één deel water. Breng de zeepoplossing op het hele systeem, in het bijzonder op de verbindingen, aan met een spuitfles, borstel of doek. Draai de gastoevoer open. Als er sprake is van een lek zullen er zeepbellen ontstaan. Als er sprake is van een lek, schakel dan de gastoevoer uit. Bevestig het lekkende onderdeel strakker, schakel de gastoevoer weer in en controleer opnieuw. Blijven er bellen ontstaan, neem dan contact op met uw leverancier. Zorg ervoor dat er geen vuur of vonken in de buurt zijn als u de lekkagetest uitvoert en rook er niet bij! Als de gasslang tekenen van barsten, scheuren of andere beschadigingen vertoont, moet hij worden vervangen door een nieuwe slang van dezelfde lengte en equivalente kwaliteit. Vervang hem minimaal elke 3 jaar. Gebruik daarvoor steeksleutel nr. 17; aan de branderkant hebt u daar 2 exemplaren nodig. Voer na vervanging een gaslekcontrole uit. DE GEUR VAN GAS Aan gas is een geur toegevoegd om u in staat te stellen een gaslek te ontdekken. Gas is zwaarder dan lucht; probeer dus vlak boven de grond de geur op te vangen! Neem onmiddellijk maatregelen als u gas ruikt! Sluit onmiddellijk de gastoevoer. Doe niets wat tot vonk of vuur kan leiden om ontsteking van het gas te voorkomen. Schakel geen elektriciteit in of uit, steek geen lucifer, aansteker o.i.d. aan en gebruik uw telefoon niet. Haal iedereen weg uit de buurt van de gasbron en geef het gas ruimschoots de tijd te verwaaien. Blijf tijdens dat proces uit de buurt! Blijft u gas ruiken of vertrouwt u de situatie niet, alarmeer dan de brandweer. Laat een gaslek door gekwalificeerde mensen repareren! GEBRUIK HET AANZETTEN VAN DE TERRASSTRALER Draai het ventiel op de gasfles helemaal open. Duw de bedieningsknop in en draai hem op de PILOT-stand. Houd de knop minimaal 60 seconden ingedrukt (nadat u een nieuwe gasfles in gebruik hebt genomen minimaal 90 seconden). Terwijl u de bedieningsknop ingedrukt houdt drukt u nu enkele malen op de ontstekingsknop (igniter), tot de waakvlam ontsteekt. Houd de bedieningsknop nog 30 seconden ingedrukt om het thermokoppel te activeren. Nu kunt u de bedieningsknop loslaten. Als de vlam niet wil ontsteken, draai de bedieningsknop naar Off en wacht 5 minuten voordat een nieuwe poging tot ontsteken wordt gedaan. Draai nu de bedieningsknop naar de laagste stand en laat de terrasverwarmer zo vijf minuten branden. Hierna kunt u de bedieningsknop op het gewenste vermogen draaien: High = maximaal. De waakvlam kan worden bekeken en gecontroleerd door het kijkgaatje met het schuifje, dat zich aan de zijkant van het vlammenscherm bevindt.

8 - 8 - HET UITZETTEN VAN DE TERRASSTRALER Draai de bedieningsknop naar de PILOT-stand. Duw de bedieningsknop in en draai hem op de UIT (OFF)-stand Draai het ventiel op de gasfles helemaal dicht. AANSLUITEN EN VERWISSELEN GASFLES Voor het verwisselen van de gasfles hebt u een verstelbare schroefsleutel nodig. Verwissel de gasfles buiten, zonder open vuur of vonken in de buurt. Draai de gasfles nooit om en leg hem niet neer. Controleer de nieuwe gasfles op beschadigingen en de aansluiting op de drukregelaar op een feilloze afsluiting. Als u schade of hapering vermoedt, wissel de gasfles dan om bij uw gasleverancier. Controleer of de gaskraan op de lege én nieuwe gasfles dichtgedraaid is (de ventielknop zo ver mogelijk met de klok mee gedraaid). Controleer of de afdichting van de gaskraan op de nieuwe gasfles in goede staat verkeert. Gebruik geen aanvullende afdichtingen. Til de gasflescontainer op het frame en neem de lege gasfles eruit. Draai de drukregelaar met een verstelbare schroefsleutel los van de lege gasfles. Controleer of de gasslang geen draaiingen of knikken vertoont. Schroef de wartelmoer van de drukregelaar met de hand tegen de klok in (linkse draad) op de gasflesaansluiting van de volle gasfles. Draai hem tenslotte met de verstelbare schroefsleutel na: de afdichting moet lekkagevrij zijn, maar beschadig hem niet door té strak nadraaien! Voer een complete controle op gaslekkage uit. Plaats de gasfles tussen het frame Laat de container weer over het frame zakken OPSLAG Controleer of de ventiel van de gasfles goed gesloten is Verwijder de gasdrukregelaar en de slang van de gasfles Controleer de gasfles op beschadigingen en de drukregelaar op een feilloze afsluiting. Als u schade of hapering vermoedt, wissel de gasfles dan om bij uw gasleverancier. Bewaar een gasfles altijd in een ruimte met een goede ventilatie Sla de terrasstraler zonder gasfles op in een droge, stofvrije en veilige ruimte. Zonodig kunt u om ruimtetechnische redenen de reflectorkap en de brander demonteren en apart opslaan. Gebruik zo mogelijk de originele verpakking ter beveiliging! Sla de terrasstraler altijd schoon op, en zorg dat hij ook stof- en vuilvrij is wanneer u hem weer in gebruik neemt. REINIGING EN ONDERHOUD Maak de gladde oppervlakken schoon met een zachte doek, evt. met wat schoonmaakmiddel voor staal. Gebruik nooit licht ontvlambare, bijtende of schurende schoonmaakmiddelen! Verwijder regelmatig al het vuil en roet uit brander en van het vlammenscherm, om het gebruik veilig te houden.

9 - 9 - PROBLEMEN EN OPLOSSINGEN PROBLEEM OORZAAK OPLOSSING Ventiel gasfles dicht Draai het open Gasfles leeg verwisselen Gasnozzle verstopt schoonmaken Waakvlam gaat Ontluchten door de bedieningsknop op niet branden Lucht in systeem de pilotstand 90 seconden ingedrukt te houden, als bij het aanzetten Losse verbinding Checken en dichten Vuil rond waakvlam Reinigen Waakvlam blijft niet branden Brander gaat niet aan Losse verbinding Thermokoppel slecht Gaslek in leiding Lage gasdruk, fles bijna leeg Lage gasdruk, fles bijna leeg Nozzle verstopt Bedieningsknop uit Thermokoppel slecht Waakvlam niet goed gemonteerd Terrasverwarmer staat niet goed of niet op goede plek Checken en dichten Vervangen Checken en dichten of vervangen verwisselen verwisselen Schoonmaken Aanzetten Vervangen Plaats waakvlam-unit goed Check plaats en plaatsing CE-VERKLARING Hierbij verklaart ondergetekende: Euromac bv., Kokosstraat 20, 8281 JC Genemuiden dat het onderstaande product terrasstraler op gas bekend onder het merk EUROM type THG12000 (op gas) & THG12000RVS (op gas) vermogen 12.0 kw voldoet aan de Europese richtlijn 2009/142EEC voor apparaten met gasvormige brandstoffen en in overeenstemming is met de volgende eisen: BSEN 14543:2005+A1:2007 Genemuiden, W.J. Bakker, alg. dir.

10 EN THANKS Many thanks for selecting a EUROM patio heater. You have made a very good choice! We hope that you will be completely satisfied with the product. In order to get the very best from your patio heater, it is important that you read and make sure you understand this instruction leaflet thoroughly and completely before use. Pay particular attention to the safety regulations: they are provided to protect both you and the environment! Keep the instruction leaflet somewhere safe so that you can consult it in future. Retain the packaging too: this is the best protection for your patio heater when storing it out of season. GENERAL SAFETY GUIDELINES Only use propane or butane gas. Shut the gas bottle valve or gas regulator after use. Read the instruction leaflet for this device before use. This devic The surface-area of the walls is the sum of the total surface-area. e is to be used outdoors and in spaces that are well ventilated. Do not use in caravans, campers, boats etc. A well ventilated room is one where 25% of the wall surface-area is open. The surface-area of the walls is the sum of the total surface-area. Use in enclosed spaces is dangerous and is FORBIDDEN. This device must be installed according to the instructions and legal regulations. System category: A. The ventilation openings in the gas bottle casing should never be blocked. Keep them free from dirt. The use of gas bottles corresponds to legal regulations. Install and keep gas bottles according to these regulations. Never use gas or other flammable liquids in the patio heater other than the propane or butane gas stipulated by the manufacturer. This gas must be contained in EU approved gas cylinders with a safety valve. Never use a gas bottle with visible damage to its surface, valve, ring or base! Replace the gas bottle outdoors and away from fire, sparks and other sources of ignition. Replace the flexible hose every 3 to 4 years. Try not to change the device in any way. Incorrect installation, irresponsible use, changes or modifications to the device could cause damage or lead to injury. The manufacturer and importer accept no liability in this instance! Only use the regulator that is supplied by the manufacturer (this applies to replacements too). The entire gas system, hose regulator, pilot light and burner must be checked before use, after the gas bottle has been changed and afterwards at least once each month. All checks for leaks must be carried out with a soapy solution; never with a naked flame! Never use the heater until all connections and leaks have been checked. Do not smoke when carrying out these checks. Shut the valve on the gas bottle if you smell gas. Gas is flammable, explosive and heavier than air; it will therefore remain low. In its natural state, propane gas does not smell; an odour, which smells like rotten cabbage, has however been added for your safety. Never move the patio heater while it is on. Shut the gas bottle and allow the patio heater to cool down before moving the device. If the patio heater is not being used, shut the gas bottle and switch the device to OFF. Regularly check whether the connections on the gas regulator are suitable and in good condition. The operating panel, burner and the air passage must be cleaned regularly. Ensure that all of the components removed for cleaning are replaced again afterwards! Do not paint the flame screen, operating panel or reflector cap. Make sure that the gas regulator and hose are always situated in a location where they cannot be damaged and where nobody can trip over them. Use the heater for its intended purpose only, i.e. heating a patio or a similar location. It is not intended to be used to heat halls, greenhouses, bars or similar or for drying textiles or other damp objects.

11 Keep flammable materials out of the vicinity of the heater. The patio heater can produce intense heat. Never expose people (particularly children or the elderly) to the direct heat of the patio heater. Be careful to avoid burns or clothing damage! Gas can cause injuries as a result of freezing if it comes into contact with exposed skin. Children, less able people, pets etc must be monitored closely when they are in the vicinity of the patio heater. If there are high winds, measures must be taken to avoid the heater being blown over. Switch off the patio heater immediately and check it or have it checked in the event of any of the following: If the heater fails to get sufficiently hot. If the burner makes popping noises when in use (a slight noise when going out is normal). If the flames are extremely yellow and you can smell gas. COMPONENTS AND ASSEMBLY 1. reflector cap 2. flame screen 3. burner 4. air inlet 5. control button 6. operation panel 7. ignition button 8. stand 9. gas bottle container 10. container frame 11. base

12 FEATURES and SPECIFICATIONS Portable patio/garden heater with gas bottle container Only suitable for outdoor use Heat issued via reflective cap Connection to gas supply equipped with swivel nuts Gas bottle container, stand, operation panel, burner and flame screen made of powder-coated plate steel. Aluminium reflector cap Specifications: Max. capacity Min. capacity Fuel Fuel consumption Connection pressure Opening burner nozzle Opening pilot light nozzle Height incl. stand Diameter reflector cap Watt 5000 Watt Propane or butane 450 to 870 gram per hour 30 mbar 1,7 mm 0,22 mm 2250 mm 813 mm ASSEMBLY Make sure you have access to the following tools before starting to assemble the device: Open-ended spanners 10, 13 and 17 Adjustable monkey wrench 8 inch Water pump pliers Medium screwdriver Soapy liquid for leak test Check that all of the components are present using the assembly description. Step Place the three bent tubes (that together form the container frame) on the base, see diagram. 1-2 Use 3 M8 x 16mm bolts to mount the tubes on the base. A = container frame B = base C = bolt Step Place the stand with the attachment plate on top of the container frame. 2-4 Use 6 M6 x 35mm bolts with nuts to mount the stand on the frame. D = stand E = nut F = bolt

13 Step Place the gas bottle container over the frame. G = gas bottle container Step Screw the headless screws (with the washer in between) with the other side held fast into the upper cap of the flame screen. 4-2 Check if the rubber gas hose is firmly mounted to the underside of the burner and allow this to drop into the stand. 4-3 Place the burner with the operation panel and the flame screen on the stand and secure with 4 M6 x 10mm bolts. The 4 bolts must be removed from the bottom of the burner firstly. 4-4 Screw pressure regulator (open-ended spanner 17) tight to the end of the gas hose. H = stay bolt I = headless screw J = washer K = gas inlet L = swivel nut M = hose N = bolts Step Remove protective cover before assemble. 5-2 Place the 3 segments that make up the reflector cap with the 9 bolts, washers and cap nuts on the central plate and secure. 5-3 Screw the 3 washers over the pins on the flame screen and place the reflector cap above the burner so that the pins fit through the holes and the cap rests on the bolts. 5-4 Place 3 washers over the headless screws and secure this whole construction above the cap with the 3 wing nuts. P = cap nut Q = central plate R = segment S = bolt

14 Step If required mount the two castors to the base of the patio heater using both bolts, the four washers and the two nuts. 6-2 Tilt the gas bottle container and allow it to rest on the frame. 6-3 Close the pressure regulator on the gas bottle and screw the fastener on securely with the adjustable monkey wrench (see: connecting and exchanging gas cylinder). 6-4 Place the gas bottle within the frame. 6-5 Let the container drop over the frame. T = pressure regulator U = gas bottle Your patio heater is now assembled. In order to conduct a comprehensive leak test: cover the entire gas pathway with the soapy solution and check for leaks. Pay particular attention to connection points and risky areas! Only when you are 100% sure that there are no gas leaks can you use the patio heater. Please refer to chapter: Checking for leaks. LOCATION AND INSTALLATION The patio heater is intended for outdoor use. Never use it in areas where this is a risk of explosion, such as rooms where gas or other flammable substances are stored. Make sure, at all times, that there is sufficient air ventilation. Find a location a good distance away from flammable materials: keep a free space of at least 45 cm on top and 60 cm at the sides. Place the patio heater on a sturdy, stable, flat and horizontal surface. Optionally anchor the patio heater with e.g. tent pegs to protect it from strong winds. For this purpose, attachment points can be mounted to the base of the patio heater (supplied). Tent pegs are not supplied, but must be adapted to the ground conditions. GAS REQUIREMENTS Only use propane or butane gas. The maximum entry pressure on the gas regulator may not exceed 10 bar. A minimum supply pressure of 28 mbar is required. The gas regulator and hose must fulfil legal requirements. The hose must be 150 cm long, be suitable for propane/butane, and must comply with national regulations and be fitted with a screw coupling. The installation must conform to legal guidelines for storage and use of liquid petroleum gases. A dented, rusted or damaged bottle of gas could be dangerous and must be checked by the gas supplier. Never use a gas bottle that has a damaged valve. Never connect a gas tank that does not fulfil regulations to the patio heater! CHECKING FOR GAS LEAKS The connections on the patio heater are checked for leaks in the factory before shipping. To prevent damage during transport or due to excess pressures, wear etc., a full leakage test must always be carried out during installation, after exchanging the gas cylinder and after storage. All leakage checks must be carried out with a soap solution, never with fire! Do not smoke while carrying out the checks. In the case of a gas leak (watch out for the odour!), immediately shut off the gas cylinder valve and remove the appliance a good distance from other heat sources. Carry out the check with a full gas bottle.

15 Set the control button to OFF. Make a soapy solution using one part liquid soap to one part water. Apply the soap solution to the whole system, particularly the connections, using a spray bottle, brush or cloth. Open the gas supply. If there is a leak, you will see soap bubbles forming. If there is a leak, turn off the gas supply. Tighten the leaking component, switch on the gas supply and check it again. If bubbles are still created, contact your supplier. Make sure that there are no flames or sparks in the vicinity when you are carrying out the leak test and do not smoke! If the gas hose signs of cracks, tears or other damage exhibits, it must be replaced by a new pipe or a hose of the same length and equivalent quality. Replace it at least every 3 years. To do this, use open-ended spanner no. 17: you need 2 on the burner side. After exchanging, perform a gas leakage check. GAS ODOUR An odour is added to gas to ensure that leaks can be detected. Gas is heavier than air; try to detect the odour just above ground level! Take immediate measures if you smell gas! Immediately shut the gas supply. Do not do anything that could lead to fire or a spark being created; this could ignite the gas. Do not switch any electrical components on or off, do not use matches or lighters and do not use your telephone. Keep everyone away from the source of gas and allow plenty of time for it to dissipate. Stay out of the area during this process! If you continue to smell gas or are not sure of the situation, always call the fire services. Always have gas leaks repaired by professionals! USE TURNING THE PATIO HEATER ON Turn the valve on the gas bottle to open. Push the control button in and turn to PILOT setting. Keep the button depressed for at least 60 seconds (around 90 seconds if you have attached a new gas bottle). While pressing the control button, press a couple of times on the ignition until the pilot light goes on. Keep the control button depressed for another 30 seconds in order to activate the thermocouple. You can now release the control button.if the flame will not ignite, turn the control button to Off and wait 5 minutes before a new attempt to inflame will be made. Turn the control button to the lowest setting and leave the patio heater to burn for five minutes. You can then turn the control button to the desired setting: High = maximum. The pilot light can be viewed and checked via the peephole with the slider which can be found on the side of the flame screen.

16 TURNING THE PATIO HEATER OFF Turn the control button to PILOT setting. Press the control button in and turn to OFF. Close the regulator on the gas bottle completely. Connecting and exchanging gas cylinder You need an adjustable spanner to exchange the gas cylinder. Exchange the gas cylinder outside, without naked fire or sparks in the vicinity. Never turn the gas cylinder round or lay it down. Check the new gas cylinder for damage and check the connection on the pressure regulator for perfect shut-off. If you suspect damage or a flaw, exchange the gas cylinder at your gas supplier. Check that the gas tap is shut off both on the empty and the new gas cylinder (the valve knob must be turned clockwise as far as possible). Check if the sealing gasket of the gas tap on the new gas cylinder is in good condition. Do not use any additional sealing. Lift the gas cylinder container onto the frame and remove the empty gas cylinder. Using an an adjustable spanner, unscrew the pressure regulator from the empty gas cylinder. Check that the gas hose has no twists or buckles. Manually screw the pressure regulator coupling nut anti-clockwise (left-hand thread) onto the gas cylinder connection of the full gas cylinder. Finally, tighten with the adjustable spanner: the seal must be leakage-free, but do not damage it by tightening too much! Perform a full check for gas leakages. Replace the gas cylinder between the frame Let the container fall back over the frame STORAGE Check or the valve on the gas bottle is closed properly. Remove the gas regulator and the gas bottle hose. Check the gas bottle for damage and the regulator for a perfect connection. If you notice damage or any other issues, change the gas bottle with your gas supplier. Always store gas bottles in an area with good ventilation. Store the patio heater, without gas bottle, in a dry, dust-free and safe area. If necessary as a result of a lack of storage height, you can remove the burner and reflector cap and store these separately. If possible, use the original packaging materials to protect the device during storage! Always store the patio heater clean and ensure that it is dust and dirt free when you wish to use it again. CLEANING AND MAINTENANCE Clean the smooth surfaces with a soft cloth and a little steel cleaning product. Never use flammable, corrosive or abrasive cleaning agents! Regularly remove dirt and soot around the burner and the flame screen in order to ensure the heater works safely.

17 PROBLEMS AND SOLUTIONS PROBLEM CAUSE SOLUTION Gas bottle valve is closed Open it Empty gas bottle Replace gas bottle Blocked gas nozzle Clean it Pilot light does Vent by keeping the the control knob not burn Air in system pressed at the pilot position for 90 seconds, just as with switching on Loose connection Check and tighten Dirt around pilot light Clean Loose connection Check and tighten Pilot light still Bad thermocouple Replace does not burn Gas leak in pipe Check and repair or replace Low gas pressure, bottle almost empty Replace gas bottle Low gas pressure, bottle almost empty Replace gas bottle Blocked nozzle Clean it Burner does not go on CE STATEMENT Control button off Bad thermocouple Pilot light not assembled correctly Patio heater is not installed properly or is not situated in a suitable place Turn it on Replace Install pilot light unit properly Check location and installation The undersigned: Euromac bv., Kokosstraat 20, 8281 JC Genemuiden hereby declares that the product below gas-powered patio heater known under the brand EUROM type THG12000 (gas) & THG12000RVS (gas) power 12.0 kw fulfils the European directive 2009/142EEC for devices with gaseous fuels and corresponds to the following requirements: BSEN 14543:2005+A1:2007 Genemuiden, W.J. Bakker, Gen. Dir.

18 - 34 -

19 - 35 -
20 - 36 -

THG12000 terrasstraler op gas
 Instructieboekje THG12000 terrasstraler op gas - 3 - DANK Hartelijk dank dat u voor een EUROM terrasverwarmer hebt gekozen. U hebt daarmee een goede keus gemaakt! Wij hopen dat hij tot uw volle tevredenheid
THG14000(RVS) terrasstraler op gas
 terrasstraler op gas") - 1 - Instructieboekje THG14000(RVS) terrasstraler op gas Artikelnummer THG14000: 32.402.0 Artikelnummer THG14000RVS: 32.405.1 - 2 - NL DANK Hartelijk dank dat u voor een EUROM terrasverwarmer hebt gekozen.
- 1 - Instructieboekje THG14000(RVS) terrasstraler op gas Artikelnummer THG14000: 32.402.0 Artikelnummer THG14000RVS: 32.405.1 - 2 - NL DANK Hartelijk dank dat u voor een EUROM terrasverwarmer hebt gekozen.
Area Loungeheater Outdoor loungeheater - gas
 Instructieboekje Area Loungeheater Outdoor loungeheater - gas 2 DANK 3 NL Hartelijk dank dat u voor een EUROM terrasverwarmer hebt gekozen. U hebt daarmee een goede keus gemaakt! Wij hopen dat hij tot
THG Terrasstraler op gas
 NL Gebruiksaanwijzing THG 10000 Terrasstraler op gas Art.nr. 32.390.0 Uitsluitend voor gebruik buitenshuis! Inhoudsopgave Dank 3 Technische gegevens 3 Waarschuwingen 3 Beschrijving, samenstelling en montage
Area Loungeheater Outdoor loungeheater gas (NL)
") Instructieboekje Area Loungeheater Outdoor loungeheater gas (NL) Art.nr. standaard: 32.311.5 Art.nr. Charcoal: 32.312.2 2 DANK 3 NL Hartelijk dank dat u voor een EUROM terrasverwarmer hebt gekozen. U hebt
Instructieboekje Area Loungeheater Outdoor loungeheater gas (NL) Art.nr. standaard: 32.311.5 Art.nr. Charcoal: 32.312.2 2 DANK 3 NL Hartelijk dank dat u voor een EUROM terrasverwarmer hebt gekozen. U hebt
instructieboekje EUROM GS5000 Infraroodstraler op gas
 instructieboekje EUROM GS5000 Infraroodstraler op gas 2 HARTELIJK DANK Hartelijk dank dat u voor de EUROM GS5000 kachel gekozen hebt. U hebt daarmee een goede keus gemaakt! Wij hopen dat hij tot uw volle
Instructieboekje Bedienungsanleitung Instruction leaflet Livret d'instructions
 - 1 - Instructieboekje Bedienungsanleitung Instruction leaflet Livret d'instructions THG12000(RVS) - terrasstraler op gas THG12000 (Edelstahl) - Gas-Terrassenheizstrahler THG12000 (Stainless steel) - Gas-powered
Montagehandleiding: doucheset
 Montagehandleiding: doucheset Installation manual: showerset 0 6 5 7 8 9 0 8 9 7 5 6 Controleer voor installatie of alle onderdelen aanwezig zijn. Check if all parts are present before installation. 5
Rhythm of Light. Susanne de Graef, Montagehandleiding / Instruction manual
 Rhythm of Light Susanne de Graef, 2016 Montagehandleiding / Instruction manual GELEVERD MATERIAAL / SUPPLIED MATERIAL B. C. D. A. E. F. A. B. C. D. E. F. armatuur / fixture fitting lange staalkabels (3)
Flybye. Ernst Koning, Montagehandleiding / Instruction manual
 Flybye Ernst Koning, 2018 Montagehandleiding / Instruction manual GELEVERD MATERIAAL / MATERIALS SUPPLIED A. B. C. D. E. F. G. A. B. C. D. E. F. G. H. H. lichtbuis / lighting tube plafondkap / ceiling
Limpid Light. design Esther Jongsma & Sam van Gurp, Montagehandleiding / Assembly Instructions
 Limpid Light design Esther Jongsma & Sam van Gurp, 05 Montagehandleiding / Assembly Instructions GELEVERD MATERIAAL / SUPPLIED MATERIAL A. A. B. B. C. D. E. F. G. G. H. I. J. K. / / ophanging / suspension:
OUTDOOR HD DOME IP CAMERA PRODUCT MANUAL GB - NL
 OUTDOOR HD DOME IP CAMERA PRODUCT MANUAL GB - NL GB PARTS & FUNCTIONS 2. ---- 1. ---- 3. ---- 7. ---------- 5. 4. 6. 1. Outdoor IP camera unit 2. Antenna 3. Mounting bracket 4. Network connection 5. Power
MONTAGE INSTRUCTIE ASSEMBLY INSTRUCTION
 MONTAGE INSTRUCTIE ASSEMBLY INSTRUCTION - 1. Waterpas stellen. De groef aan de zijkant van de beschermdeksel moet gelijk staan met de deellijn van het inbouw box. 2. Zet de inbouw box vast in de muur.
Procedure Reset tv-toestellen:
 Procedure Reset tv-toestellen: Volgende procedure is te volgen wanneer er een tv-toestel, op een van de kamers niet meer werkt. TV Re-installation Factory Default Her-installeren van de TV Fabrieksinstellingen
Sears Flameheater 190 cm
 Sears Flameheater 190 cm Handleiding 1 0359 / 2015 Lees deze instructies zorgvuldig door voordat u de Flameheater in gebruik neemt 1 BELANGRIJKE VEILIGHEIDSVOORSCHRIFTEN 3 Bij het gebruik van dit apparaat
EU Declaration of Conformity and safety instructions EU Conformiteitsverklaring en veiligheidsinstructies
 EU Declaration of Conformity and safety instructions EU Conformiteitsverklaring en veiligheidsinstructies Battery operated UNICOM 300 N51 UNICOM 300 met batterijvoeding N51 Explosion safety instructions
OUTDOOR HD BULLET IP CAMERA PRODUCT MANUAL
 OUTDOOR HD BULLET IP CAMERA PRODUCT MANUAL GB - NL GB PARTS & FUNCTIONS 1. 7. ---- 3. ---- 4. ---------- 6. 5. 2. ---- 1. Outdoor IP camera unit 2. Antenna 3. Mounting bracket 4. Network connection 5.
2000 Volkswagen Passat GLS
 REAR DOOR WINDOW Rear door window, assembly overview Fig. 304: Exploded View Of Rear Door Window 1 - Door Removing and installing: --> Rear door, removing and installing 2 - Spring nut Qty 2 3 - Screw
Canberra Grill Barbecue (gas)
") Instructieboekje Canberra Grill Barbecue (gas) 2 3 NL DANK Hartelijk dank dat u voor een EUROM barbecue hebt gekozen. U hebt daarmee een goede keus gemaakt! Wij hopen dat hij tot uw volle tevredenheid
Instructieboekje Canberra Grill Barbecue (gas) 2 3 NL DANK Hartelijk dank dat u voor een EUROM barbecue hebt gekozen. U hebt daarmee een goede keus gemaakt! Wij hopen dat hij tot uw volle tevredenheid
Dagelijkse checklist Daily checklist
 Dagelijkse checklist Daily checklist Sluiting met snelspanner Verstelbare hoofdsteun Verstelbare en aanpasbare riem Verstelbare voetsteunen Verstelbare riemen van de voetsteun Quick release locked Head
ANT S KINGDOM Here is some advice for setting up your Master Ant Farm!
 ANT S KINGDOM Master NL EN Instructies Mierenboerderij Master Bedankt voor je bestelling van de Mierenboerderij Master. De beste keus! Installatie NL Naast de informatie die te lezen is in ons boekje
FSW-VW-2X2 FSW-VW. Handleiding / Manual
 FSW-VW-2X2 FSW-VW Handleiding / Manual Rev. 1.0 17-03-2014 I Pakketinhoud / Content Accessoires Benodigde gereedschappen / Required Tools Montage / Assembling Onderhoud / Maintenance Veel Gestelde Vragen
Weedburner XXL Onkruidbrander op gas
 Instructieboekje Weedburner XXL Onkruidbrander op gas 1 DANK Hartelijk dank dat u voor een EUROM Weedburner hebt gekozen. U hebt daarmee een goede keus gemaakt! Wij hopen dat hij tot uw volle tevredenheid
Table Lounge heater 3000 RVS
 - 1 - Instructieboekje Bedienungsanleitung Instruction leaflet Livret d'instructions Table Lounge heater 3000 RVS RVS terrasstraler - gas Edelstahl Terrassenheizstrahler Gas Stainless steel Patio heater
Flameheater Round 11000
 Gebruiksaanwijzing Flameheater Round 11000 Art.nr. 32.432.7 Uitsluitend voor gebruik buitenshuis Bewaar deze instructies voor toekomstig gebruik Terrasstraler op gas (propaan of butaan) 15-01-2019 Inhoudsopgave
Quick start guide. Powerbank MI Mah. Follow Fast All rights reserved. Page 1
 Quick start guide Powerbank MI 16.000 Mah Follow Fast 2016 - All rights reserved. Page 1 ENGLISH The Mi 16000 Power Bank is a very good backup option for those on the move. It can keep you going for days
Function checklist for the ML-350 or XL-350 with a print set. Missing loop.
 Function checklist for the ML-350 or XL-350 with a 260217 print set. Below mentioned check-point should resolve function problems of the lift systems. Missing loop. When a lift is connected to an external
2006 Volkswagen Jetta TDI
 Door handle and door lock, assembly overview The illustration shows the left side. The right side is derived accordingly from this. Fig. 99: Door Handle And Door Lock, Assembly Overview 1 - Cable For disengaging
Gebruikers- en installatie- handleiding SUNWOOD MARINO. Propaan
 Gebruikers- en installatie- handleiding SUNWOOD MARINO Versie: Aardgas Propaan Specificaties Fabrikant Sunderman Openhaarden V.O.F. / Sunwood Contactgegevens Christiaan Huygensstraat 10 2665 KX Bleiswijk
EU Declaration of Conformity and safety instructions EU Conformiteitsverklaring en veiligheidsinstructies ISC 230B
 EU Declaration of Conformity and safety instructions EU Conformiteitsverklaring en veiligheidsinstructies ISC 230B Explosion safety instructions (Ex) (EN) ISC230B is approved for use outside the explosion-hazardous
Mobile concrete base
 1 14 Mobile concrete base UMBASM8000000000 Mobile concrete base UMBASM8000000000 Congratula ons with your purchase! Please completely read and follow all the instruc ons. pg. 3 Proficiat met uw aankoop!
Instructieboekje. Flameheater. op propaan / butaan. Uitsluitend voor gebruik buitenshuis!
 Instructieboekje Flameheater op propaan / butaan Uitsluitend voor gebruik buitenshuis! 2 Alleen voor gebruik met propaan of butaan I3B/P(50). Het gebruik van dit toestel in een gesloten ruimte kan gevaarlijk
Instructieboekje TH elektrische terrasstraler
 Instructieboekje TH 2007 elektrische terrasstraler - 2 - DANK Hartelijk dank dat u voor een EUROM terrasverwarmer hebt gekozen. U hebt daarmee een goede keus gemaakt! Wij hopen dat hij tot uw volle tevredenheid
Gedeponeerd bij de Kamer van Koophandel te Zwolle onder nummer:
 ALGEMENE VOORWAARDEN citykist hurenenverhuurzwolle citykist gevestigd en kantoorhoudende te Zwolle Gedeponeerd bij de Kamer van Koophandel te Zwolle onder nummer: 08207924 ARTIKEL 1 Algemeen 1. Deze algemene
NEDERLANDS. Display Instructies. Knoppen. Geeft afwisselend Tijd, Datum en Temperatuur weer, kan ook ingesteld worden op enkel tijd
 NEDERLANDS Het ziet eruit als een simpel blokje hout, maar maak een geluid (knip met je vingers, kuch, klap in je handen, of tip op de bovenkant) en het geeft onmiddelijk en afwisselend tijd, datum en
256 kb Memory in NMS 8250, 8255 and 8280
 256 kb Memory in NMS 8250, 8255 and 8280 Supplied by Bastiaan Huber, 2001 Converted to PDF by HansO, 2001 Dutch text follows the english text! MEMORY-UPGRADE to 256Kb This description is only for people
PATIO HEATER TERRAS VERWARMINGSTOESTEL
 PATIO HEATER TERRAS VERWARMINGSTOESTEL Installatie - en gebruikshandleiding Voor gebruik van dit toestel aub. zorgvuldig installatie - en gebruiks handleiding lezen en deze erna goed bewaren. ATTENTIE
MCP-16RC, luchtzuiveringstoren
 Compacte patroonfilter met pulsreiniging De MCP-16RC luchtzuiveringstoren is een compacte patroonfilter voor gedecentraliseerde reiniging van binnenlucht, waar terugwinnen van lucht mogelijk is. Het compacte
Group work to study a new subject.
 CONTEXT SUBJECT AGE LEVEL AND COUNTRY FEATURE OF GROUP STUDENTS NUMBER MATERIALS AND TOOLS KIND OF GAME DURATION Order of operations 12 13 years 1 ste year of secundary school (technical class) Belgium
IOS and Android APP instruction
 IOS and Android APP instruction - Open de APP Store of Google Play op uw toestel - Open the APP Store or Google Play on your device IOS Android - Download de Eurom Heating APP: - Download the Eurom Heating
User manual Gebruikershandleiding. Version 1.0 March
 User Manual Hotel Safe GB NL User manual Gebruikershandleiding 1 User Manual Overview LED display Override key cover * button # button General Thank you for choosing a SafetyFirst Hotel Safe. Before operating
liniled Cast Joint liniled Gietmof liniled Castjoint
 liniled Cast Joint liniled Gietmof liniled is een hoogwaardige, flexibele LED strip. Deze flexibiliteit zorgt voor een zeer brede toepasbaarheid. liniled kan zowel binnen als buiten in functionele en decoratieve
Rolkachel infrarood Chauffage mobile infrarouge Gasheizung Mobil infrarot Mobile gasheater infrared. Model: GRT-508
 Rolkachel infrarood Chauffage mobile infrarouge Gasheizung Mobil infrarot Mobile gasheater infrared Model: GRT-508 Handleiding Mode d emploi Gebrauchsanweisung Manual Lees deze handleiding aandachtig door
Montage handleiding Broilfire 4 Poot powerfire/gas komfoor 4p-01p
 Montage handleiding Broilfire 4 Poot powerfire/gas komfoor 4p-01p Instructies voor het monteren en gebruik van de Powerfire: Technische data: Gas type Butaan Propaan Werk druk: mbar 30-50 37-52 Categorie
MyDHL+ Van Non-Corporate naar Corporate
 MyDHL+ Van Non-Corporate naar Corporate Van Non-Corporate naar Corporate In MyDHL+ is het mogelijk om meerdere gebruikers aan uw set-up toe te voegen. Wanneer er bijvoorbeeld meerdere collega s van dezelfde
The upside down Louisa tutorial by Dorothée: Noortjeprullemie.blogspot.be Written for Compagnie M.: m.com
 The upside down Louisa tutorial by Dorothée: Noortjeprullemie.blogspot.be Written for Compagnie M.: www.compagnie- m.com Dorothée heeft een unieke Compagnie M. hack gemaakt: de Louisa op zijn kop. Als
Extreem veilig Het product Our product Voordeel Advantage Bajolock Bajolock Bajolock Bajolock Bajolock Bajolock Bajolock
 Extreem veilig Het product Alle koppeling zijn speciaal ontworpen en vervaardigd uit hoogwaardig RVS 316L en uitgevoerd met hoogwaardige pakkingen. Op alle koppelingen zorgt het gepatenteerde veiligheid
1/8 ATLAS Atlas cabinet cabinet 1 7
 TLS cabinet / / / 0 D E F G H / L x Lx x L / x x D E Dx Ex / x x x x x x Fx x Hx Gx Fx Fx Fx Fx G H G H H G 0 0 0 0 0 / L / 0 NL: Deze kast bevat twee gaten aan de achterkant om aan de wand te kunnen bevestigen.
PANEELRADIATOR - Type PR Handleiding. PANEL RADIATOR - Type PR Manual
 Fax. +31 (0)227-549 150 Website: www.sinusjevi.com PANEELRADIATOR - Type PR Handleiding PANEL RADIATOR - Type PR Manual Page 2 of 8 Page 3 of 8 Technische informatie Spanning: 230 of 400 Volt Vermogen:
HANDLEIDING - ACTIEVE MOTORKRAAN
 M A N U A L HANDLEIDING - ACTIEVE MOTORKRAAN MANUAL - ACTIVE MOTOR VALVE Model E710877 E710878 E710856 E710972 E710973 www.tasseron.nl Inhoud / Content NEDERLANDS Hoofdstuk Pagina NL 1 ALGEMEEN 2 NL 1.1
Smeertechniek Rotterdam Cairostraat 74 3047 BC Rotterdam Tel.: 010 466 62 55 Fax 010 466 66 55 Internet: www.smeertechniek.
 DEZE KOPPELINGEN WORDEN GEBRUIKT IN OLIE- EN VETSMEERSYSTEMEN IN PLAATS VAN DE SNIJRINGKOPPELINGEN ( SNIJRING & DRUKMOER ) KOPPELEN EN ONTKOPPELEN VAN DE LEIDING KAN HERHAALD WORDEN ZONDER BESCHADIGING
PIR DC-SWITCH. DC Passive infra-red Detector. Model No. PDS-10 GEBRUIKSAANWIJZING/INSTRUCTION MANUAL
 PIR DC-SWITCH DC Passive infra-red Detector Model No. PDS-10 GEBRUIKSAANWIJZING/INSTRUCTION MANUAL Please read this manual before operating your DETECTOR PIR DC-Switch (PDS-10) De PDS-10 is een beweging
B1 Woordkennis: Spelling
 B1 Woordkennis: Spelling Bestuderen Inleiding Op B1 niveau gaan we wat meer aandacht schenken aan spelling. Je mag niet meer zoveel fouten maken als op A1 en A2 niveau. We bespreken een aantal belangrijke
DRAAIDEUR 80/90 PIVOT DOOR
 HANDLEIDING MANUAL DRAAIDEUR 80/90 PIVOT DOOR 800/900 Montagehandleiding Reflex draaideur 80/90 met zijpaneel 80/90 Verstelbaarheid 611801: (770-810) x (770-810) x 1850 mm Verstelbaarheid 611802: (870-910)
SOLAR VERWARMING KAPPA3380
 SOLAR VERWARMING KAPPA3380 1 SOLAR PANEEL 1 2 STEUNPOTEN 2 3 PAKKING 2 4 SLANGCONNECTER 2 5 SCHROEFDOP 2 6 SLANGVERKLEINER 2 7 KLEM 2 8 SLANG 1 9 KORTE SLANG 1 Veiligheidsinstructies / bewaar voor later
Gebruikershandleiding
 V1 Stoelfiets Bewegingstrainer Gebruikershandleiding Voor vragen of ontbrekende onderdelen kunt u contact opnemen met Fitness Benelux: Fitness Benelux Uw partner in fitness Twekkelerweg 263 7553 LZ Hengelo
Handleiding Digipass DP310
 Handleiding Digipass DP310 Deze handleiding geeft u uitleg over het activeren en gebruik maken van uw Digipass. Toetsen van de Digipass OK: voor het aan- of uitschakelen van het apparaat of om een handeling
(1) De hoofdfunctie van ons gezelschap is het aanbieden van onderwijs. (2) Ons gezelschap is er om kunsteducatie te verbeteren
 De hoofdfunctie van ons gezelschap is het aanbieden van onderwijs. (2) Ons gezelschap is er om kunsteducatie te verbeteren") (1) De hoofdfunctie van ons gezelschap is het aanbieden van onderwijs (2) Ons gezelschap is er om kunsteducatie te verbeteren (3) Ons gezelschap helpt gemeenschappen te vormen en te binden (4) De producties
(1) De hoofdfunctie van ons gezelschap is het aanbieden van onderwijs (2) Ons gezelschap is er om kunsteducatie te verbeteren (3) Ons gezelschap helpt gemeenschappen te vormen en te binden (4) De producties
My Inspiration I got my inspiration from a lamp that I already had made 2 years ago. The lamp is the you can see on the right.
 Mijn Inspiratie Ik kreeg het idee om een variant te maken van een lamp die ik al eerder had gemaakt. Bij de lamp die in de onderstaande foto s is afgebeeld kun je het licht dimmen door de lamellen open
Kies uit setje A of B voor deze bakfiets Choose between set A or B for this transportbike
 Kies uit setje A of B voor deze bakfiets Choose between set A or B for this transportbike A A Selecteer op bestelformulier: Houtenbak gat 5 punts bevestiging Set A: standaard setje voor bevestiging icm
Shipment Centre EU Quick Print Client handleiding [NL]
![Shipment Centre EU Quick Print Client handleiding [NL]](/thumbs/78/76906513.jpg "Shipment Centre EU Quick Print Client handleiding [NL]") Shipment Centre EU Quick Print Client handleiding [NL] Please scroll down for English. Met de Quick Print Client kunt u printers in Shipment Centre EU configureren. De Quick Print Client kan alleen op
Shipment Centre EU Quick Print Client handleiding [NL] Please scroll down for English. Met de Quick Print Client kunt u printers in Shipment Centre EU configureren. De Quick Print Client kan alleen op
Table Lounge heater 3000 RVS
 - 1 - Instructieboekje Table Lounge heater 3000 RVS RVS terrasstraler - gas Art.nr. 32.304.7 - 2 - NL EN DE Dit symbool op uw apparaat betekent: niet afdekken! This symbol on your device means: do not
Digitale ph-meter. Specificaties Bereik: pH Resolutie: 0.01pH Nauwkeurigheid: ±0.1pH Automatische Temperatuur Compensatie:
 Digitale ph-meter Specificaties Bereik: 0.00-14.00pH Resolutie: 0.01pH Nauwkeurigheid: ±0.1pH Automatische Temperatuur Compensatie: Batterij: 4XLR44 (1.5V) Knoopcel Gebruikstemperatuur: Kalibratie: Handmatig
INSTRUCTIEBOEKJE HG800P / HG1200R. hydrofoorgroepen
 INSTRUCTIEBOEKJE HG800P / HG1200R hydrofoorgroepen 2 Hartelijk dank! Hartelijk dank dat u voor een EUROM HG hydrofoorgroep gekozen hebt. U hebt daarmee een goede keus gemaakt! Wij hopen dat hij tot uw
!!!! Wild!Peacock!Omslagdoek!! Vertaling!door!Eerlijke!Wol.!! Het!garen!voor!dit!patroon!is!te!verkrijgen!op! Benodigdheden:!!
 WildPeacockOmslagdoek VertalingdoorEerlijkeWol. Hetgarenvoorditpatroonisteverkrijgenopwww.eerlijkewol.nl Benodigdheden: 4strengenWildPeacockRecycledSilkYarn rondbreinaaldnr8(jekuntnatuurlijkookgewonebreinaaldengebruiken,maar
EM7680 Firmware Update by Micro SD card
 EM7680 Firmware Update by Micro SD card 2 NEDERLANDS/ENGLISH EM7680 Firmware update by Micro SD card Table of contents 1.0 (NL) Introductie... 2 2.0 (NL) Firmware installeren... 2 3.0 (NL) Opmerking...
Introductie in flowcharts
 Introductie in flowcharts Flow Charts Een flow chart kan gebruikt worden om: Processen definieren en analyseren. Een beeld vormen van een proces voor analyse, discussie of communicatie. Het definieren,
EM7680 Firmware Update by OTA
 EM7680 Firmware Update by OTA 2 NEDERLANDS/ENGLISH EM7680 Firmware update by OTA Table of contents 1.0 (NL) Introductie... 3 2.0 (NL) Firmware installeren... 3 3.0 (NL) Release notes:... 3 4.0 (NL) Overige
Quality requirements concerning the packaging of oak lumber of Houthandel Wijers vof (09.09.14)
") Quality requirements concerning the packaging of oak lumber of (09.09.14) Content: 1. Requirements on sticks 2. Requirements on placing sticks 3. Requirements on construction pallets 4. Stick length and
Quality requirements concerning the packaging of oak lumber of (09.09.14) Content: 1. Requirements on sticks 2. Requirements on placing sticks 3. Requirements on construction pallets 4. Stick length and
MyDHL+ ProView activeren in MyDHL+
 MyDHL+ ProView activeren in MyDHL+ ProView activeren in MyDHL+ In MyDHL+ is het mogelijk om van uw zendingen, die op uw accountnummer zijn aangemaakt, de status te zien. Daarnaast is het ook mogelijk om
LOAD SECURING PROCEDURE IN 15 FT/20 FT HOT CONTAINER
 Page: 1 of 5 Page: 2 of 5 Load securing SNS Pool procedure Den Helder in the Procedure 15 ft/20 ft vastzetten hot containers lading according in de 15 ft/20 ft to the NOGEPA guidelines hot containers volgens
NEDERLANDS. Plaatselijke telefoonnummers voor de klantendienst kunt u vinden op: G-01 rev.
 For the latest User Installation Guide please visit: www.ergotron.com User's Guide - English Guía del usuario - Español Manuel de l utilisateur - Français Gebruikersgids - Deutsch Benutzerhandbuch - Nederlands
Annex 1 Goggles and Socks
 Annex 1 Goggles and Socks Goggles Every worker in a grade A/B area, clean sterilized protective garments (including eye coverings and masks) of an appropriate size should be provided at each work session.
Gebruiksaanwijzing. Buitenkeuken 4 branders met zijbrander
 Gebruiksaanwijzing Buitenkeuken 4 branders met zijbrander BELANGRIJK: Bedankt voor uw aankoop van deze buitenkeuken. lees voor de ingebruikname eerst de veiligheidsinstructies Waarschuwing: Alleen voor
L.Net s88sd16-n aansluitingen en programmering.
 De L.Net s88sd16-n wordt via één van de L.Net aansluitingen aangesloten op de LocoNet aansluiting van de centrale, bij een Intellibox of Twin-Center is dat de LocoNet-T aansluiting. L.Net s88sd16-n aansluitingen
9 daagse Mindful-leSs 3 stappen plan training
 9 daagse Mindful-leSs 3 stappen plan training In 9 dagen jezelf volledig op de kaart zetten Je energie aangevuld en in staat om die batterij op peil te houden. Aan het eind heb jij Een goed gevoel in je
MCP-16RC, luchtzuiveringstoren
 Compact cartridge filter with pulse cleaning De MCP-16RC luchtzuiveringstoren is een compacte patroonfilter voor gedecentraliseerde reiniging van binnenlucht, waar terugwinnen van lucht mogelijk is. Het
Instructieboekje BLUE FLAME. Gaskachel (met gasslang en drukregelaar)
") Instructieboekje BLUE FLAME Gaskachel (met gasslang en drukregelaar) 2 NL Dit symbool op uw apparaat betekent: niet afdekken! EN This symbol on your device means: do not cover! DE Dieses Symbol auf Ihrem
Instructieboekje BLUE FLAME Gaskachel (met gasslang en drukregelaar) 2 NL Dit symbool op uw apparaat betekent: niet afdekken! EN This symbol on your device means: do not cover! DE Dieses Symbol auf Ihrem
EM7580 Firmware Update by Micro SD card
 EM7580 Firmware Update by Micro SD card 2 NEDERLANDS/ENGLISH EM7580 Firmware update by Micro SD card Table of contents 1.0 (NL) Introductie... 3 2.0 (NL) Firmware installeren... 3 3.0 (NL) Opmerking...
SPANBUSSEN RVS LOCKING DEVICES SS SPANNSÄTZE INOX MOYEUX DE SERRAGE INOX
 SPANBUSSEN RVS OCKING EVICES SS SPANNSÄTZE INOX MOYEUX E SERRAGE INOX KTN 10 KTN 30 KTN 40 KTN 61 KTN 80.7.1 SPANBUSMONTAGE OCKING EVICE MONTAGE SPANNSÄTZE MONTAGE MOYEUX E SERRAGE MONTAGE 1 2 3 4 5 dg
Handleiding Zuludesk Parent
 Handleiding Zuludesk Parent Handleiding Zuludesk Parent Met Zuludesk Parent kunt u buiten schooltijden de ipad van uw kind beheren. Hieronder vind u een korte handleiding met de mogelijkheden. Gebruik
VEILIGHEIDSWAARSCHUWINGEN TERRASVERWARMER
 VEILIGHEIDSWAARSCHUWINGEN TERRASVERWARMER HET APPARAAT MOET WORDEN GEÏNSTALLEERD IN OVEREENSTEMMING MET DE INSTRUCTIES EN DE PLAATSELIJKE WET- EN REGELGEVING. Gebruik dit apparaat niet binnen om persoonlijk
Gebruiks- en montage instructies VERWARMINGSTOESTEL
 Gebruiks- en montage instructies VERWARMINGSTOESTEL Gelieve alvorens het toestel te gebruiken, de instructies in deze handleiding grondig te lezen. Inhoud Pg. Veiligheid 2 Aansluiting van de gasfles 3
ALGEMENE VOORWAARDEN citykist Beamerverhuurzwolle citykist gevestigd en kantoorhoudende te Zwolle Gedeponeerd bij de Kamer van Koophandel te Zwolle
 ALGEMENE VOORWAARDEN citykist Beamerverhuurzwolle citykist gevestigd en kantoorhoudende te Zwolle Gedeponeerd bij de Kamer van Koophandel te Zwolle onder nummer: 08207924 ARTIKEL 1 Algemeen 1. Deze algemene
ENGLISH: IMPORTANT Instructions for safety, maintenance and operation. Keep and study this information very carefully.
 ENGLISH: IMPORTANT Instructions for safety, maintenance and operation. Keep and study this information very carefully. Assembly and disassembly instructions : Product Number bed: M-001-L01 This bed is
HANDLEIDING HAND IMPULSE SEALER SK-110 SK-210 SK-310 SK-410 SK-510
 HANDLEIDING HAND IMPULSE SEALER SK-110 SK-210 SK-310 SK-410 SK-510 STANDAARD SET RESERVE-ONDERDELEN: Sealdraad : 2 stuks Teflon strip : 2 stuks Teflon tape : 1 stuk Zekering : 1 stuk (2 A) Handleiding
EU Declaration of Conformity and safety instructions EU Conformiteitsverklaring en veiligheidsinstructies UNIGAS 300
 EU Declaration of Conformity and safety instructions EU Conformiteitsverklaring en veiligheidsinstructies UNIGAS 300 Explosion safety instructions (Ex) (EN) UNIGAS 300 is approved for use in potentially
INSTALLATION INSTRUCTION
 TV MOUNT INSTALLATION INSTRUCTION MODEL:HA051 HA051-T1 HA051-T6 Max VESA: 200 X 200 mm/8x8" Please read this instruction carefully before installation. Fits for most 14-32 inches Plasma, LCD and LED TVs.
5/2/2011 Understanding Clouds Clouds form as warm air is forced upward As the air is forced upward, it expands and cools 1
 Understanding Clouds Clouds form as warm air is forced upward As the air is forced upward, it expands and cools 1 Understanding Clouds As the air cools, the relative humidity reaches 100% Water vapor begins
Add the standing fingers to get the tens and multiply the closed fingers to get the units.
 Digit work Here's a useful system of finger reckoning from the Middle Ages. To multiply $6 \times 9$, hold up one finger to represent the difference between the five fingers on that hand and the first
Settings for the C100BRS4 MAC Address Spoofing with cable Internet.
 Settings for the C100BRS4 MAC Address Spoofing with cable Internet. General: Please use the latest firmware for the router. The firmware is available on http://www.conceptronic.net! Use Firmware version
KLASEN. Design and Quality IKEA of Sweden
 KLASEN Design and Quality IKEA of Sweden ENGLISH 4 NEDERLANDS 10 4 ENGLISH KLASEN side burner WARNING For outdoor use only. Read these instructions before using the side burner. Failure to follow these
INSTALATIEGIDS VIDEOWALL
 INSTALATIEGIDS VIDEO 1. Bereken de hoogte van de rails door te meten hoeveel lager het onderste scherm zal uitkomen. Je kan dit meten aan de achterkant van de display, waar de beugels op gemonteerd zijn.
How to install and use dictionaries on the ICARUS Illumina HD (E652BK)
") (for Dutch go to page 4) How to install and use dictionaries on the ICARUS Illumina HD (E652BK) The Illumina HD offers dictionary support for StarDict dictionaries.this is a (free) open source dictionary
(for Dutch go to page 4) How to install and use dictionaries on the ICARUS Illumina HD (E652BK) The Illumina HD offers dictionary support for StarDict dictionaries.this is a (free) open source dictionary
Triple tumble bars BBPE040.4K
 Triple tumble bars BBPE040.4K 0,0 m 0,05 m 0,00 m,8 m,45 m,7 m,0 m,00 m B Typeplaatje Identification plate 0,00 m 0,00 m 0,80 m,59 m,9 m Duikel trio 0--07 TOE BBP 040 4K Hoofdafmetingen Main dimensions
Teksten van de liederen die gospelkoor Inspiration tijdens deze Openluchtdienst zingt.
 Don t you worry There s an eternity behind us And many days are yet to come, This world will turn around without us Yes all the work will still be done. Look at ever thing God has made See the birds above
FRAME [UPRIGHT MODEL] / [DEPTH] / [HEIGHT] / [FINISH] TYPE OF BASEPLATE P Base plate BP80 / E alternatives: ZINC finish in all cases
![FRAME [UPRIGHT MODEL] / [DEPTH] / [HEIGHT] / [FINISH] TYPE OF BASEPLATE P Base plate BP80 / E alternatives: ZINC finish in all cases](/thumbs/60/44127117.jpg "FRAME [UPRIGHT MODEL] / [DEPTH] / [HEIGHT] / [FINISH] TYPE OF BASEPLATE P Base plate BP80 / E alternatives: ZINC finish in all cases") FRAME XS UPRIGHT BASE PLATE UPRIGHT HORIZONTAL PROFILE DIAGONAL PROFILE DESCRIPTION A vertical structure consisting of 2 uprights, joined by a system of bracing profiles, and base plates intended to support
FRAME XS UPRIGHT BASE PLATE UPRIGHT HORIZONTAL PROFILE DIAGONAL PROFILE DESCRIPTION A vertical structure consisting of 2 uprights, joined by a system of bracing profiles, and base plates intended to support
DALISOFT. 33. Configuring DALI ballasts with the TDS20620V2 DALI Tool. Connect the TDS20620V2. Start DALISOFT
 TELETASK Handbook Multiple DoIP Central units DALISOFT 33. Configuring DALI ballasts with the TDS20620V2 DALI Tool Connect the TDS20620V2 If there is a TDS13620 connected to the DALI-bus, remove it first.
PLUS & PRO. Addendum installatie aanvullende MID 65A kwh-meter - Addendum installation additional MID 65A kwh-meter SET
 PLUS & PRO Addendum installatie aanvullende MID 65A kwh-meter - Addendum installation additional MID 65A kwh-meter 1 Aansluiten MID 65A kwh-meter Adres instellen MID 65A kwh-meter Maxem kan verschillende