J. de Jongh. stagiaire: stagebegeleider: ir. J. Banens. WFW rapport
|
|
|
- Hendrik Hendriks
- 3 jaren geleden
- Aantal bezoeken:
Transcriptie
1 mplementatie van een elektronische schakeling voor de besturing van een kanteltsfel WFW rapport stagiaire: J. de Jongh stagebegeleider: ir. J. Banens februari 1991
2 SAMENVATTNG De bij de groep regeltechniek ontwikkelde kanteltafel moet vanuit een PC aanstuurbaar worden, zodat de twee gewenste hoeken overeen komen met de werkelijke hoeken. Verder moeten motorsnelheden, voor gewenste rotatiesnelheden, voorgeschreven en momentaan bepaald kunnen worden. De actuele positie moet eveneens vastgesteld kunnen worden. Hiertoe is een schakeling geïmplementeerd, die de gewenste positie achtereenvolgens vertaalt, vergelijkt met de werkelijke positie en daarmee stuursignalen genereert, die na versterking servomotoren aandrijven. De schakeling kan ook de andere, eenvoudigere opdrachten verwerken. De twee motoren zorgen via overbrengingen voor de rotatie van de tafel. Met behulp van een gwbasic testprogramma is gekeken of de schakeling aan deze gestelde eisen voldoet. De schakeling kan met dat programma motorsnelheden voorschrijven, motorsnelheden bepalen en, na initialisatie, gewenste posities realiseren. De werkelijke posities kunnen met het programma bepaald worden. Toetsing van de schakeling met dit programma geeft bevredigende resultaten.
3 ~ ~~ ~~ ~~~ ~~~ ~~~ NHOUDSOPGAVE 1 nleiding 2 Samenhang van verschillende geïntegreerde 2.1 De HCTL De 8255 kaart 2.3 De EXTernal CLOCK 2.4 RESET 2.5 LMT 2.6 De DACO8 2.7 De S De OPA ncrementele Encoder 3 Basisprogrammais in gwbasic 3.1 De standaardinstelling 3.2 RESET puls 3.3 Het sturen van een waarde naar een HCTL 3.4 Het ontvangen van een waarde van een HCTL 4 Praktijkprogrammais 4.1 Schrijven van een MotorComando 4.2 Lezen van een MotorComando 4.3 Lezen van de werkelijke positie 4.4 PositieControlMode instellen 4.5 Opgeven van de gewenste positie schakelingen 5 Testen met praktijkprogrammais 5.1 RESET puls 5.2 MotorComando voor HCTL-A en HCTL-B 5.3 Vergelijken van werkelijke met gewenste positie ~ ~~ ~ ~~ ~~ ~ Bijlage 1 Bijlage 2 tot 10 Bijlage 10 Gedetailleerd schema van de schakeling Technische gegevens van de gebruikte componenten Listing van gwbasic testprogramma
4 1 NLEDNG Bij de groep regeltechniek van de vakgroep WFW is een kanteltafel ontwikkeld. De tafel bestaat uit een cardanisch opgehangen tafelblad met daaraan vast twee halve tandwielen, die op hun beurt worden aangedreven door servomotoren. Hierdoor kan het blad (vanuit zijn middelpunt gezien) een willekeurige hoek innemen tussen de aanslagen van elk tandwiel. Zie ook figuur 1. Het koppel dat de MOTORen afgeven wordt bepaald door de stroom, de positie van de MOTORas gemeten met een incrementele Encoder. i i i_ ~- Het doel van de stage is om een elektronische schakeling te bouwen, die positiesturing vanuit een Personal Computer van de twee motoren mogelijk maakt. De door de computer opgegeven positie wordt in de schakeling vergeleken met de door de Encoder gemeten positie. Met behulp van deze informatie genereert de schakeling MOTORstromen die zorgen dat de gewenste positie bereikt wordt. n hoofdstuk 2 vertellen we hoe de schakeling is opgebouwd, in hoofdstuk 3 hoe we communiceren met de schakeling op poortniveau en in hoofdstuk 4 welke intelligente programma's nodig zijn om positiesturing mogelijk te maken. Het laatste hoofdstuk, 5, vertelt iets over de nauwkeurigheid van de schakeling en de testresultaten. Wanneer de schakeling voldoet kan in de toekomst positiesturing van een kogel op de tafel mogelijk worden. Hierbij zal de kogelpositie worden gemeten met een camera, waarna dit signaal in de computer vergeleken wordt met- de toestandcvariabelen van -de tafel. Programmatuur zal voor regelacties zorgen, 1
5
6 2 SAMENHANG VAPP DE VERSCHLLENDE GENTEGREERDE SCHAKELNGEN Na voorbereidende opdrachten, geven we een positieopdracht. Deze opdracht wordt vertaald in de 8255 kaart en daarna in de HCTL's vergeleken met de werkelijke positie. Het dan afgegeven signaal wordt omgewerkt tot een stroom waardoor de MOTORen koppels afgeven. Hierdoor gaat de tafel bewegen totdat de gewenste positie wordt bereikt. Totdat een nieuwe opdracht wordt verzonden blijft de positie gehandhaaft. Figuur 2 geeft een schema van het geheel. Bijlage 1 bevat het gedetailleerde schema van de schakeling. 2.1 De HCTL 1100 De HCTL onderneemt na commando's vanuit de PC zelf actie. Er kunnen gewenste posities worden aangeboden op de ADresDataBus waarna de HCTL Motorcommando's genereert zodat die positie bereikt wordt. Figuur 2 toont welke poorten een belangrijke rol spelen: een ADresDataBus een noutcontrol - een MotorComando De poorten zijn met een contrastekker verbonden, evenals de voedingen en de aarde. Elke poort is in figuur 3 per draad uitgesplitst. De AD/DB bestaat uit acht draden ADO tot en met AD7, de MC bus uit NCO tot en met MC7. De 1/0 bestaat uit ALE, CS, OE, R/W, RESET, LMT, STOP en NDEX. De /O, een mode control bepaalt of de HCTL interne adressen of data ontvangt danwel moet geven. De betekenis - van elke draad wordt in hoofdstuk 3 duidelijk. Verder heeft de HCTL nog twee draden CHannel, waar de HCTL de werkelijke positie van de Motoras bepaalt, en een draad waarvan de HCTL zijn CLocKfrequentie betrekt. Bijlage 2 bevat meer details. 2.2 De 8255 kaart De 8255 kaart wordt gebruikt als doorgeefluik voor informatie van de PC voor de twee HCTL's. Van de 8255 kaart worden vijf acht bits poorten gebruikt. Twee poorten worden gebruikt voor het zenden en ontvangen van data, een poort voor het zenden van interne adressen van de HCTL's en het zenden of ontvangen van data en twee poorten dienen (onder andere) als mode control van beide HCTE@s. De toestanden van deze laatste twee bepalen welke HCTL data of interne adressen krijgt of moet geven. De eerste drie poorten zitten op , de laatste twee op De 8255 kaart is kant en klaar geleverd en in de computer gezet a 3
7 / / Figuur 2. Schema van de elektronische schakeling. De lijnen bestaan uit acht draden tenzij anders aangegeven. De chip die RESET pulsen afgeeft bij het opstarten van de PC is' niet afgebeeld. 4
8 LUT si& PROF HT s- - - Figuur 3. nwendige structuur en de poorten vam een HCTL. De kaart levert voor de schakelingen ook nog voedingen van-lzv, 12V, 5V, een aarde en is via twee veertig aderige platte kabels verbonden met een printplaat S. Voor meer details van de 8255 kaart: zie bijlage 3. Op de printplaat S zijn twee 32 pinnige stekkers gemonteerd. Op elke stekker schuiven we een contrastekker van een printplaat, A en B, met de geïntegreerde schakeling. 2.3 De EXTernai CLOCK De MCTL sampler gebrulkt een klokfrequentie van 2MHz. Een 8224 timer counter ship (zie bijlage 4) levert met enkele passieve componenten deze frequentie aan HCTL-A. Via printplaat S krijgt HCTL-B ook deze frequentie. 5
9 2.4 RESET Bij het opstarten van de PC genereert chip 4528B een RESET puls. Aangezien we ook een RESET via het toetsenbord van de PC kunnen genereren (zie hoofdstuk 4) hebben we een AND poort nodig (74SL08; bijlage 5). De door 4528B gegenereerde puls wordt via printplaat S aan HCTL-B doorgegeven. 2.5 LMT Ook de draad LMT, die bij lage spanning zorgt dat de MOTOR wordt uitgeschakeld, kan via de programmatuur worden bestuurd of als 'aanslag' worden ingebouwd. Hiervoor gebruiken we ook een AND poort (74SL08). De LMT is via printplaat S met HCTL-B verbonden. i 2.6 De DACO8 Het MC wordt in de DACO8, een digitaal analoog omzetter, van een digitale in een analoge spanning omgezet, die nog in opamp 741 versterkt wordt. Een voeding voor de DACO8 van 1OV wordt in de AD584 gemaakt. De specificaties van elke geïntegreerde schakeling bevindt zich in bijlage De S0100 j_ -- onder De isolerende versterker S0100 geeft het analoge MC onverzwakt door en zorgt dat eventuele storingen in de MOTORspanning geen invloed hebben op het door DACO8 afgegeven MC,- De S0100 wordt - anaërë gevoed met- +15V-en -15V, die in 7815 en 7915 uit +24V en -24V externe voeding worden gemaakt. Zie ook bijlage De OPA501 De operationele versterker OPA501 zorgt dat de stuurspanning MC een MOTORstroom van enkele tienden Amperes wordt. Hij is op een koelplaat gemonteerd en wordt gevoed met +24V en -24V externe spanning. Zie bijlage ncrementele Encoder Als de MOTOR beweegt geeft de Encoder twee in fase verschoven biokspanningen af, die aan de HCTL op CHA en CHB aangeboden worden. Dit gebeurt via een tien aderige platte kabel, een stekker en een op de printplaat gemonteerde contrastekker. Zie ook bijlage 9. 6
10 lb3 3 BASSPROGRZMMA@S N GWBASC n dit hoofdstuk wordt beschreven hoe de basisfuncties van de HCTL's geïmplementeerd worden. We beschrijven met welke commando's en in welke volgorde we ons doel bereiken. Als we het gwbasic programma hebben gestart moeten we eerst de poorten van en in de juiste mode zetten; willen we informatie versturen (schrijven) of ontvangen (lezen). Daarna kunnen we met behulp van het toetsenbord de volgende acties voor de HCTL genereren: - lezen van een MotorCommando. Dit gebeurt op de poorten 1- PB en 1-PC. - schrijven naar noutcontrol. Door verschillende opdrachten wordt het mogelijk data met een intern adres te versturen. Verder kan hier een RESET commando worden heengeschreven, waardoor Motorsnelheid en Encoderpositie nul worden gesteld. - lezen of schrijven van data met interne adressen nadat de juiste noutcontrol commando's zijn verstuurd. Hiermee kunnen we de schakeling regelen. Tabel 1 toont de connecties tussen de poorten van , , HCTL-A en HCTL- B. HCTL 8255 POORTNR. POORTNR o [Hex1 [Decl AD/DB (A&B) 1-PA lbo 432 MC 1-PB lbl PC lb2 1-CM ~ ~~ CA9 2-PA lb (B 2-PB lb CM lb7 439 Tabel 1. Connecties tussen poorten. 3.1 De standaardinstelling Als we de waarde 128 toekennen aan de ControlMode van , poort 439, dan is de mode van de poorten 2-PA en 2-PB 'OUT'. We kunnen dan alleen waarden verzenden. Wanner we aan de ControlMode viin , 435, de waarde 155 geven dam staan de poorten -PA, 1-PB en 1-PC op 'N'. Dit betekent dat we alleen waarden die die poorten hebben kunnen ontvangen. Een afwijkende instelling hiervan treedt op als we data of interne adressen over de ADresDataBus willen zenden. Dam is de mode van 1-PA 'OUT' en moeten we de poort 435 de waarde 139 geven. De achtergronden hiervan worden in bijlage 3 belicht. 7
11 ~ OUT ~ ~~ ~ ~ ~ ~~ ~ Wanneer we de snelheid van de motoren nul willen maken en posities nul willen noemen geven we een RESET puls. Volgens het tijddiagram van de HCTL (zie bijlage 3 blz 5) hoeven we dan alleen maar de RESET poort even nul en dan weer een te maken. Figuur 3 toont dat de RESET poort het vijfde bit bij HCTL-A en HCTL-B is. Als we HCTL-A en HCTL-B tegelijk willen resetten zetten we de poorten 2-PA en 2-PB op 'OUT'. Volgens tabel 1 moeten we 128 naar 2-CM, poort 439 schrijven (zie ook bijlage 3 blz 2 en 19). n gwbasic taal levert dit: OUT 439,128 Als uitgangspunt horen 1-PA, 1-PB en 1-PC op 'N' te staan zodat geen informatie verstuurd kan worden. Daarom sturen we naar 1-CM, poort 435: 435,155 Hierna gaan we over tot de werkelijke RESET puls, bit vijf wordt nul. We schrijven naar de poorten 2-PA (lb4hex) en 2- PB (lb5hex): OUT 436,239 OUT 437,239 Nu moeten we volgens het RESET tijddiagram 2500 ns wachten. Het versturen van gwbasic opdrachten duurt langer dus we kunnen de RESET poort gelijk weer een maken. We schrijven ~ naar de poorten 2-PA en 2-PB: OUT 436,255 OUT 437,255 Hiermee is de RESET puls cyclus voltooid. 3.3 Het sturen van een waarde naar een HCTL De HCTL kan waarden ontvangen ten behoeve van bijvoorbeeld een gewenste positie en het initialiseren van hem. Voordat we zon waarde versturen moeten we eerst zijn bestemming (interne adres) kenbaar maken. Of we waarden of bestemmingen versturen over de ADresDataBus wordt bepaald door bit nul van de noutcontrol, WdreaLatchEnable. We bekijken nu hoe data met de waarde RDATA' naar een intern adres sregïsteri geschreven wordt. RDATA is een acht bits woord en ligt dus tussen nul en 255. We schrijven naar 1-CM. Hierdoor staat á-pa in de 'OUT' mode zodat we data naar HCTL-A en HCTL-B kunnen sturen (zie tabel 1). OUT 435,139 8
12 ~ We beschouwen alleen HCTL-A. Op de noutcontrol van HCTL-A, 2-PA doorlopen we de schrijfcyclus zoals in figuur 4. ALE wordt nul op poort 2-PA; we sturen ~ ~ naar poort 436: OUT 436,254 (a) Nu wordt het adres verstuurd waarheen de data straks moet. REGSTER sturen we naar de AD/DB 1-PA, poort 432: -, i 1 i OUT 432,REGSTER (b) n het tijddiagram wordt nu Chipselect op poort 2-PA nul, dus naar 436: OUT 436,252 (c) Omdat we nu waarden gaan verzenden wordt ALE weer een: OUT 436,253 (d) Vervolgens wordt Readwrite nul. Dit is bit drie. We sturen naar 436: OUT 436,245 (e) Nu kan de data met waarde RDATA over de AD/DB worden verstuurd: OUT 432,RDATA ( f) De CS wordt weer een; op poort 436 wordt het eerste bit hoog: OUT 436,247 (53) Hierna wordt het schrijven van data - ~- maken van bit arie, R/W: afgebroken -door het hoog- ~ OUT 436,255 (h) We sluiten af door -PA,l-PB en l-pc weer op *Ng te zetten. Hiervoor schrijven we naar poort 432 en sluiten de subroutine af. OUT 435,155 RETURN Op soortgelijke wijze kunnen we data naar HCTL-B schrijven. 3.4 Het ontvangen van een waarde van een HCTL We bekijken hoe data met waarde RDATA uit een intern adres VREGSTER* gelezen kan worden. We beschouwen weer HCTL-A. Uit figuur 4 blijkt dat eerst ALE nul wordt, zodat we de data van de juiste bestemming kunnen lezen. We geven bit nul van poort 1/0 de waarde nul, schrijf naar poort lb4hex. 9
13 OUT 436,254 (a) Aangezien we een intern adres willen versturen moeten we de AD/DB in de mode 'OUT zetten. Daartoe kennen we aan 1-CM, poort 435, de waarde 139 toe. OUT 435,139 Nu kan het interne adres REGSTER' geschreven worden op de AD/DB, poort 432. OUT 432,REGSTER (b) vervolgens wordt bit een, CS, van 1/0 nul. OUT 436,252 (c) Achtereenvolgens worden ALE (bit nul) en CS (bit een) weer een. OUT 436,253 OUT 436,255 Aangezien er straks data wordt gelezen, moet de AD/DB op N. Daarvoor is het volgende CM commando nodig: naar l-cm, poort OUT 435,155 Nu moet OutEnables, bit 2 van 1/0 van HCTL-A nul worden. Hierdoor wordt het mogelijk data van de HCTL te lezen. We geven poort 436 de waarde ~ ~ (d) (e) RDATA=NP ( ) (9) Voordat we deze subroutine beëindigen maken we OE weer 1. OUT 436,255 RETURN Op soortgelijke manier kan data uit HCTL-B gelezen worden. 10
14
15 ~~ Het ~~~~~~~~ ~~~ ~~~~~~ ~~~~~~~~~~~~~~~~ ~~~ ~~~~~~~~ ~~~~~~~~~~ ~~~~ ~ 4 PRAKTJKPROGRAMMA'S De basis voor het besturen van de schakeling van MOTOR A en B is in hoofdstuk 3 gelegd. We kunnen gewenste MOTORsnelheden schrijven. Verder kunnen we gewenste posities opgeven nadat de HCTLls in de PositieControlMode zijn gezet. Andere (Snelheid)- ControlModes staan beschreven in bijlage 2 vanaf blz 10. De werkelijk bereikte posities kunnen ook weer gelezen worden. De interne adressen van de HCTLs heten REGSTERS en hebben allen een verschillende functie die in tabel 2 staat. REGSTERNR. Functie Lez en/schrij ven O welke ControlModes S start voorprogrammering S 8 bits MotorCommando S MSB van gewenste positie S MD van gewenste positie S LSB van gewenste positie S MSB werkelijke positie 1 MD werkelijke positie 1 LSB werkelijke positie 1 Tabel 2. REGSTERnummers en hun functie. 4.1 Schrijven van een MotorCommando MotorCommando is een acht bits woord dat naar REGSTER acht geschreven moet worden (tabel 2). Voor HCTL-A ziet het gwbasic programma er als volgt uit: REGSTER=8 NPUT ii8 bits mot~rsnelheid=~~ "RDATA GOSUB [regelnr. Write HCTL-A] END De opgegeven waarde moet tussen O en 255 liggen en wordt toegekend aan de variabele RDATA. Als RDATA kleiner is dan 128 beweegt de MOTORas linksom, is RDATA gelijk aan 128, dan volgt er geen beweging en wanneer RDATA groter dan 128 wordt gekozen, dan beweegt de MOTORas rechtsom. 4.2 Lezen van een MotorComando Het 8 bits MC kan onmiddelijk worden gelezen op de poorten 1-PB (HCTL-B) en 1-PC (HCTL-A) van de 8255 kaart. Deze poorten hebben nummer 433 (HCTL-B) en 434 (HCTL-A). Zie ook tabel 1. We bekijken MOTOR A. MC=NP ( 4 3 4) 12
16 PRNT MC END 4.3 Lezen van de werkelijke positie De positie is een 24 bits woord dat in drie acht bits REGSTERS is opgeslagen. n REGSTER 12Hex (18) zit het belangrijkste woord, in REGSTER 14Hex (20) het minst belangrijke woord en REGSTER 13Hex (19) het tussenliggende. Zie tabel 2. Als we de drie positiewoorden van HCTL-A lezen en tegelijkertijd op het scherm brengen, ziet het programma er zo uit: REGSTER=20:GOSUB [regelnr. Read HCTL-A] LSB=RDATA REGSTER=19:GOSUB [regelnr. Read HCTL-A] MD=RDATA REGSTER=18:GOSUB [regelnr. Read HCTL-A] MSB=RDATA PRNT llmsb=ll;msb;llmd=";md;lllsb=ll ;LSB END Wanneer de tafel tijdens de positiebepaling beweegt moeten de REGSTERS in deze volgorde gelezen worden omdat de HCTL de drie woorden anders niet tegelijkertijd maar achtereenvolgens bepaald. 4.4 PositieControlMode instellen ~-~ - Wanneer we de schakeling intelligent willen besturen door het opgeven van een gewenste positie waarna actie volgt tot die positie bereikt wordt, moeten we eerst deze wens kenbaar maken (zie tabel 1). Achtereenvolgens moeten we: een-wset RUS w v g -~ ~ - -~ de gewenste posities nul maken (we voorkomen directe beweging). de voorprogrammering starten - de drie niet gewenste SnelheidControlModes deactiveren zodat de PositieContrslMsde wel wordt geactiveerd - afsluiten van de voorprogrammering. Na het geven van een RESET puls ziet het PositieControlMode programma er voor HCTL-A zo uit: [regelnr. Write HCTL-A] : Voor meer details, zie bijlage 3 vanaf blz
17 4,s opgeven van gewenste positie De gewenste positie bestaat uit een 24 bits woord dat, na ket instellen van de PositieControlMode, verstuurd kan worden. Naar REGSTER chex (12) zenden we het belangrijkste acht bits woord (MSB), naar REGSTER ehex (14) het minst belangrijke (LSB), en naar REGSTER dhex (13) bit negen tot en met bit zestien (MD) van het 24 bits woord. We lezen de woorden in onderstaande volgorde in omdat de tafel anders na een opdracht al gaat bewegen. Voor HCTL-A geldt: NPUT ;llpositie MSB=, MD=,LSB= ";MSB,MD,LSB REGSTER=12:RDATA=MSB:GOSUB [regelnr. Write HCTL-A] 11 =13: 11 =MD: =14: 81 =LSB: END Als de posities zijn opgegeven beweegt de tafel er onmiddellijk naartoe. 14
18 5 TESTEN MET PRAKTJKPROGltS We hebben subprogramma's tot onze beschikking om voor schakeling A en B een: RESET puls te geven MotorCommando's te schrijven MotorCommando's te lezen PositieControlModes te activeren Gewenste posities op te geven - Werkelijke posities te lezen n de hoofdstukken 3 en 4 staan de details hiervan. n bijlage 10 bevindt zich een listing van de gebruikte subprogramma's. 5.1 RESET puls Wanneer we het programma RESET uitvoeren en we lezen de werkelijke positie en het MotorCommando, dan blijken de gegevens goed overeen te komen. Zie tabel 3. De door de schakeling gegenereerde RESET puls bij opstarten werkt ook. HCTL-A HCTL-B positie positie MC MSB MD LSB MC MSB MD LSB volgens opgave 128 O00 O00 O O00 O00 O00 werkelijke waarde 128 O00 O00 O O00 O00 O00 De werkelijk aangesloten MOTOR maakt geen enkele beweging. 5.2 MotorCommando voor HCTL-A en HCTL-B Als we direct een MC opgeven en lezen die dan weer, dan krijgen we goede resultaten. Zie ook tabel 4. MC voor HCTL-A MC voor HCTL-B voorgeschreven MC O O werkelijke MC QCO O Tabel 4. Werkelijke en voorgeschreven MCis voor HCTE-A en HCTL-B. De onbelaste MOTORen hebben toerenbegrenzers waardoor de werkelijke stromen door de MOTORen laag zijn. 15
19 ~~ ~ ~~~ 8ZT 090 ~ ~ ~~ ~ ~ ~~~ ~~ 97: 827: OP2 zoo zoo zoo zoo zoo zoo 827: 510 TOO O00 O00 O00 O00 O O90 O ~ -090 ~ 8ZT 510 TCCT 051 OST 05T 057: OCT 8ZT STO O00 O00 O00 5CZ 552 SCZ 827: OP2 O00 O O00 O ZT OP : 'coo TOO TOO TOO TOO TOO 827: - O00 O00 O00 O00 O00 O00 VN SNE~~P;~ BST am BSH BST am BSH 3H 3~ sod ay6ytayzam sod aqsuaaab 627: 6PT TOO zoo zoo zoo zoo zoo O00 O00 O00 O00 O00 O00 8ZT 510 O90 O90 O90 O90 O90 O90 827: CTO OS7: 057: 057: OCT 057: OST 827: SCZ : OP LO O00 O : OP '1: - O00 TOO TOO TOO TOO TOO O00 O00 O00 O00 O00 O00 VN SNX~L'J BST am BSH BST am BSR 3H 3~ sod ~ ~ C T T C ~ ~ Z sod ~ M aqsua~ab
20 Bijlage 1 Gedetailleerd schema van de schakeling
21 z- T-SSL8 9 L 6
22 tic0 mi MC2 tlc3 E4 M E --_ -- HC6 MC? 14 t5v PC 7GM)PC 74Lm j - 1 s 1 U4Q u2 9,16 t5v PC 8 GND PC U --s?iw 16 +5V Ft 8GNDfT
23 D 1 W o l i U M
24
25 HCTL-OOQ Features 0 DC, DC BRUSHLESS AND STEPPER MOTOR CONTROL 0 POSTON CONTROL 0 VELOCTY CONTROL PROGRAMMABLE VELOCTY PROFLNG 0 PROGRAMMABLE DGTAL. FLTER 0 PROGRAMMABLE COMMUTATOR 0 PROGRAMMABLE PHASE OVERLAP 0 PROGRAMMABLE PHASE ADVANCE 0 GENERAL 8 BT PARALLEL 1/0 PORT Q 8 BT PARALLEL MOTOR COMMAND PORT s PWM MOTOR COMMAND PORT 0 QUADRATURE DECODER FOR ENCODER SGNALS 0 24 BT POSTON COUNTER 0 SNGLE 5V POWER SUPPLY 0 TTL COMPATBLE General Description The HCTL-1000 is a high performance, general purpose motion control C fabricated in Hewlett-Pacbard NMOS technology. t performs all the time-intensive tasks of digital motion control, thereby freeing the host processor for other tasks The simple programmability of all control parameters provides the user with maximum flexibility and quick design Package Dimensions ORENTAT*) NOTCH: M1F.S *1. EACH PNCENTERLNE TOBE LOUTED WMlN OF TS TRUE LWCTUONAL?OSTOH 2 LEAO FNW: SOLOER COAT. i L Should be left fioating HNOUT TECHNCAL DATA NOVEMBER 198. i f ~gure1.syrtem~ld k- Diagram of control systems with a minimum number of components processor to specify commands, an amplifier and motor with an incremental encoder. No analog compensation or velocity feedback is necessary (see Figure 1). Table of Contents PAGES GENERAL DESCRPTON... 1 THEORY OF OPERATON... 2 ABSOLUTE MAXMUM RATNGS... 3 DC CHARACTERSTCS... 3 AC CHARACTERSTCS... 4 TMNG DAGRAMS... 5 FUNCTONAL PN DESCRPTON... 9 HOW TO OPERATE THE HCTL-SOOO USER ACC SS!BLE REG!STERS OPERATNG MODES COMMUTATOR HOW TO NTERFACE TO THE HCTL /O NTERFACE ENCODER NTERFACE AMPLFER NTERFACE PN BLASTC DUAL-N-LNE PACKAGE P i ESD WARNNG: Since this is an NMOS device, normal f- precautions should be taken to svoid static damage. b
26 ~ ~ ~ ~ ~ ~- LWT SiW PROF NT a0 CO PO PROFLE GENERATOR STATUS FLAGS 1 VE PR PF NPUT b P a P a? a C * a l r FEEDBACK -! a PHA a a COMMUTATOR PHB PHC PHD 0 CHA CHB NDEX -- ~- Figure 2. nternal Block Diagram i ntroductisn The purpose of this section is to describe the organization of this data sheet. The front page includes the key features of the HCTL a general description of the pari, the mechanical drawing and pin-out, and a Table of Contents. Followins this section is the Theory of Operation, which gives the user a brief overview of how the HCTL-1000 operates by describing the internal block oiagram shown in Figure 2. The following five sections give the specifications of the HCTL-1000, including Absolute Maximum Ratings, DC Characteristics. AC Characteristics, Timing Diagrams. and Functional Pin Descriptions. The final two sections include the detailed information on how to operate and interface to the HCTL The How to Operate section discusses the function and address of each software register, and describes how to use the four position and velocity control modes and the electronic commutator, The How to nterface section describes how to interface the HCTL-1000 to a microprocessor, an encoder, and an amplfter. Theory of Qperation The HCTL-1000 is a general purpose motor controller which provides position and velocity control for dc, dc brushless and stepper motors. The internal block diagram of the HCTL-1000 is shgwn in Figure 2. The HCTL-1000 receives its input commands from a host processor and position feedback from an incremental encoder with quad- ;a!ü:e ou!pu?. AR %bi! bidirectional multiplexed addressldata bus interfaces the HCTL-1000 to the host processor. The encoder feedback is decoded into quadrature counts and a 24-bit counter keeps track of position. The HCTL-1000 executes any one of four control algorithms selected by the user. The four control modes are: Position Control Proportional Velocity Control Trapezoidal Profile Control for point to point moves ntegral Velocity Control with continuous velocity profiling using linear acceleration 2
27 ~ -- - ~ ~ ~1~,-_. ~. e -~ 2 resident Position Proftle Generator calculates the necesp y profiles for Trapezoidal Profile Control and ntegral &locity Contol The HCTL-1000 compares the desired position lor velocity) to the actual position (or velocity) to compute compensated motor commands using a programmable digital filter Dczì The motor command is externally available at the Motor Command Port as an &bit byte and at the PWM Port as a Pulse Width Modulated (PWM) signal The HCTL-1000 has the capability of providing electronic Cornmutation for dc brushless and stepper motors Using the encoder position information. the motor phases are enabled in the correct sequence The commutator is fully programmable to encompass most motor encoder combina- tions in addition. phase overlap and phase advance can be programmed to improve torque ripple and high speed performance The HCTL-O0 contains a number of flags including two externally available flags, Profile and nitialization, which allow the user to see or check the - status of the controller t also has two emergency flags, Limit and s p. which allow operation of the HCTL-1000 to be interrupted under emergency conditions The HCTL-1000 controller is a digitally sampled data system While information from the host processor ts accepted asynchronously with respect to the control functions. the motor command S comnuted on a discrete sample time basis The sample timer is programmable Absolute Maximum Ratings Operating Temperature... 0 C to 70 C Storage Temperature C to +125"C Supply Voltage V to 7 V input Voltage V to 7 V Maximum Power Dissipation W Maximum Clock Frequency... :... 2 MHz D.C. Characteristics T~ = ooc to t70"c; vcc = 5 v Parameter Symbol Min. TYP. - 5'10, vss = O v Power Supply vcc Supply Current 'cc ma input Leakage Current Trictate Output b*&wrmt ~ lit toh v 1 1 =~ - ~ Max. Units Test Condttians 10 PA Vin = 5.25 V +lo PA Vout = -0.3 to 5.25 V CL nput Low Voltage VL nput High Voltage V H 2.0 VCC V Output Low Voltage VOL v îo~ = 2.2 ma Output High Voltage VOH. 2.4 vcc v lqh = -2OO PA Power Dissipation PD mw nput Capacitance Cin t 1 Output Capacitance Load Cout 100 Y ~~ c- 20 PF Ta=25"C.t=1 MHz unmeasured pins returned to ground PF Same as above ~. ~.
28 _ 1. C. Electsical Specifications TB = o to 70 C. vcc = 5.0 v rt 5%. Units = nsec - 7 nput Pulse Width ndex. ndex t X nput Pulse Width CHA, CHB t AB Q Delay CHA to CHB Transition t AB t 31 Output Pulse Width, PROF, NT, Pulse. Sign, t OF 500 loo0 PHA-PHD, MC Pori 32 Output Rise/Fall Time, PROF, NT, Pulse, Sign, t OR PMA-PHD, MC Port 33 Delay Time, Clock Rise to Output Rise t EP M &lay aime, Rising to MC Fort Vatid 32m & 4
29
30 , T L- O00 /O Timing Diagrams nere are three different timing configurations which can be used lo give the user flexibility io interface the HCTL- loo0 to most microprocesors See the l/o interface Section for more details, AX/= NON OVERLAPPED 4. Write Cycle 1! AD 'DE VALD DATA B. Read Cycle
31 a
32 eaiav...
33 ~ Functional Pin Description NPUT/OUTPUT SGNALS ' Symbol Pin Number krcripuon F ADOD AddressData bus - Low 6 bits of 8 bit /O port which are multiplexed between address AD5/DB5 end data N,D7 8,9 Data bus - Upper 2 bits of 8 bit 110 port used for data only. NPUT SGNALS Pin Number Description Channel A,B - input pins for position feedback from an incremental shaft encoder. Two channels, A and B. 90 degrees out of phase are required. ndex Pulse - input from the reference or index pulse of an incremental encoder. Used only in conjunction with the Commutator. Either a low or high true signal can be used with the ndex pin. See Timing Diagrams and Encoder nterface section for more detail. m 37 Readwrite - determines direction of data exchange for the /O port. 38 Address Latch Enable - enables low 6 bits of external data bus into internal address latch. L OE bìz Stop Reset 39 Chip Select - performs /O operation dependent on status of fuw line. For a Write, the external bus data is written into the internal addressed location. For Read, data ts read from an internal location into an internal output latch Output Enable - enables the data in the internal output latch onto the external data bus to complete a Read operation. Limit Switch - an internal flag which when externally set, triggers an unconditional branch to the nitialization/ldle mode before the next control sample is executed. Motor Command is set to zero. Status of the Limit Flag is monitored in the Status Register. 15 Stop Flag - an internal flag that is externally set. When flag is set during integral Velocity control mode, the Motor Command is decelerated to a stop. 36 Reset - a hard reset of internal circuitry and a branch to Rest mode. ExtClk 34 External Clock 1 1 Voltage Supply - Both Vcc pins must be connected to a 5.0 volt suppfy. 1 Not Connected - this pin should be left floating. J OUTPUT SGNALS! nit Pin Number Description Motor Command Port - 8 bit output port which contains the digital motor command adjusted for easy bipolar DAC interfacing. MC7 is the most significant bit (MSB). 16 Pulse - Pulse Width Modulated signal whose duty cycle is proportional to the Motor Command magnitude. The frequency of the signal is External Clock/lûû and pulse width is resolved into 100 external clocks Sign - gives the sigddirection sf the pulse signal. Phase A, B. C. D - phase enable outputs of the commutator. Profile Flag - status flag which indicates that the controller is executing a profiled position move in the Trapezoidal Profile Control Mode. nitialization/ldle Flag - status flag which indicates that the controller is in the nitialization/ dle mode. 9
34 /ow to Operate the HCTL-1000 uses Accessible Registers The HCTL-1000 operation is controlled by a bank of 64 8-bit registers. 32 of which are user accessible. These registers contain command and configuration information necessary to properly run the controller chip. The 32 user accessible registers are listed in Table. The register number is also the address. A functional block diagram of the HCTL-1000 which shows the role of the user accessible registers is als0 included in Figure 3. The other 32 registers are used by the, internal CPU as scratch registers and should not be accessed by the user There are several registers which the user must configure to his application. These configuration registers are discussed in more detail below. PROGRAM COUNTER (ROSH) The program counter. which is a write only register, executes the preprogrammed functions of the controller The program counter is used along with the control flags FO, F3, and F5 in the Flag Register (RDOH) to change control modes The user can write any of the following four commands to the program counter. OOH - SoftwareReset O1 H - nftialization/ldle mode 02H - Align mode 03H - Control modes flags FO, F3, and F5 in the Flag Register (RWH specify which control mode will be executed The commands written to the program counter are discussed in more detail in the section called Operating Modes and are shown in flowchart form in Figure 4. FLAG REGSTER (ROOH) The flag register contains flags FO thru F5 This register is ~~~te-o~ly~egrslereachflag is set and clear& by_= writing an 8-bit data word to ROOH The upper four bits are ignored by the HCTL-1000 The bottom three bits specity the flag address and the fourth bit specifies whether to set (biel) or clear íbit=oj the addressed flag e- Bit number O Don't Function sevclear AD2 AD1 AW care FO - F1 - Trapezoidal Profile Flag - set by the user to execute trapezoidal profile control. The flag is reset by the controller when the move is completed. The status of FO can be monitored at the Profile pin i121 and in status register R07H bit 4. nitialization/ldie Flag - setícleared by the HCTLlo00 to indicate execution of the nitialization/ldle mode. The status of F1 can be monitored at the nitialization/ldle pin 113, and in bit 5 of the Status register ir07h). The user should never attempt to set or clear F1. F2 - Unipolar flag - setlcleared by the mer to specify bipolar (clearl or unipolar (set) mode for the Motor Command Port F3 - Propoflionai Velocity Control Flag - set by the user to specify proportional velocity control F4 - Hold Commutator Flag - sevcleared by the user or automatically by the Align mode When Set. thrs flag inhibits the internal commutator counters to allow open loop stepping of a motor by using the commutator F5 - ntegral Velocity Control - set by the user to specify integral velocity control STATUS REGSTER (ROH) The Status Register indicates the status of the HCTL-1000 Each bit decodes into one signal All 8 bits are user readable and are decoded as shown below Only the lower 4 brts can be written to by the user to configure the HCTL-1000 To set or clear any of the lower 4 bits, the user writes an 8-bit word to R07H The upper 4 bits are ignored Each of the lower 4 bits directly sets/clears the corresponding bit of the status register as shown below For example, writing XXXX0101 to R07H sets the PWM Sign Reversal inhibit. sets the Commutator Phase Configuration to "3 Phase'. and sets the Commutator Count Configuration to "full" status Bit O LSE 1 = 2 b- Funcîion WVM Sign Reveersal nhibit O=off 1 =on Cornmutator Phase Configuration O = 3 phase 1=40hase Commutator Count Configuration O = quadrature 1 =full Should always be set to o Trapezoidal Profile Flag FO 1 = in Profile Control nitialization/ldle Flag F1 1 = in nitialiration/ldle Mode stop Rag Q = set (Stop tflggered) 1 = cleared (no Stop) 7 Limit Flag O = set (Limit triggered) Note Discussed in Amplifier nterface section under PWM Port. Discussed in Commutator section -i Discussed in Gommutator SeCtiOn Discussed in Operating Mode section under Trapezoidal Profile Control Discussed in Operating Mode section under nitializationíldle Mode DixusJed in Emer- Flags Section Discussed in Emergency Flags /y5 p, 1 = cleared (no Limit) Section 10
35 R*tW W.x) ROOH R05H R07H RûöH R09H ROCH RODH ROEH ROFH R12H R13H R14H R18H R19H RlAH Rl BH R1CH RlFH R20H R21 H R22H R23H R24H R26H R27H R28H R29H RPAH RPBH R34K - R35H R3CH Notes Funcîion Flag Register Program Counter Status Register 8 bit Motor Command Port PWM Motor Command Port Command Position imsb) command Position Command Position CLSB) Sample Timer Actual Position (MSB) Actual Position Actual Position (LSB) Commutator Ring Commutator Velocity Timer X Y Phase Overlap Offset Maximum Phase Advance Filter Zero, A Filter Pole, B Gain, K Command Velocity (LSB) Command Velocity (MSB) Acceleration ílsbi Acceleration (MSBi Maximum Velocity Final Position ilsbi Final Position Final Position (MSB) ACSlG4W-a Actual Vetocity MSB) Command Velocity TABLE : REGSTER REFERENCE?ABLE uwie lhed All All All All All Position Control Position Control Position Control All Position Control Position Control Position Control All All All All All All All except Proportional Velocity All except Proportional Velocity All Proportional Velocity Proportional Velocity ntegral Velocity and Trapezoidal Profile ntegral Velocity and Trapezoidal Profile Trapezoidal Profile Trapezoidal Profile Trapezoidal Profile Trapezoidal Profile Pmpo-fiönai Velocity Proportional Velocity ntegral Velocity 2's complement+8oh 2's complement 2's complement 2s complement 2s complement scalar 2's complement 2s Complement 2s complement scaiarl51 scalar scalar151 scaiarl5i 2s complement scalarlsl scalar scalar scalar 2s complement 2s complement scaiarisl scaiarl51 sca1arl51 2s complement 2s complement 2s complement 2s complement 2s complement 2s complement W W riwl1l riw, riw r/wl2i r/w121 riw121 W flsi r13f/w14l r131 r/wlsl W r/w /W r/wpi riwí61 r/w 4. Writing to R13H clears Actual Position Counler to zero 1. Upper 4 bits are read only 5 The scalar data is limited to positive numbers (OOH to 7FHi 2. Writing lo ROEH LSBi latches all 24 bits 6 Thé commutator registers ir18h. R1 CH. R1 FHi have further limits 3 Reading R14H ilsb latches data into R12H and R13H which are discussed in the Commutator section of thls data sheet r/w riw /W r/w riw r/w COMMAND POSiTiON ROCH MSû RMH Lsa /- MSTON PROFLLE GENERATON NTEGRAL 1 TRAPEZOOAL RSH MSB RYH Lsa R2W A R21H ü R22H < \A-.Ha RCHOFFSET COL(MUTAT0R R18H RNG RlAH Y RlBH Y WLSE VCN --c MA-PHO RlFH MAX ADVANCE R1W VELOCTY TMER OVBDRATURE VELOCW VELOCTY RZBH FNAL POS MSB R2AH FNAL POS ROYPROGRAMCOUNTER CHA CH6 Figure 3. Register Block Diagram 11
36 MERGENCV FLAGS - STOP AND LMT Stop and Limit Flags are hardware set flags that signify the occurrence oí an emergency condition and cause the controller to immediately take special action The Stop Flag affects the HCTL-1000 only in the ntegral Velocity Mode When the Stop Flag is set. the system will come to a decelerated stop and stay in this mode with a command velocity of zero until the Stop Flag is cleared and a new command velocity is specified The Limit Flag, when set in any control mode, causes the HCTL-1000 to go into the nitialization/ldle Mode. clearing the Motor Command and causing an immediate motor shutdown Stop and Limit Flags are rëspectivë pins ~ (1 the input to the corresponding pin goes high, signifying that the emergency condition has been corrected, AND a write to the Status Register R07Hi is executed That is. after the emergency pin has been set and cleared, the flag also must be cleared by writing lo R07H Any word that is written to R07H after the emergency pin is set and cleared will clear the emergency flag. but the lower 4 bits of that word will also reconfigure the Status Register DGTAL FLTER (R22H, RZOH, RWH) All control modes use some part of the programmable digital filter Daz. to compensate for closed loop system stability. The compensation D z has the form. where z = the digital domain operator The cornpensation is a first order lead filter which in combination with the sample timer T (ROFH affects the dynamic step response and stability of?he control system The sample timer, T, determtnes the rate at which the control algorithm gets executed All parameters. A, 8, K, and T, are &bit scalars that can be changed by the user any time The digital filter uses previously sampled data to calculate DE). This old internally sampled data is cleared when the nitialization:ldle Mode S executed SAMPLE TMER REGSTER (ROFH) The contents of this register set the sampling period of the HCTt The sampling period is t = 16 ROFH t 1) il/frequency of the external clock) The sample timer has a iimit on the minimum allowable sample time depending on the control mode being executed The limits are given below ROFH Contents Minimum Limit Position Control 7 Proportional Velocity Control 7 Trapezoidal Profile Control 15 ntegral Velocity Control 15 The maximum value of ROFH is FFH 255 decimal'. For example, with a 2MHz clock. the sample time can vary from 64 psec to 2048 psec Operating Modes The HCTL-1000 executes any one of 3 set up routines or 4 control modes selected by the user The 3 set up routines include - Reset - nitialization/ldle - Align The four control modes available to the user include - Position Control - Proportional Velocity Control - Trapezoidal Profile Control - ntegral Velocity Control The HCTL-1000 switches from one mode to another as a ~esuk-of oneofme3ottowi KgThïëe=mxcháms- ~~ p= =- 1 The user writes to the Program Counter 2. The user sets/clears flags FO. F3, or F5 by writing to the Flag Register (ROOH 3 The controller switches automatically when certain initial conditions are provided by the user This section describes the function of each set up routine and control mode and the initial conditions which must be provided by the user to switch from one mode to another Figure 4 shows a flowchart of the set up routines and control modes, and shows the commands required to switch from one mode to another
37 SET UP RBUTlMES 1. Rcseí The Reset mode is entered under all conditions by either executing a hard reset (Reset Pin goes low) or a soft reset (write OOH to the Program Counter. R05Hì When a hard reset is executed the following conditions occur - All output signal pins are held low except Sign (17). Databus (2-9). and Motor Command (18-25) - All flags (FO to F5) are cleared. - The PWM port (Rû9Hì is preset to FFH - The Motor Command Port ir08h) S preset to 80H - The Commutator logic is cleared - The 10 control logic is cleared. - A soft reset is automatically executed When a soft reset is executed, the following conditions occur. - The digital filter parameters are preset to A ír20hì = E5H B ír21 Hi = K ír22hì = 40H - The sample timer (ROFHì is preset to 40H - The status register ír07h) is cleared -The Position counters (R12H. R13H and R14Hi are cleared to O. From Reset mode, the HCTL-1000 goes automaticatiy to nitialization/ldle mode. u RESET BN NTALZATON WRTE OOH TO Fp5H PROPORTONAL VELOCTY CONTROL 2. initiaiization/idle The nitializationlidie mode is entered either automati -(Rotjund~~~~~ from Reset or by writing 01H to the-fid- ~ er any conditions n the nitialization/ldle mode. the following conditions occur - The nitialization/ldle Flag íflf S set - The PWM port 'R09H is set to OOH - The Motor Command port (R08H is set to 80H - Previously sampled data stored in the digital filter S cleared t is at this point that the user should pre-program all the necessary registers needed to execute the desired control mode The HCTL-1000 stays in this mode (idling) until a new mode command is given 'Only one fbg can be set at a îirne. Figure 4. Operating Mode Flowchart 13
38 3. Ulgn The Align mode can be entered only from the nitialization/ldle mode by writing 02H to the Program Counter (R05Hi This mode automatically aligns multiphase motors to the Commutator Align mode is executed only when using the commutator feature of the HCTL-1000 and before any control modes are used The Align mode assumes that, during encoder/motor assembly the encoder index pulse has been physically aligned to the last motor phase, the Commutator parameters have been correctly preprogrammed (see the section called The Commutator for details), and a hard reset has been executed while the motor is stationary The Align mode first disables the commutator and with open loop control enables the first phase íphai and then the last phase (PHC or PHD) to orient the motor on the last phase torque detent Each phase is energized for 2048 system sampling periods For proper operation. the motor must come to a complete stop during the last phase enable Once the last phase torque detent is found, the Commutator is enabled and commutation is closed loop The HCTL-1000 then switches automatically from Align to the Control Modes CONTROL MODES Control flags FO. F3. and F5 in the Flag Register (ROOH) determine which control mode is executed Only one control flag can be set af a rime. After one of these control flags is set, the control modes are entered either automatically from Align or from the nitialization/ldle mode by writing 03H to the Program Counter (R05H). 1. Position Contrd FO. F3. F5 cleared Position Control performs point to point position moves ~ : ~ ~ ~ position command. which the controller compares to the 24-bit actual position. The position error is calculated, the full digital lead compensation is applied and the motor command is output. The controller wiil remain position locked at a destination until a new position command is given. The actual and command position data is 24-bit two's complement data stored in six 8-bit registers Position is measured in encoder quadrature counts. The command position resides in ROCH- (MSB), RODH. ROEH (LSB). Writing to ROEH latches all 24-bits at once for the control algorithm. Therefore, the command position is written in the sequence ROCH. RODH and ROEH. The command registers can be read in any desired order. The aciuai position resides in R12ii (MSB. 813i-î. ana R14H ilsbi. Reading R14H latches the upper two byîes into an internal buffer. Therefore, actual position registers are read in the order of R14H, R13H. and R12H for correct instantaneous position data. The position registers cannot be written to. but they can all be cleared to O by a write to R13H. 2. Proporüonal Velocity Control F3 set Proportional Velocity Control performs control of motor speed using only the gain factor K. for compensation The dynamic pole and zero lead compensation are not used The algorithm takes a user command velocity calculates the actual velocity. and computes the velocity error The velocity error is multiplied by K/4 and output as motor command The command and actual velocity are 16-bit two's complement words The units of velocity are encoder quadrature counts/sample time n addition. the command velocity is internally divided by 16 to produce fractional resolution The 16-bit command S interpreted as 12-bits of integer and 4-bits of fraction R24 H R23H FFFF COMMAND VELOCTY FORMAT The command velocity resides in unlatched R24H (MSBi and R23H CLSB) The registers can be read or written to in any order The actual velocity is computed only in this algorithm and stored in scratch registers R35H {MSB) and R34H (LSB) There is no fractional component in the actual velocity registers and they can be read in any order The controller tracks the command velocity continuously until new mode command is given The system behavior after a new velocity command is governed only by the system dynamics. until a steady state velocity is reached 3. ntegral Velocity Control ntegral Velocity Control performs continuous velocity profiling which is specified by a command velocity and command acceleration. Figure 5 shows the capability of this control algorithm. The user can change velocity and acceleration any time to continuously profile velocity in time. Once the specified velocity is reached, the HCTL-1000 will maintain that velocity until a new command is specified. Changes between actual velocities occur at the presently specified linear acceleration. The command velocity is an 8-bit two's complement word stored in R3CH. The units of velocity are quadrature countdsample time. While the overall range of the velocity command is &bits. two's compiemeni. Pne difference beiween any two sequential commands cannot be greater than 7-bits in magnitude (i.e., 127 decimal). For example, when the HCTL-1000 is executing a command velocity of 40H i+wdl. the next velocity command must fall in the range of 7FH i+127d). the maximum command range, to C1H l-63d). 14
39 YAXMUM VELOCTV FO CLEARED BY \ CVEL3 1' FoSET CVEL COMMAND VELOCTY R3CH A ACCELERATON R26H. R27H STOP TRGGER 0 USER CHANGESACCELERATON USER CHANGES VELOCTY COMMAND VELOCTY Figure 5. ntegral Velocity Mode The command acceleration is a 16-bit scalar word stored in R27H and R26H The upper byte (R27Ht is the integer part and the lower byte (R26H) is the fractional part provided for resolution The integer part has a range of r OOH to 7FH. The contents of R26H are internally divided by 256 to produce the fractional resolution FFFFFFFW256 COMMAND ACCELERATON FORMAT A 7- TRAP ZODAL MAXMUM VELOCTY FNAL POSTON TRANGULAR Figure 6. Trapezoidal Profile Mode HCTL FNAL POSTON format as discussed under ntegral Velocity Control The maximum velocity is a 7-bit scalar (range S OOH to 7FH) written to R28H with units of quadrature counts/sample The command data registers can be written'read in any order Once desired data is entered, flag FO is set in the Flag Register (ROOH) to commence motion (if already in Position Control) When the Trapezoidal Profile move is finished. the controller clears FO and Position Control locks on the final position The status of the Profile flag The units of acceleration are quadrature counts/sample time squared nternally. the controller performs velocity profiling through position control From the user specified command velocity and acceleration. the controller internally generates position profiles n control theory terms integral compensation has been added and therefore, this system has zero steady state velocity error The advantage that this mode has over Proportional Velocity modes is that the system has zero steady state velocity error However, the drawback which comes along more difficult to achieve. n the ntegral Velocity Mode. the system is actually a position control system and therefore the complete dynamic compensation D.z is used in this control mode. f the external STOP flag F6 is set during this mode signaling an emergency situation. the controller automatically decelerates to zero velocity at the presently specified acceleration factor and stays in this condition until the flag is cleared. The user then can specify new welocity profiling data. 4. Trapezoidal Profile Control FO set Trapezoidal Profile Control performs point to point position moves and profiles the velocity trajectory to a îraperoid OT iriangie.?he user specifies oniy the aesirea final position. acceleration and maximum velocity. The controller computes the necessary profile to conform to the command data. if maximum velocity is reached before the distance halfway point. the profile will be trapezoidal, otherwise the profile will be triangular. Figure 6 shows the possible trajectories with Trapezoidal Profile control. The command data for this control mode is a 24-bit two's complement final position written to R25H (MSB), R2AH, and R29H (LSB). The acceleration resides in R27H (MSB) and R26H (LSE). it is the same integer and fraction The internal profile generator produces a position profile using the present command position (ROCH-ROEH) as the starting point and the final position (R29H-R25H) as the end point The controller actually performs position control while the profile generator loads profile data into the Command Position registers The full digital filter is applied for compensation Commutator by the user to properly select the phase sequence for electronic commutation of multiphase motors The Commutator is designed to work with 2. 3, and 4 phase motors of various winding configurations and with various encoder counts. Besides the correct phase enable sequence, the Commutator provides programmable phase overlap and phase advance. Phase overlap is used for better torque ripple control. t can also be used to generate unique state sequences which can be further decoded externally to drive more complex amplifiers and motors. Phase advance allows the user to compensate for the frequency characteristics of the motor/amplifier combination. By advancing the phase enable command (in position), the delay in reaction of the motor/amplifier combination can he offset and higher performance can be achieved. The ouput of the Commutator is on PHA (26) to PHD (29i. The inputs to the Commutator are the three encoder signals, Channel A. Channel 5. and ndex. and the configuration data stored in registers. The Commutator uses both channels and the index pulse of an incremental encoder. The index pulse of the encoder must be physically aligned to a known torque curve location because it is used as the reference point of the rotor position with respect to the Commutator phase enables. 15
40 ~~? The index pulse should be permanently aligned during motor encoder assembly to the last motor phase This S done by energizing the last phase of the motor during assembly and permanently attaching the encoder codewheel to the motor shaft such that the index pulse is active Fine tuning of alignment for commutation purposes S done electronically by the Offset Register (R CHi once the complete control system S set up 1. Commutator Configuration Registers The Commutator is programmed by the data in the following registers Figure 7 shows an example of the relationship between all the parameters Status Register (R07H) Bit #1 - O = 3 phase configuration. PHA. PHB. and PHC are active outputs 1 = 4 phase configuration. PHA - PHD are active outputs Bit #2 - O = rotor position measured in quadrature counts 1 = rotor position measured in full counts 1 PHASE ENCODER. So COUNTYREVOLUTDN FULL COUNTS RNG 0 NDEX PULSE OCCURS AT X THE ORGN Y o OFFSET ADVANCE D O 0 1 X X Pnc, RNG i 7! * RNG REGSTER (R18H) The ring register is scalar and determines the length of the electrical cycle measured in full or quadrature counts as set by bit #1 in R07H The magnitude of Ring is limited to 7FH. X REGSTER (RlAH) Scalar data which sets the interval during which a phase is the only one active. Y REGSTER (RïBH) Scalar data which sets the interval during which two sequential phases are both active Y is phase overlap. ---#d- - X and Y must be such that X + Y = Ring/i# of phases) These three parameters define mutation cycle OFFSET REGSTER (RlCH) The offset is two s complement data which determines the relative start of the electrical cycle with respect to the index pulse. Since the index pulse must be physically referenced to the rotor, offset performs fine alignment between the electrical and mechanical torque cycles PHASE ADVANCE REGSTERS (RlSH, RlFH) The phase advance feature performs the function of linearly incrementing the phase advance according to measured speed of rotation up to a set maximum VELOCTY TMER REGSTER (R19H) Tnis regisier contains scaiar daia wnich determines the amount of phase advance at a given velocity. The phase advance is interpreted in the units set for the Ring counter by bit #1 in R07H. The velocity is measured in revolutions/ second. Advance = Nvìt 16 lr19h+1 where At = f external clk N = encoder counts/revolution v = velocity revolutions/second Figure 7. Commutator Configuration MAXMUM ADVANCE REGSTER (RlFH) The scalar data sets the upper limit for phase advance regardless of rotor speed Figure 8 shows the relationship between the phase advance registers Note f the phase advance feature is not used, set both R19H and R1FH to O ADVANCE COUNTS MAX ADVANCE- Figure 8. Phase Advance vs. Motor Velocity. * (REVOLUTONS. SECOND
41 COMMUTATOR CONSTRANT8 There are several numerical consttrîis tir tiset should be aware of to use the Commutator The parameters of Ring. x, Y, erid M ~ Advance R must be positive numbers (OOH to 7FHi AtltJllicitinlly. the foliowing equation must be satisfied 2. With a 3 phase 15 degree/steo Vriiinhlc Reluctance Motor the torque cycle repeats every 45 degrees Or 360 deg/45 deghevolution. 3. Ring Register = (4) i1921 coiiiils'rwolut~l_ B/rovoliiion = 96 quadrattiti' coiinfs '4. By measuring the motor torqtic ciirve in both directions. i it is determined that an offset of 3 degrees. and a phase verlap of 2 degrees is needed Offset = 3" o(192i = 6 qlixiiatiirc cottnts 360" y = overlap = (2") 14) ( " How to Onterface to the HCTL-1000 VQ NTERFACE The HCTL-1000 looks to the user like a bank of &bit registers which the user can readlwrite The data in these registers control the operation of the HCTL-1000 The user communicates with these registers over an 8-bit address/ data multiplexed --- bidirectional bus. The four /O control lines. ALE, CS. OE and m. execute the data transfers There are three different timing configurations which can be used to give the user greater flexibility to interface the HCTL-1000 to most microprocessors (see Timing diagrams) They are differentiated from one another by the arrangement of the A T signal with respect to the cs signal The three timing configurations are listed below ALE, CS non-overlapped 2 ALE, CS overlapped 3 ALE within CS Any 110 operation staris by asserting the ALE signal which starts sampling the external bus into an internal address latch Rising A X or falling CS during ALE stops the sampling into the address latch, - CS low after rising A= samples the external bus into the data latch. Rising CS stops the sampling into the data latch, and starts the internal synchronous process. n the case of a write. the data in the data latch is written into the addressed location n the case of a read, the addressed location is written into an internal output latch OE low enables the internal output latch onto the external bus The ÖË signal and the internal output latch allow the 110 port to be flexible and avoid bus conflicts during read 09-w The l/o Port is designed to work with most microprocessor systems and is easily fitted in as part of addressable RAM. -- X + Y Therefore, x = 28 y = 4 For the purposes of this exaniplc. the Velocity Timer and Maximum Advance are set to O 8/ EXÏEEHÄL BUS / 5' - AüDRESS. * ANY LATCX STROBES 8/ DATA - b 8/ /- LATCH / - 0 e/ - NTERNAL BUS ALT Figure Port Block Diagram E
42 h ENCODER NTERFACE The HCTL-1000 accepts TTL compatible outputs from 2 or 3 channel incremental shaft encoders such as the HEDS and 6OOO series Channels A and B are internally decoded into quadrature counts which increment or decrement the 24-bit position counter For example, a 500 count encoder is decoded into 2OOO quadrature counts per revoiution The position counter will be incremented when Channel B leads Channel A The ndex channel is used only for the Commutator and its function is to serve as a reference point for the internal Ring Counter The inputs to the quadrature decoder from Channel A and B have a 3-bit state delay filter to filter out unwanted noise spikes on the encoder input lines Any transition on the input pins must be stable during 3 consecutive external clock edges before it is qualified internally as a legitimate transition This 3-bit state delay filter, together with the quadrature decoder, impose a limit on the encoder frequency The AC specifications give the delay requirements between encoder signal edges When calculating the encoder frequency limit. the user must take into Consideration the external clock frequency and the encoder state width error The index signal of an encoder is used in conjunction with the Commutator t resets the internal ring counter which keeps track of the rotor position so that no cumulative errors are generated The ndex pin of the HCTL-1000 also has a 3-bit filter on its input The ndex pin S active low and level franstf/on sensihe. t detects a valid high to low transition and qualifies the low input level through the 3-bit filter At this point. the ndex signal is internally detected by the commutator - logic This type of configuration allows an ndex or ndex signal to be used to generate the reference mark for commutator operation as long as the AC specifications for the ndex signal are met AMPLFER NTERFACE The HCTL-1000 outputs a motor command in two forms. an &bit Motor Command which can be connected to a DAC to drive a linear amplifier and PULSE and SGN output to drive a PWM amplifier AH control algorithms internally compute an error between the desired command and actual feedback which is processed through the digital filter The result is an internal &bit 2's complement motor command Before the internal motor command is made externally available, it is addi- tionally adjusted for different output formats and ease of interfacing to external hardware The sections below discuss the externally available amplifier interfaces and their formats Tables and ll summarize the amplifier interface outputs %-Bit Parallel MQ~X Command Pofl The &bit Motor Command Port consists of register R08H whose data goes directly to external pins MCO-MC7. MC7 is the most significant bit. R08H can be read and written to, however, it should be written to only during nitialization/ldle mode. During any of the four Control Modes. the controller writes the motor command into R08H. The Motor Command Port is the ideal interface to an 8-bit DAC. configured for bipolar output. The data written to the 8-bit Motor Command Port by the control algorithms is the internally computed 2's complement motor command with an 80H offset added. This allows direct interfacing to a DAC. Figure 10 shows a typical DAC interface to the HCTL An inexpensive DAC. such as MC1408 or equivalent. has its digital inputs directly connected to the Motor Command Port. The DAC produces an output current which is converted to a voltage by an operational amplifier. RO and RG control the analog offset and gain. The circuit is easily adjusted for +5V to -5V operation by first writing 80H to R08H and adjusting RO for OV output. Then FFH is written to ROW and RG is adjusted until the output is 5V. Note that OOH in R08H corresponds to -5V out. The above interface is suitable to drive linear amplifiers and DC motors because of the bipolar output. When using commutated motors, the direction of rotation of the motor is governed by the order of firing the motor phases which is under commutator control. n this case, it is desirable to have the Motor Command be unipolar to specify magnitude only. not direction. The HCTL-1000 has the feature of digitally configuring the 8-bit Motor Command Port into unipolar mode. Flag F2 in the Flag Register ROOH controls this lul LLU F2 'ear - Bipolar mode F2 set - Unipolar mode This mode functions such that, with the same circuit in Figure 10 (or any DAC configured for similar bipolar operation) setting F2 will cause the DAC to output from OV to 5V only and to digital data on pins MCO to MC7 to be restricted in the control modes from 80H to FFH nternally the commutator keeps track Of the "gn Of the llotor command for Of the motor prowr P iy Figure 10. Linear Amplifier nerface
43 iternally. the HCTL-1000 operates on data of and &bit lengths to PmdUCe the 8-bit motor command, available externally Many times the computed motor command will be greater than &bits At this point. the motor command is saturated by the controller The saturated value output by the controller is not the full scale value OOH, or FFH The saturated value is adjusted to OFH (negative saturation1 and FOH (positive saturation' saturation levels for the Motor Command Port are also included in Table PWM Port The PWM port outputs the motor command as a pulse width modulated signal with the correct sign of polarity. The PWM Port consists of the Pulse and Sign pins (pins 16 and 17) and R09H The PWM signal at the Pulse pin has a frequency of External Clock/lOo and the duty cycle is resolved into the 100 clocks. The Sign pin gives the polarity of the command. Low output on Sign pin is positive polarity The 2's complement contents of R09H determine the duty cycle and polarity of the PWM command For example. DBH i-40d) gives a 4Ooh duty cycle signal at the Pulse pin and forces the Sign pin high Data outside the 64H (+lood1 Po 9CH i-1ood) linear range gives 100% duty cycle ROSH can be read and written to However, the user should only write to R09H when the controller is in the nitializationadle mode Table t gives the PWM output vs the internal motor command When any Control Mode is being executed. the unadjusted internal 2's complement motor command is written to R09H Because of the hardware limit on the linear range í64h to 9CH.?lOOD), the PWM port saturates sooner than the 8-bit Motor Command Port OOH to FFH. +127D to -128D When the internal Motor Command saturates above 8 bits. the PWM Port is saturated to the full i110oo/o duty cycle level Table ll gives the actual values inside the PWM port Note that the unipolar Flag, F2, does not affect the PWM port TABLE ii. MOTOR COMMAND PORT OUTPUTS Functional Condition nternal Motor Command FU-1 condition During Control Modes Minimum Motor Command Negative nternal Motor Command Saturation Minimum PWM Linear Range Zero Motor Command BmKi!iwe!n!ernn_l MQ!W Command Saturation Maximum FWM Linear Range Maximum Motor Command ntemel PWM Port Motor Command R09H PuieDutyCyde Sgn 80H 80H 100% High 80H 8FH 100% High 9CH 9CH High OH QQH 096 Low ' 7FH?^E?!9% Low 64H 64H 100% Low 7 FH 7FH wo% Low 19
44 e od has an option that can be used with H bridge,/ers The option is Sign Reversal nhibit. which [he Pulse output for one PWM period after a sign #reversal This allows one pair of tfanststors io turn sfore others are turned on and thereby avoids a short.{oss the power supply Bi1 O in the Status Register (R07H controls the sign reversal inhibit option Figure 11 shows the output of the PWM port when Bit O is set Figure 12 shows an example of how to interface the HCTL to an H bridge amplifier (amplifier schematic is simplified An H bridge amplifier works such that either 01 and 0 4 conduct or O2 and 03 conduct This allows for bipolar motor operation with a unipolar power supply The Sign Reversal nhibit feature prevents all transistors from being on at the same time when the direction of motion S reversed - PULSE r--y t f TME Figure f. Sign Reversal inhibit +vcc - PULSE SGN - i P 1 - J f Figure $2. H-Bridge Arnpllfier nierfece -i fot moie inioimailon call youi local HP sales office isled in ihe telephone drrecioty *hilt pages Ask loi he Componenis Depaiirneni 01 wrik io Hewlell Pachard USA - PO ûoi Paio Allo CA turlpr - P O Box AZ Arnsieiveen The NelheilanOs Canada Goteway Diive Mtssissauga L4V 1M6 ûnialio Japan - Vokogawa Hevilefl Pachard LlU 3B21 Takaido Higashi Suginami Lu Tokyo 168 tirewhere in the eo110 *iiite io Hewet Packard nletconlrnenlal Y95 Deer Creek Road Paio A110 CA WC-4 Printed in U S A Data Subject 10 Change
45

46 Computer Engineering Roosendaal B.V. De connectoraansluitingen van de FPC-024 zijn veranderd. Hier dient op gelet te worden bij het aansluiten van een nieuwe FPC Als dit de eerste FPC-024 is die u in uw bezit heeft is er voor u niets aan de hand.
47 1 V. NSTALLATON. PORT ADDRESS SW4 = OFF SW5 = ON Select $1üO - $1BF SW4 = ON SW5 = OFF Select $lfo - $1FF!. SYSTEM BOARD DEFAULT $lbo - $1BF $180: Port 1A read/write buffer $161: Port 16 readlwrite buffer $182: Port 1C readlwrite buffer $183: $184: Port 1 control register (8255) Port ZA readlwrite buffer $165: Port 28 readlwrite buffer $166: Port 2C readlwrite buffer $187: $168: Port 2 control register 18255) Counter O readlwrite buffer $169: Counter 1 readlwrite buffer $1BA: Counter 2 readlwrite buffer $166: Counter chip 8253 control register iii. SWl = ON SWl = OFF SW2 = ON SW2 = OFF SW3 = ON SW3 = OFF Select internal clock (1.19MHz) to counter O Counter 2 used external clock Select internal clock (1.19MHr) to counter 1 Counter 1 used external clock Select internal clock MHz to counter O Counter O used external clock. V. DEMO PROGRAM LST 100 REM * BM-PC 8255 Card Testing program 11OSCREEN 0.0.0: WDTH 80,25: KEY OFF: CLS 120 LOCATE 10.10: PRNT "BM-PC 8255 Card testing LOCATE 12.10: PRNT "Two 8255 port A,B,C output Square wave LOCATE 14.10: PRNT "8253 Counter O divide by LOCATE 16.10: PRNT '' 160 LOCATE 18.10: PRNT " 250 REM 8253 tester 255 PORT =&H 1BO 260 OUT PORT+ll,&H OUT PORT+ll,&H OUT PORT+1 1,&HE6 290 OUT PORT+8,&H2: out port+8,&ho 300 OUT PORT+9,&H32: OUT PORT+S,&HO 310 OUT PORT+lO,&H64: OUT PORT+lO,&HO 320 PORT=&HlBO Counter 1 divide by Counter 2 divide by OUT PORT+3,&H A=O: GOSUB FOR K=O TO 1000: NEXT 350 A=&HFF: GOSUB PORT=PORT OUT PORT+3,&H A=O: GOSUB FOR K=O TO 1000: NEXT 390 A=&HFF: GOSUB GOT FOR 1=0 TO OUT PORT+,A 520 NEXT 530 RETURN V. 8253,8255 DATA SHEET PN OUT: PN 1 GND 2 GND 3 NC 4 PA3 5 PA1 CN 1 (PORT 1) 6 PA2 7 CLKO 8 PAO 9 GATE0 10 OUT0 11 OUT2 12 CLK2 13 CLKl 14 GATE2 15 OUT1 16 GATE1 17 PA5 18 PA4 19 PA7 20 PA6 PN 21 PC6 22 PC7 23 PC4 24 PC5 25 PC1 26 PCO 27 PB7 28 PC2 29 PB6 30 PC3 31 PB5 32 PBO 33 PB4 34 PB1 35 PB3 36 PB v 38-5V v 40-12V CN 2 (PORT 2) PN 1 GND PN 21 PC7 2 GND 22 PC6 3 NC 23 PC5 4 NC 24 PC4 5 NC 25 PCO 6 NC 26 PC1 7 NC 27 PC2 8 NC 28 PB7 9 NC 29 PC3 10 NC 30 PB6 11 NC 31 PBO, 12 NC 32 PB5 13 PAO 33 PB1 14 PA1 34 Pi34 15 PA2 35 PB2 16 PA3 36 PB3 17 PA v 18 PA5 38-5V 19 PA v 20 PA V 2 3
48 FUNCTONAL DESCRPTON General The 8253 is a programmable interval timer/counter specifically designed for use with th ntel lm Micro-computer systems. ts function is that of a general purpose, multi-timin element that can be treated as an array of /O ports in the system software. The 8253 solves one of the most common problems in any microcomputer system, the generi tion of accurate time delays under software control. nstead of setting up timing loops i systems software, the programmer configures the 8253 to match his requirements, initializi one of the counters of the 8253 with the desired quantity, then upon command the 8253 wi count out the delay and interrupt the CPU when it has completed its tasks. t is easy to SE that the software overhead is minimal and that multiple delays can easily be maintained b assignment of priority levels. three counters to be operated on and to address the control word register for mode selection. CS (Chip Select) A "low" on this input enables the No reading or writing will occur unless the device is selected. The CS input has no effect upon the actual operation of the counters. MUNTCM.o -CLO -c,,t - OU7 o -ct* 2 COUNlC* 4 " -o*'c -0u1 Other counter/timer functions thatare non-delav in nature but also common to most micri computers can be implemented with the Programmable Rate Generator Event Counter Binary Rate Multiplier Real Time Clock 0 Digital One-Shot *Complex Motor Controller r- G -ClRt COWCR t- OU? Data Bus Buffer This 3-state, bi-directional, 8-bit buffer is used to interface the 8253 to the system data bl Data is transmitted or received by the buffer upon execution of Nput or OUTput CPU i structions. The Data Bus Buffer has three basic functions. 1. Programming the MODES of the Loading the count registers. 3. Reading the count values. ReadlWrite Logic WR Write) A "low" on this input informs the, 8253 that the CPU is outputting data in the form of mod information or loading counters. AO, A l These inputs are normally connected to tho address bus. Their function is to select one of th 4 i 1 igure 3. Block Diagram Showing Data Bus B RedlWritP nnir Fiinrtinne Fer and Controt Word hëgistsr The Control Word Register is selected with AO, Al are 11. t then iccepts information from the data bus buffer and stores it in a register. The information stored in this register controls the operational MODE of each counter, selection of binary or BCD counting and the loading of each count register. The Control Word Register can only be written into; no read operation of its contents is avail. able. Counter #o, Counter #, Counter #2 These three functional blocks are identical in operation so only a single Counter will be des- cribed. Each Counter consists of a single. 16-bit, pre-settable DOWN counter. Thecounter can operate in either binary or BCD and its input, gate and output are configured by the selection of MODES stored in the Control Word Register. The counters are fully independed and each can have separate Mode configuration and counting operation, binry or BCD. Also, there are sbecial features in the control word that handle the loading of the count values so that software overhead can be minimized for these functions. 5
49 The reading of the contents of each counter is avtlilable to the programmer with simple REAC operations for event counting applications and special commands and logic ere included in thc 8253 so that the contents of each counter can be read."on the fly" without having to inhibi the clock input SYSTEM NTERFACE The 8253 is a component of the nteltm Microcomputer System$ and interfaces in the Sam manner as all other peripherals of the family. t is treated by the systems software as an arrel of peripheral \/O ports; three are counters and the fourth is a control register for MODE prc gramming. Basically, the select inputs AO, A l connect to the AO, A l address bus signals of the CPU. Th % can be derived directly from the address bus using a linear select method. Or it can b connected to the output of a decoder, such ais an intel 8205 for larger systems. Once programmed, the 8253 is ready to perform whatever timing tasks it is assigned to accomplish. The actual counting operation of each counter i4 completely independent änd additional logic is provided on-chip so that the usual problems associated with efficient monitoring and management of external, asynchronoui events or rates to the microcomputer system have been eliminated. All of the MODES for each counter are progra omrations. by the systems software by simple 110 Each counter of the 8253 is individually programmed by writing a control word into the Control Word Register. (AO, A l = 11) Control Word Format Di D6 D D2 D DO SCí SCO 1 RL1 RLO M2 dl 1 MO 1 BCD batinition of Controt SC - Select Counter: AL - AaadLoad: O O 1 1 O SelectlCounter O 1 Select Counter 1 O Select Counter 2 1 llegal O Counter Latching operation (see REAWWRTE Procedure Section) 1 O Read/Load most significant byte Figure Syutein nerlaca Figure 4. Block Diegisrn Showlng Conliol Waïd Repisiei and Counlei Functlonr OPERATONAL DESCRPTON General The complete functional definition of the 8253 is programmed by the systems software. A of control words must be sent out by the CPU to initialize each counter of the 8253 with desired MODE and quantcty information. Prior to initialitation, the MODE, count, and out1 of all counters is underfined. These control words program the MODE, Loading sequence i selection of binary or BCD counting. M - MODE: M2 M1 MO 8CD: O Binary Counter 16-bits 1 Binary Coded Decimal (BCDJ l i Counter (4 Dûcades) Counter Loading The count register is not ioaded until the count vahl! ig written (one or two bytes, depending on th@ mode Selected by the RL bits), lokwed bv a rising édge dnd i) tallina edge of the clock. 6 i
50 Any read of the counter prior to that falling clock bdge may yield invalid data. MODE Definition MODE O: nterrupt on Terminal Count. The output will be initially low after the mode se1 operation. After the count is loaded into the selected count register, the out put will remain low and the counter will count. Whenter minal count is reached the output will go high and re. main high until the selected count register is reloaded with the mode or a new count is loaded The counter continues to decrement after terrninal count has been reached. MODE 4: Software triggered Strobe. Afterthe mode is set, the output will be high. When the count is loaded, the counter will begin counting. On terminal count, the output will go low for one input clock period, then will go high again. f the count register is reloaded during counting, the new count will be loaded on the next CLK pulse. The count will be inhibited while the GATE input is low. Rewriting a counter register during counting results in the following: (1) Write 1st byte stops the current counting. (2) Write 2nd byte starts the new count. MODE : Programmable One-Shot. The ouiput will go low on the count following the risin! edge of the gate in put. The output will go high on the terminal count. f a new count value is loaded while the outpu is low it will not affect the duration of the one-shot pulse until the succeeding trigger. Th current count can be read at any time without affecting the one-shot pulse. The one-shot is retriggerable, hence the output will remain low for the full count after an rising edre of the gate input. MODE 2: Rate Generator. Divide by N counter. The output will be low for one period of th input clock. The period from one output pulse to the next equals the number of input counl in the count register. f the count register is reloaded between output pulses the present perio will not be affected, but the subsequent period will reflect the new value Low or Going Low -- 1) Disables counting 2) Sets output immediately high 1) Disables counting 2) Sets output immediately high Rising -- 1) initiates counting 2) Resets output after next clock 11 Reloads counter 2) nitiates counting initiates counting High Enables counting -- Enables counting Enables counting Disables counting initiates counting -- Figure 6. Gate pin Operations Sùmmary Enables countinq The gate input, when low, will force the output high. When the gate input goes high, tb counter will start from the initial count. Thus, the gate input can be used to synchronize tt counter. When this mode is set, the output will remain high until after the count register is loaded. T. output then can also be synchronized by software. MODE 3: Square Wave Rate Generator. Similar to MODE 2 except that the output will rema high until one half the count has been completed (for even numbers) and go OW for the 0th half of the count. This is accomplished by dlecrementing the counter by two on the failing ed! of each clock pulse. When the counter reaches terminal count, the state öf the output is chan ed and the counter is reloaded with the full count and the whole process is rebeated. f the count is odd and the output is high, the first clock pulse (after the count is loaded) d crements the count by 1. Subsequent clock pulses decrement the clock by 2. After timeoi the output goes low and the full count is reloaded. The first clock pulse (following the reloa decrements the counter by 3. Subsequent clock pulses decrement the count by 2 until timeot Then the whole process is repeated. n this way, if the count is odd, the output will be high f (N + 1)/2 counts and low for (N counts. 8 MObk 8: Hardware Triggered Strobe. The counter will start counting after the rising edge of the trigger input and will go low for one clock period when the terminal count is reached. The counter is retriggerable. The output will not go low until the full count after the rising edge of any trigger REAb/WWiTE PROCEDURk Write óperations The systems software must program each counter of the 8253 with the mode and quantity desired. The programmer must write out to the 8253 a MODE control word and the programmed number of count register bytes (1 or 2) prior 40 actbally using the se1 The actual order of the programming is quite flexible. h ing out of the MODE control word can be in any sequence of counter selection, e.g., counter #o does not have to be first or counter #2 last. Each counter s MODE control word register has a separate address so that its loading is completely sequence independent. (SCO, SC1 1 9 A
51 The loading of the Count Register with the actua1,count value, however, must be done in eactl th sequence programmed in the MODE control dord (RLO, RLt). The loading of the counter count register is still sequence independent like the MODE control word loading, but when selected count register is to be loaded it must be loaded with the number of bytes programmf in the MODE control word (RLO. RLl). The one or two bytes to be loaded in the COU register do not have to follow the accociated MODE control word. They can be programmf at any time following the MODE control word loading as long as the correct number of bytei loaded in order. trolling the AO, Ai ' (remember that no re ment with this meth All Counters are down counters. Thus, the value loaded into the count register will actually decremented. Loading all zeroes into a count register will result in the maximum count (2 for Binary of lo4 for BCD). n MODE O the new count Will not restart until the load has bet completed. t will accept One of two byte!; depending on how the bode control words (RL RL1) are programmed. Then proceed with the vestart operation. MSB Coiint Reg ster bvte Counter n Count Register byte Counter n Note Fomat &how simpte example 01 toading me 8753 ene doei not amply thit it the only toimai insi wn be u@. Flguri 8. Progrimmlng Formal.. MODE Control Word 1 MODE Control Word NO. No. Count Register Bvte NO. MSû Counter 1 LsB Count Register Bvtc N6. Counter 2 7 Lij; Count Rq'ster No. Counter 2 No. B Count Regtrier Byte Counter O No h.se Count Register Bvte Counter O 1, o 1 Read Operations n most countcr applications it becomes neceaw] to read the and make a computational decision based on this quantity. E most common application that uses this function. The 8253 t programmer to easily read the contents of any ot the threê cóuntdrs Witholit tllstc(rbihg actual count in progress. There are two methods that the programmer can use to read the vbhie) of th% EoüntêrS f
52 p1--=+-/ 8085 f an 8085 clock output is to drive an clock input, it must be reduced to 2 MHz or less. - Figure 10. MC8-85TM Clock ntertatd % FUNCTONAL DESCRPTON General The 8255A isa programmable peripheral interface (PP) device dekigned for use in micro-..".., d ióltwifte. in èssence,
53 the CPU "outputs" a control word to the 8255A1 The controi Nord contain$ nformation SU( as "mode", "bit set", "bit reset", etc., that nitializes thd functional configuratiori of ti 8255A. Each of the Control blacks (Group A snd Group 8) Bccepts "commands" trom the head/nri Control Logic, receives "control word," trom the internal date bus and issues the prop commands to its associated ports. Control Group A - Port A and Port C upper (C7-C4) Control Group B - Port B and Port C lower BC3-CO) The Control Word Register can Only be written into. NO Redd operation of the Contrbl WO Register is allowed. bore A, B. and C The 8255A contains three 8-bit ports (A, E), end C). All can b& configured in a wide v functional characteristics by the system *ofhiirar& but Bach has its own special features "personality" to further enhance the power and flexibility of thë 8255A. 8255A OPkRABOkAL û,escr tpton Mode Sèleetion There are three basic modes of operation that can be selected by the System softvvare: Mode O - besic nput/outplit Mode 1 -Strobed npwolitput Mode 2 - hi-directional Bus When the reset inbùt doei "high" all portf will be bet io the input mbdd li.$., $11 24 lines will be in the high impedahce state). After the reset i$ rhovëd th mode with no ädditional initialization required. During thi? S5A can remain in the input ution ot the system program whild $ort C is divided into two of tht! dlitput registers, including:!&d. bhdes may be combined so Port A. One 8-bit data output latch/buff$r iind ond 8-bit data in Port B. One 8-bit data inputloutput latchlbuffer and one 8-bit data input buffer. on an interrupt-driven Port C. One 8-bit data output atcwbuffer and one 8-bit data input buffer (no latch for inpi. This port can be divided into two 6bit borts under the mode control. Each 4-bit port conta a 4-bit latch and it can be used for the control signal butputs and in ci junction with ports A and B. t'1n CObJFCUllATON 1 flgure 5. Êaslc dode Delinll)ons énd au4 nîedlce - Figure A Dlock Diogrom Chowlng Group A End Group D Control Funcllons i4 i5
54 peripheral device with no external logic. Such' design representi the maximum use of the available pins. ' Fldlird CeVReset Pormot Flgiire 6. Mode Deflnlllon Formal Single Bit Set/Reset Feature Any of the eight bits of Port C can be Set or Reset Using a single OUTput instruction. Thi feature reduces software requirements in Control-based applications. When Port C is being used as statuslcontrd foi Pori A ök B, these bit$ can be Sct or reset b using the Bit Set/Reset operation just as if they wem data output ports. J Operating Modeh MODE O (Basic hput/ou tj. This functional confi operation9 for 88ch of the three ports. No "handshd or read from a specified port. Mode O Basic hnctional behnitioni: Two %bit ports and tdd 4-bit port.!. Any port can bi! input or olitpüt.. Outputs arti latched. nputs are not latched. 16 different nputloutput cbnfiglliali &re bo$$bl,j in this f&&. rovides simple input and output B nterrupt Control Functions When the 8255A is programmed to operate in mode 1 or mode 2, contr.71 signals &re provid that can be used as interrupt request inputs t6 interrupt request signals, generated from port C, CAO bi ihl,ibited or resetting the associated NTE flipflop, iibing tha hit sp:!reset fuhction ot i 16 17
55 ~ MOOB O ConfigurntionS.- r e O$# --- A hiia 4-1 CVNl~Ol won0 hs, %%-- 18 tri a -
56 signals. for iransferrking" signals. and-shaking'' bode 1 Basic Func RD input. ) A "high" on this output can be used to interrupt the CPU when ari iiipuit dt stice is requesting service. NTR is set by the STB is 3 "one", bf i 'one" and lr~te is a "o ie". t is reset bv the failling edge of Rb. This brocedüre allows an t devicb to rcwost swi-e fròm the CPU by kimply strobing its data into the port. 0) -- 0, NTE A Controlled bv bit setlreset of PC,. NTE 8 Controlled bv bit swre
57 EZ
58 Used in Group A only. One 8-bit, bi-directional bus Port (Port A) akd a 5-bit control Port (Port C). Both inputs and outputs are latched. "status" of éach periphera the input latch. NTE 2 (The NTE Flip.Flop Associated With &F). Controlled by bit setlreset of PC,. P 25
59 'd C P ti c o m tl z 01 U < v, u 1 O 0 P w ti z 9 u t L 2 n m U P tr a P L N 8 2 m m 2 z ; z i c1 X 9 z 2: m r W í-l y ù ü m m P P' P
60 Bijlage 4 Technische gegevens van de $224

61 pin 13 (input) processor chip will enter a WAT state for a, long as the READY line is at logic O. This input &in also be,wed to single step the CPU. HOLD. This input pin requests the CPU 40 enter the HOLD state, which allows an externall device to gain control of the 8080 address and dat$ busses as soon as the 8080 has completed its use busses for the current machine cycle. Once enters the HOLD state, the address bus data bus will be in their high-impedance sdte. The CPU acknowledges the HOLD state *th the HLDA, or HOLD ACKNOWLEDGE, OU ut pin. HOLD is recognized under two conditions? 1) the CPU is in the HALT state, or (2) the CPU is in the Tz or T, state and the READY signal is atllogic 1. So much for the control inputs. Now the contr are flags. The term fi.g can be defined as follows: flag-n a computer, am indication that a par ~ompleted.~ A flag is typically a flip-flop cleared in response to operations occurring in th system. The six control output pins on the 8080 pin 24 (output) WAT. The wait outp the central processing in a WAT state, this pin is at logic 1. pin 18 (output) WR, or m. This output pin is Write and 1/0 control. When this the data on the data bus is stable into a memory location or to an pin21 (output) HLDA, or HOLD ACKN goes to a logic 1 state in respons signal. t indicates that the data are in their high-impedance pin 16 (output) 46 nal begins at either of two memory or input, or (2) the clock perio T3 for write memory or output operations. NTE, or NTERRUPT cates the state of the flip-flop may be set disable interrupt instructions (37% slpectively ) and inhibits interrupts cepted by the CPU when the iiip The flip-flop is automatically de pin 17 (output) ning of each machine cycle. DBN, or DATA BUS N. When this pin goes to a logic 1, it indicates to external circuits that the data bus is in the input mode. This pin is used to enable the gating of data onto the 8080 data bus from memory and 1/0 devices. Some of the preceding characteristics of the control pins will become dearer in Chapter 6, where the m, SYNC, DBN, and READY control pins are discussed. THE 8224 CLOCK GENERATOR/ DRVER CHP n early 8080 microcomputer systems, the clock inputs were provided by transistor driver circuits, MOS clock driver chips, or even opencollector TTL buffer chips. All worked reasonably well, but they complicated the design. A recent 808OA interface chip, the 8224 clock generator and driver, contains an internal oscillator and a clock generator/driver. All you need to provide is the appropriate crystal and power supply voltages of f5 and +12 volts. Since the 8224 will divide the crystal frequency by nine, you will require an 18-MHz crystal to produce a 2-MHz clock output from the clock generator. n the system described in this chapter, the microcomputer frequency is 750 khz; a MHz crystal is required. The ntel specification sheets for the 8224 clock generator/dnver are shown on the following pages. The functional description of the chip is excellent, SO there is no need to repeat it here. Observe how the divide-by-nine counter circuit within the 8224 chip is used to generate the individual clock phases and &, which "swing" between f12 volts and ground. The inputs to and outputs from the 8224 chip can be summarized as follows: pin15, pin14 XTAL1 and. The crystal is connected at pin 13 pin 2 (input tone mode crystals, which have uch lower gain than crystals that operate on the fundamental frequency. RESN. With the aid of a Schmitt trigger circuit, internal to the chip, and an externa1 RC network, rts a slow transition in the power 47

62 ina" Sch Single Chip Clock GeneratorDriver for 8080A CPU Power-Up Reset for CPU Ready Synchronizing Flip-Flop Advanced Status Strobe Oscillator Output for External System liming Crystal Controlled for Stable System Operation Reduces System Package Count The 8224 is a single chip clock generatoddriver for the CPU. t is controlled by a crystal, selected by the designer, to meet a variety of system speed requirements. Also included are circuits to provide power-up reset, advance status strobe and synchronization of ready. The 8224 provides the designer with a significant reduction of packages used to generate clocks and timing for 8080A. AL DESCRPT single chip Clock Gene r circuit derives its basic operating frequency nal, series resonant, fundamental mode crystal. e provided for thecrystal connections (XTAL1. selection of the external crystal frequency depends nly on the speed at which the 8080A is to be run at Basically, the oscillator operates at 9 times the desired pro- imple formula to guide the crystal selection i s Crystal Frequency = - 1 times 9 fcy The waveforms generated by the decode gating follow a simple 26.2 digital pattern. See Figure 2. The clocks gen. erated; phase 1 and phase 2, can best be thought of as consisting of "units"based on the oscillator frequency. Assume that one"un1t"equalsthe period of the oscillator frequency. 8y multiplying the number of "units" that are contained in a pulsewidth or delay, times the period of the oscillator fre quency. the approximate time in nanosecondscan be derived. The outputs of the clwk generator are connected to two high wel drivers for direct interfaee to the 8080A CPU. A TTL level phase 2 is a b brought out 02 (TTL) for external timing purposes. t is especially useful in DMA dependant activities. This signal isused to gate the requesting device on. to the bus once the 8080A CPU issues the Hold Acknowledgement (H LDA) Several other signals are also generated internally so that optimum timing of the auxiliary flipflops and status strobe m B S achieved. PN CONFGURATON BLOCK DAGRAM Example 1: (500ns tcy) 2mHz times 9 = 1ûrnHz' Example s tcyl' 1.25mHz times 9 = 11.25mHz ther input to the oscillator is TANK. This input allows use overtone mode crystals This type of crystal geny has much lower "gain" than the fundamental type so external LC network isnecessarytoprovide the additional " for proper oscillator operation. The external LC netis connected to the TANK input and is AC coupled to d. See Figure 4. ormula for the LC network is D RDVN READY D PN NAMES he output of.the oscillator is buffered and brought out n OSC (pin 12) so that other system timing signals can be erived from this stable, crystal-controlled source hen using ~rvstal~ above 10mHz P small amount of freauenev rlmmmg" may be necerwary. The addition of a small cawitdm 3pF 1OpFl in setm wlh ihr crystal woli eccompl8ih this unction 1 "NT = 2.- 0% ir l 3 l. t S t i, 2 1 i Generator consists of a synchronous "divide by ter and the associated decode gating to create the of the wo 8OBOA clocks and auxiliary timing 48 49
, an =tive low nmbe can be derived that occurs at the start of each mb chine cycle at the earliest possible")
63 ~ SCHOTTKY BPOLAR 8224 Status Strobe) the beginning of e&, machine cycle me 8mm CPU 11- infomation on ifs data bus, inforn,ation tells what type of actim will take place during that mnchine cycle. BV bringing in the SYNC from the CPU, and gating it with an internal timing signal ($A), an =tive low nmbe can be derived that occurs at the start of each mb chine cycle at the earliest possible moment that natus data is stable on the bus. The S m signal connects directly to the 8228 System Controller. The Reset Wnerates STSTB* but Of 'Or a longer period be artomatically this function. This feature the 8228 lo additional pins devoted for Power-On Reset and Ready FlipFlog A common function in 8MOA Microcomputer systems is the generation of an automatic system reset and start.up upon initial power.on. The 8224 has a built in feature to amomp lish this feanre. An external RC network is connected to the RESN input. The slow transition of the power supply rise is sensed by an internal Schmitt Trigger. Thiscircuit converts the slow transition into a clean. fast edge when its input'level remhes a predetermined value. The outpui of the Schmitt Trigger is connected to a "D" type flip-flop that is clocked with 42D (an internal timing 'signal). The flipllop is synchronously reset and an active high level that complies with the 8mOA input spec is generated. For manual switch type system Re. sei circu=n active low switch closing can be connected to the RESN input in addition to the powevon RC netnetwork. The READY input to the 8mOA CPU has certain tlmin! SpeCifiCatiOns such as ''set-up and hold" thus. an externa SynchronizirigfliFfloP 1s required.the 8224 has this featuri built-in. The "'N the asynchronous request" the "D"fVP flipflop. BY clocking the flipflol a rynchron'2ed READY at the correct in put level* can be to the The reason for requiring an external flip-flop to synchro nize the "wait request" rather than internally in the Em[ CPU is that due to the relativelv ona delavs of MOS o& such an implementation would "rob" the designer of aboui 200ns during the time his logic if determining if a "watt' is necewry. An external bipolar circuit built into the clock generator eliminates most of this delay and has no effect or component count l ' rl L ----_--.. r.e UtfOONL" FOROYlTONE CR*STb.LS supply to a clean, fast edge that resets the 8080A microprocessor chip when the RESET output signal is connected to th reset switch may also be ogic 1 output that is applied at t of the 8080A chip to reset it. RDYN. Accepts an asynchronous wait request a synchronizes it to produce EADY signal that is output to the 8080A chip. utput) READY. A logic 1 indicate the 8080A that valid memory or input data is available on the data bus. nput) SYNC. The SYNC pin on the 8080A chip provides a synchronizing output to the 8224 chip to indicate the beginning of each machine cycle. and &. The two-phase clock that is output to the 8080A chip, Each of these two outputs swing between +12 volts and ground; they are not normal 11 (output), (output) TTL outputs. $2(TTL). This is a TTL clock output that has the same frequency and timing characteristics as does $2. t is used for external timing purposes, such as those described in Chapter 5. STSTB. Status strobe output. This output is used to latch the status bits that appear on the bidirectional data bus. OSC. Buffered crystal oscillator output that can be used to generate other system hing signals. should be clear that the 8224 clock generatorldriver chip is well designed for its particular function. Connections between it and the 8080A microprocessor chip are direct, and require no intermediate inverters, gates, or fiip-flops. There is little incentive to use transistor driver circuits MOS clock driver chips, or open-collector TTL buffer the 8224 chip is already available since both +5 are required by the 8080A. 50 AN 8080-BASED MCROCOMPUTER 24 shows the central processor section of a small 8080A-based icrommputer. The figure is provided by Radio-Electronics magazine, ch described the microcomputer in the May, June, and July, 1976, We will now examine the component chips in the circuit as well signal flow between them. The objective here is to demonstrate t a microcomputer is a very straightforward and reasonable device, d that you should not feel intimidated by it. 51

64 ~ ~ i Courtesy Radio-Electronics@, Gerncback Publications, nc. i ndividual output pins on the 8080 microprocessor chip have a fanately 0.16 ma. The outare 1.9 ma for each output standard TTL load. 1 Veither the 8080A is a superior son, we use it in.our microto drive the required, bus drivers are also following under the bus The control section of the microcomputer is shown in Fig ncluded is the previously described 8224 clock generator/driver chip connected directly to the 8080A. The only additional electronic components required, besides the two chips, are a pair of 1-kilohm resistors, Courtesy Radio-E/ectronics@, Gernsback Publications, nc Fig The processor, memory, and control sections of a small 8080A microcomputer system. Power t is assumed that power supplies for the required +5, -12, and +12 volts are available. They are common, and are relatively inexpensive. (However, be wary of the very cheap supplies.) The intermediate voltages of -5 and -9 volts required by our microcomputer are easily derived from voltage regulator integrated-circuit chips such as the LM320 series, or from zener diode shunts, as is shown in Fig i chip, those not connected E, NTERRUPT, WAT, in our small microperiment with them. HOLD input permits you to drive the 8080Ä chip into the hold and disable the address and data busses. The HLDA control outacknowledges the existence of a hold state. The NTERRUPT ermits you to interrupt the 8080A program execution, provided interrupt flip-flop within the 8080A chip is enabled. f it is the NTE output is at logic 1. Finally, the WAT output ts the 8080A chip to signal that it is not ready or that it is wait- 53
65 Bijlage 5 Technische gegevens van de 945E88
66 ~ ~~~~ ~! _- QUAD 2-NPUT AND GAT SUPPLY VOLTAGE PART NUMBERS MN TYP TEMPERATURE MAX 9LS08XM /54LS08XM 4.5 v 5.0 V 5.5 V 1-55OC to 125T 9LSO8XC/74LSO8XC 475 v 5ov 525v j OOC to 75oc SYMBOL PARAMETER LMTS UNTS 1 MN 1 TYP 1 MAX vh 1 input HGH Voltage j V Guaranteed nput HGH Voltage XM! i 0.7 TEST CONDTONS (Note 1) f f Output Short Circuit Current (Note 3) j -l5 j l i ' Supply Current LOW j ma 1 Vcc=MAX,VN=OV i - ---T SYMBOL PARAMETER Turn Off Delav. nput to Output UNTS 1 TEST CONDTONS LMTS MN TYP MAX ns vcc=50v iph 1 Turn or; üelsy. input to Output i iis 1 Ci =15pf NOTES: i. FGi condi?igns shefir; Bf Ml% ui MAX. use ihe spprocrb3te value specified ucder recomne!?ded opsrering condi?ions +or the es!icable device type. 2. Typical limits are at Vcc = 5.0 V. TA = 25 C. 3. Not more than one ourput should be shorted at a time
67 Bijlage 6 Technische gegevens van de DACQ8, de 781 en de AD584

68 8 BT HGH SPEED MULTPLYNG D/A CONVERTER UNVERSAL DGTAL LOGC NTERFACE GENERAL DESCRPTON me DAC-08 series of 8 bit monolithic multiplying Digital-to- \nalog Converters provide very high speed performance wpied with low cost and outstanding applications flexibility wanted circuit design* achieves 85 nsec settling times with wlow glitch and at low power consumption. Monotonic mulpiying performance is attained over a wide 40 to l reference orient range Matching to within 1 LSE between reference and JU scale currents eliminates the need for full scale trimming in wst applications. Direct interface to all popular logic families 0th full noise immunity is provided by the high swing. adjustable ireshold logic inputs ligh voltage compliance dual complementary current outputs re provided. increasing versatility and enabling differential peration to effectively double the peak-to-peak output swing. n iany applications. the outputs can be directly converted to voltje without the need for an external op amp. li DAC-O8 series models guarantee full 8 bit monotonicity, and xilineanties as tight as 3.1% over the entire operating tempature range are available. Device performance is essentially ichanged over the 24 5V to c 18V power supply range, with i mw power consumption attainable at 15v supplies. EQUVALENT CWCU? FEATURES e Fast Settling Output Current nsec Full Scale Current Prematched to =1 LSB O Direct nterface to TTL, CMOS, ECL, HTL, PMOS e Nonlinearity to =0.7?/0 Max Over Temp Range High Output mpedanceand Compliance -lov to c18v O Differential Current Outputs 0 Wide Range Multiplying Capability. 1 MHz Bandwidth O Low FS Current Drift... z3oppml C O Wide Power Supply Range V to =18V e Low Power 15V e LOW cost The compact size and low power consumption make the DAC-08 attractive for portable and militaryiaerospace applications: devices processed to ML-STD-883A, Level B are available.! P 11-21

69 ~ i Operating Temperature DAC-O8AQ, O DAC-08EQ. CO Storage Temperature Power Dissipation* Derate above 100 C Lead Soldering Temperature v+ Supply to v- Supply Logic nputs -55 C to +125OC VLC 0 C to +70"C Analog Current Outputs -65'C to +15OoC Reference nputs (V74, V15) 500mW Reference nput Differential Voltage 1 OmWP c (v14 to v15) 3OO0C (60 sec) Reference nput Current (174) V- to V- PUS 36V These specificaiions appiy for L 'Over full operating range TYPCAL PERFORMANCE PHOTOGRAPHS FGURE 2 TRUE AND COMPLEMENTARY OUTPUT OPERATO REF = 2mA (0000'0000) 50 nsecidivisron tcgic nput Levels..Logic "O" FGURE 4 LSB SWTCHNG Reference input lil &w Rate 50 nsecidivision 200 *s@:/division SEE FGURE 27 REP 200n RL= loon CC'C

70 'oltage 36V V- to V- PUS 36V v- to v+ See Fig. 12 v- to v+ ciav ELECTRCAL CHARACTERSTCS * These specifications apply for Vs = = 15V REF = 2 O ma. TA = - 55 C to C unless otherwise specified Output characteristics refer to both iout and OUT c DAC-08A DAC-08 - Parameter Symbol Test Conditions Min Typ Max Min Typ Max Unlt c ReSOlUtiOn a bits Monotonicity a Nonlinearity TA= 0 C to 70 C - - io E 3 ETTLNG TME alt biis switched ON W 9%" Settling Time S To r% LSB,all bits switched ON or OFF - TA = 25 C (Note i) Propagation Delay Each bit ~PLH TA =25"c All b!ts switched ~PHL (Note 1) - 35 * Full Scale Tempco TCFS - ~ *$i Output Voltage, Compliance [True Compliance) r voc - Full scale current change < 1% LSB -10 +i8 -to ROUT -, 20 Megohm typ - nsec nsec CQ O Full Range Current REF = 2 ma FR r TA = c25"c ' i Full Range Symmetry FRS FR4 - FR2 - r Zero Scale Current ZS V- = -5.OV. 50 nuddivision TME FXTURE OF FGU ìe 5 ìence OPERATON nxc/division FGURE 27 EO = 200a i= (000 Logic nput Levels Logic "O logic nput "1" Logic nput Current -~og>sic-~~- ~- p- - Logic input "1" Logic nput Swing VL VH - -- ~ L H VS Logic Threshold Range V ~ R Reference Bias Current 1,s Reference inpul slew Rate Power Supply Sensitivity Power Supply Current - 'Ower Dissipation ;: dudt pssfs+ PsSiFs- - - i+ - PD VLC = OV r-;.ö ' 0.8 _ f - See Fig. 5, 27 (Note 1) V+=45Vto18V OTE i: Parameter not 100% tested; guaranteed by design '0.01, v- = -45V to -18V zo.01 [REF = 1.0 ma : _ O volts volts mw mw mw
 81 8-1 85 ao Output Voltage Compliance (True")
71 ~~ ~~ ~~ ELECTRCAL CHARACTERSTCS ciftcations apply for VS = 2 15V. REF = 2.0 ma, TA = 0 C to 70 C unless othermse specified. Output charactenstics refer to both on LL SCALE C Settling Time 1 ts Propagation Delay Each bit To 2% LSE all bits switchedonoroff 1 TA = 25 C (Note 1) ao Output Voltage Compliance (True Compliance) 'Oc FullRangeCurrent FR~ Full Range Symmetry lms Zero Scale Current t---+- Full scale current ROW z 20 Megohm VREF = 1O.OOOOV TA = 25 C Output Current Range 1 Logic nput Levels Logic nput "1" Logic nput Current Logic "O.* Reference Bias Current Reference nput dvdt iee Fig. 5, Slew Rate Note 1) Power Supply Sensitivity Current vs = i5v. REF = 1.0 ma Vc = +5V. -15V REF = 2.0 ma vs = 215v REF = 2.0 MA v. REF = 1.0 ma +5V, -15V, REF = 2.0 ma 115V, REF = 2.0 ma 135 NOTE 1: Parameter not looo/o tested; guaranteed by design. ; ij i0.002 io zo o.m ro '+A3L5 volts - ma/ Pm %/% %/%.3.8 ma -5.8 ma 3.8 ma -7.8 ma 3.8 ma -7.8 ma 48 mw 136 mw CVNL t CC.15, 2 5c.3: j

72 OP SZ-11 30V110A ndn 'SA lnïäwl3 ndn OL 3ürl'DJ 10.0.: LOO.: 1.w 1*3Sl<"3 3m35 i,","d,ly 54 O! LO O1 O ''1 'SA AV730 NOlV'DVdOüd 8Sl L DJ

73 S3Aüíì3 33NWWMOdü3d lw3ldai

74 FGURE i9 RECOMMENDED FULL SCALE ADJUSTMENT CRCUT LOWTC DAC-08 - sra FGURE 21 BASC UNPOLAR NEGATVE OPERATON US Y' PPPPPPP '0" TEMPERATURE FGURE 22 BASC BPOLAR OUTPUT OPERATON FGURE 23 OFFSET BNARY OPERATON lok!! x rt5v -1% p iw.i50 1 E1 B BS 66 B7 88 Eo Eo POS FULL RANGE OOW POSFULLRANGE-LSB O C9.920 ZEROSCALELSB O O O O O O W ZERO SCALE owo+oobo ZEROSCALE-LSB O Oo00 NEGFULLSCALEiLSB O O O O O O O NEGFULLSCALE o o o o o o o o +1qwo Bi 82 E B 881 EO POS FULL RâNGE &%O ZERO SCALE ~ NEtFULLSCALEtiLSB O O O O O O O ' NEG FULL SCALE o o o o o o o o-5.ooo 11-27

75 ~ BASC CONNECTONS FGURE 24 POSTVE LOW MPEDANCE OUTPUT OPERATON <OR COUPLEMENTAR OUPUT 1OPER.TOH S NEGATVL LOGC D K) COUHECT UYE>WG NPUT W OP-WP TO E PN 21. CONNECT 10 (PN. TO GROUND -~ FGURE 26 NTERFACNG WTH VAROUS LOGC FAMLES TTLDTL "T".+.4V VT" =VLc+l.4V- +15V CMOS, HTL, HNL VT**+?.~ V ATJPLCATONS NFO? e FGURE 25 - NEGATVE LOW MPEDANCE OUTPUT OPERATON loutput current is the pro eference current. The ri a y from nearly zero to s:a linea: function of i DAC-O8 -'O - 10 RL FR'ZkF FS.R>L ifs L = X REF whl FOR COYPLEYENAR OUTPUT (OPERäTlON S A NEGbTVE LOGC DAC positive reference COHNECT UON-NVERTNG NPUT OF Op-AMP TO 6 PN 21. CONNECT 10 PN 41 TO GROUND tive reference voltag1 REF(+) terminal (pin ' wively. a negative refe pin 15 (Fig. 20 1; referen PULSED REFERENCE OPERATON RM into VREF(+) as in reference connectic dance presented at tracks the voltagr reference arnpli$ cancel bias curre FGURE 28 ACCOMODATNG BPOLAR REFERENCES * 6.c~ 2 PEAK NEG4TVE SWNG W &N FGURE 4 mc-oe 11-28

76 ~ ~~ ~ ~~~~~ ~- ~ famliiesand REFERENCE AMPLFER COMPENSATON FOR MULTPLYNG APPLCATONS current. The reference current,-ay be fixed or may nearly zero to +4.OmA. The full scale output current function of the reference current and is given by: REF where REF = 114. S ANEGATVE LOGC 010 tive zeference applications (Fig. 18 1, an external TO (PN 21. CMNECT io reference voltage forces current through R14 into the terminal (pin 141 of the reference amplifier. Altera negative reference may be applied to VREF(-) at Fig. 20 1; reference current flows from ground through PERATON i reference amplifier. R15 (nominally equal to R14) is o cancel bias current errors, Ri5 may be eliminated with minor increase in error. references may be accomodated by offsetting VREF or n a DC reference is used, a reference bypass capacitor is mmended. A 5.0V TTL logic supply is not recommended AC reference applications will require the reference amplifii to be compensated using a capacitor from pin 16 to V- Tt value of this capacitor depends on the impedance presented t pin 14. for R14 values of 1.0, 2.5 and 5.OKR. minimum valut of C, are 15, 37, and 75 pf Larger values of R14requir proportionately increased values of C, for proper phase margir For fastest response to a pulse, low values of R14 enabiin small Cc values should be used. f pin 14 is driven by a hig impedance such as a transistor current source, none of th above values will suffice and the amplifier must be heavil compensated which will decrease overall bandwidth and slev rate. For R14 = 1 KR and Cc = 15 pf, the reference amplifie slews at 4 ma/psec enabling a transition from REF = O t< REF = 2 ma in 500 nsec. Operation with pulse inputs to the reference amplifier may bt accomodated by an aiiernate compensation scheme shown ir Fig. 27. This technique provides lowest full scale transitior times. An internal clamp allows quick recovery of the reference amplifier from a cutoff (REF = O) condition. Full scale transition (O to 2 ma) occurs in 120nsec when the equivaleni impedance at pin 14 is 200 R and C, = O. This yields a reference slew rate of 16mA/wec which is relatively indepen dent of RN and V, values REMENT should be split into two resistors with the junction sed to ground with a 0.1 pf capacitor. most applications. a +lo.ov reference is recommended for mum full scale temperature coefficient performance. This minimize the contributions of reference amplifier VOS most applications the tight relationship n REF and FS will eliminate the need for trimming required. full scale trimming may be accomplished ing the value of Ri4, or bv using a potentiometer for improved method of full scale trimming which minates potentiometer T.C. effects in shown in Fig. 19. mg lower values of reference current reduces negative power ly current and increases reference amplifier negative commode range. The recommended range for operation with reference current is t0.2ma to +4.0mA. reference amplrfier must be compensated by using a itor from pin 16 to V-. For fixed reference operation, 0.01 pf capacitor S recommended. For variable reference Plications, see section entitled "Reference Amplifier Comnsation for Multiplying Applications." LTPLYMG OPERATQN DAC -08 prevides excellent maltip!yins peifoiniance h an extremely linear relationship between FS and REF r a range of 4 ma to 4pA. Monotonic operation is mainover a typical range of REF from 100pA to 4.0mA; nsult factory for devices selected for monotonic operation LOGC NPUTS The DAC-O8 design incorporates a unique logic input circuit which enables direct interface to all popular logic proode? maximum nose is made possible by the large input swing capability, 2pA logic input current and completely adjustable logic threshold voltage. For V- = -15V. the logic inputs may swing between -lov and +18V. This enables direct interface with +15V CMOS logic. even when the DAC-08 is powered from a +5V supply. Minimum input logic swing %nd minimum logic threshold voltage are given by: V- plus (REF X 1 KR) plus 2.5V. The logic threshold may be adlusted over a wide range by placing an appropriate voltage at the logic threshold control pin (pin 1. VLC). Fig. 11 shows the relationship between VLC and VTH over the temperature range, with VTH nominally 1.4 above VLC. For TTL and DTL interface. simply ground pin 1. When interfacing ECL, an REF = 1 ma is recommended. For interfacing other logic families, see Fig. 26. For general setup of the logic control circuit. it should be noted that pin 1 will source 1 O0 pa typical: external circuitry should be designed to accommodate this current. Fastest settling times are obtained when pin 1 sees a low impedance. f pin 1 is connected to a 1 Ka divider, for example,it should be bypassed toground by a 0.01 pf capacitor.,

77 ANALOG OUTPUT CURRENTS Both true and complemented output sink currents are provided, where lo + = FS. Current appears at the "true" output when a "1" is applied to each logic input. As the binary count increases, the sink current at pin 4 increases proportionally, in the fashion of a "positive logic" D/A converter. When a "O" is applied to any input bit, that current is turned off at pin 4 and turned on'at pin 2. A decreasing logic count increases as in B negative or inverted logic D/A converter. Both outputs may be used simultaneously. f one of the outputs is not required it must still be connected to ground or to a point capable of sourcing FS; open. do not leave an unused output pin Both outputs have an extremely wide voltage compliance enabling fast direct current-to-voltage conversion through a resistor tied to ground or other voltage source. Positive compliance is 36V above V- and is independent of the positive supply. Negative compliance is given by V- plus (REF X1 KR) plus 2.5V. The dual outputs enable double the usual peak-to-peak load iwing when driving loads in quasi-differential fashion This feôture is especially useful in cable driving, CRT deflection snd in other balanced applications such as driving centertapped coils and transformers The nonlinearity and monotonicity specifications of DAG08 are guaranteed to apply over the entire rated opera temperature range. Full scale output current drift is ti typically?r10 ppmpc, with zero scale output current a drift essentially negligible compared to 1/2 LSB. Full scale output drift performance will be best with +lo. references as Vos and TCVos of the reference be very small compared to 1O.OV. The temperatu of the reference resistor R14 should match and the output resistor for minimum overall ful Settling times of the DAC-08 decrease a 10% at -55 C; at +125OC an increase of about 1 SETTLNG TME The DAC-08 is, capable of extremely fast settling typically 85nsec at REF= 2.0mA. Judicious circuit desig careful board layout must be employed to obtain full p mance potential during testing and application. The switch design enables propagation delays of only 35 nsec each of the 8 bits. Settling time to within 1/2 LSB of t LSB is therefore 35 nsec, with each progressively la taking successively longer. The MSB settles in 85 nsec, determining the overall settling time of 85 nsec Settii 6-bit accuracy requires about 65 to 70 nsec. The o capacitance of the DAC-08 including the packa approximately 15 pf, therefore the output RC time const dominates settling time if RL > POWER SUPPLES The DAC-08 operates over a wide range of power supply voltages from a total supply of 9V to 36V. When operating at supplies of +5V or less, REF 5 1 ma is recommended. Low reference current operation decreases power consumption and lower load resistors.thus reducing the output RC time con increases nepánve -cornplrarnse,- ~~2rer,ceanptifi~a~~iv~ common mode range, negative logic input range, and negative logic threshold range; consult the various figures for guidance. Measurement of settling time requires the ability to accur resolve 14 PA, therefore a 1 KR load is needed to pr For example, operation at -4.5V with REF = 2mA S not adequate drive for most oscilloscopes. The settling time fi recommended because negative output compliance would be reduced to near zero. Operation from lower supplies is possible. of Fig 29 uses a cascode design to permit driving a 1 KR with less than 5pF of parasitic capacitance at th however at least 8V total must be applied to insure turn-on cif the internal bias network. node. At REF values of less than 1.0 ma, Symmetrical supplies are not required. as the DAC-08 is quite insensitive to variations in supply voltage Battery >peration is feasible as no ground connection is required iowever, an artificial ground may be useful to insure logic,wings, etc remain between acceptable limits. 'ower consumption may be calculated as follows:,, > = (+) (V+) + (+) (V-) + (2 REF) (V-). A useful feature,f the DAC-08 design is that supply current is constant ind independent of input logic states; this is useful in cryptoiraphic applications and further serves to reduce the size of he power supply bypass capacitors. Settling time and propagation delay are relatively in to logic input amplitude and rise and fall times.due to gain of the logic switches. Settling time also remains es constant for REF value- down to 1.OmA, with gradual inc for lower REF values The principal advantage of higher values lies in the ability to attain a given output level damping of the output is difficult to prevent whi adequate sensitivity. However, the major carry fr to provides an accurate indicator of This ccde change does not require the norma constants to settle to within 10.2% of the final value, an settling times may be observed at lower values of REF DAC-08 switching transients or "glitches" are very and may be further reduced by small capacitive loads at output at a minor sacrifice in settling time. Fastest operation can be obtained by using short minimizing ouîput capaciîance and load esistor valses. 2 adequate bypassing at the supply, reference and VLC termi Supplies do not require large electrolytic bypass capaclton the supply current drain is independent of input logic Srrd O 1 pf capacitors at the supply pins provide full trand

78

79 SpafiEluwr~uiboklfarrrrciestalonillproducwnuoinatf~c1~zcnlculotalpsovpmgcow~~opcnong~~~~. d test. Raultsímm thme rarsrrcufedtocalculteo~~q~iykveis.all '*Se~uon i3forpackagcou~cuúan~uon. mui ind max rpaficnuons PTC gunrnnued, airhough oniy thmc shown m SpafirPuonssubjcct tocbangeanthournoua. boldfaccrrcmiedonillpmducuonunin. ~OLUTEMAXRATXNGS nput Voltage VN O Ground.... 4OV Power Dissipation fir +25T mW Operaung Junction Temperature Range -55 C to 125 C Lead Temperature (Soldering Osec) C Thermal Resistance Junction-to-Arnbienr (H-08A) (E-20A) "Cw O0Cw û-16 VOLTAGE REFERENCES

80

81 ~ -~ With power applied to pins 8 and 4 and ail other pins open the AD584wiUproduce a buffered nominal 1O.OV output between. pins l and 4 (see Figure l). The stabilized output voltage may be reduced to 7.W. S.0V or2.w by connecting the programming pins 85 follows: OUTPUT VOLTAGE PN PROGRAMMNG Join the 2.5V and 5.OV pins (2) to a value which can be tolerated by the load arcuits. f is 'zero, adjusting R1 to its lower limit will result in a loss of control over the output voltage. if precision voltages are required to be set at levels other Than the standard outputs. the 20% absolute tolerance in the internal resistor ladder must be accounted for. Alternatively, the output voltage can be raised by loading the 2.5V rap with R3 alone. The output voltage can be lowered by and (3).. - _ connecting R4 &ne. Sither of these &ston can be a fied Connect the 5.OV pin (2) to the Connect the 2.5V pin (3) to the output pin (1). resistor selected by tesc or an adjusuble resistor. in all cases the rcsiston should have a low temperature cocffiacnt to match the ADS84 internal resistors, which have a negative T.C. cssthan 6OppmPC. if both R3 andr4are used, these mistors should have matched temperature coeffiaenrs. When only smali adjustmen= or uimsare required, the circuit of Figure 2 offers better resolution over a limited trim range. The circuit can be programmed to 5.OV, 7.5V or 1OV and. programming pin with a unitygain ngopamp. - - adjusted by means of R1 over a range of about f2oomv. To aim the 2.5V output option, R2 (Figure 2) can be reconnected to the bandgap reference (pin 6). n this configuration, the adjustment should be limited to f100mv in order 10 aroid --- -affecting the performance of the-ad584. R3.- *THE ZSVTAPSUSU> NTERNALLY ASJBUSPONT M sc>uw NOT BE CliAüûED BY WRE THAN lo(kiv N ANY TRM CDNFGLRA1,TDN. - Figure - L- Variable Ournut Options The ADS84 can also be programmed over a wide range of output volcages, including voltages greater than lov, by the addition of one or more external resistors. Figure 1 illustrates the general adjustment procedure, with approximate values given for the internal resistoa of the The ADS84 may be modeled as an op amp with a noninverting feedback connection, driven by a high stability volt bandgap reference (see Figure 3 for schematic). When the feedback ratio is adjusted with external resistors, the output amplifier can be made to multiply the reference voltage by almost any convenient amount, making popular outputs of 10.24V, 5.12V. 2.56V or 6.3V easy to obtain. The mostgenerai adjustment (which gives the greatest range and poorest reolution) uses R1 and R2 alone (see Figure i).as R is adjusted to its upper limit the 2.5V pin 3 will be connected to the output, which will reduce to 2.W. As Rl is adjusted to its lower kmit. the output voltage will rise to a value limited by R2. For example, if R2 S about 6kQ, the upper h it of the output range will be about ZOV even for large values of R. R2 should. Figure 3. Schematic Diagram 8-18 VOLTAGE REFERENCES
82
83
,--an Mode RanQe YtRENCE CURRENT SOURCES -1 OFFSET CURRENT (10s) b* * L, O'%ei n remperature Poaf Supphes")
84 PECFCATONS * '. - *?PC and CVcc = 15VDC unless n.. Slope Vos! -**a! Ottsel va Trnperature.i inwl Power Supplies *i lime " "$4 stage ~vosor -w Oftset n Tem$maiure.+ Ou~put Power Supplies S Tune "%-+hiode Relection Ratio@),--an Mode RanQe YtRENCE CURRENT SOURCES -1 OFFSET CURRENT (10s) b* * L, O'%ei n remperature Poaf Supphes r( Tm@

85 EMENTS n emoerature *Power Supplies x 1oe +15 * %%RU PARAMETERS ***: Csrent Range -7-T- o * O O O05 o

86 ELECTRCAL KONT) PARAMETER BOWER SuPPLltS nput Staga Voltage (rated perlormancel Voltage dorated perionnancei Supply Current Output Shgs Voitage (rated perlormancel Voltage (derated petiormancei Supply Current Shoe Circuit Current Limit OENLRALPARAYCTERS nput Current Range Linear Operation Without Damaga nwt lmwdance Ohput Voitage Swing Outnu1 rnwdance CONDTONS N = -0.02pA N = -20~4A vo=o RL = 2kfì. RF = 1Mn OAN Vo =RF N nitial Error1 AdiustableToZeroi va Temperature va Time Nonlinearitv i31 BPOLAR OPLRATON -10 +lo 1200 CURRENT NOSE N = 0.2pA 0.OlHz to 1OHz 1.5 iohr 17 íwh2 7 1kHr 8 NPUT OFR3ET CURRëNï tios. bipolarll41 nllial Offset va Temperature 3 va Power Suppiiaa O7 va Time 250 POWER SUPPLES nput Stege Voltage freted performance) fl5 Voliaga (derated petionnincei 27 tl8 Supply Current li~=+topa t t3.-2 iin = -1OpA te ,-2 output stage Voitsge fratad ~+rformance~ '44 Voltage (derated pertormance) +7 +le Supply Current vo=o +t 1 9 Short Circuit Currenl Limit f40 * Same as SOlWAP NOTES 1 Sea Typical Performance Curves for temperature effects 2 See Theory of Operation section for definitions For dü see Ex 2, CM and HV errors 3. Nonlinearity s he peak deviation from a "best fir straight line expressed a 4. Bipolar offset current includes effects of reference current mismatch and u ~ NPUT COMMON * * PCAL PERFOR *WC. Vcc = t5vdc unless otherwi =- SMALL SGNAL FREOUENCY RESPONS Frequency khri PHASE SHFT VS FREQUEP M) Frequency. khr SOLATON LEAKAGE CU VS SOLATON VOLTA OUTPUT COW solation Voltage kv 3-8

87 O a h B N,AL a68iloa uotieiosi 30 snonuiiuo3 DC Leakage Current qna c? f d 6 w W 3 E n t u> W u> a r
.")
88 RATE OF GAN ERROR SHFT VS SOLATON VOLTAGE kolaiion Voltage WDCt THEORY OF OPERATON The S0100 is fundamentally a unity gain current amplifier intended to transfer small signals between electrical circuits separated by high voltages or different references. n most applications an output voltage is obtained by passing the output current through the feedback resistor (RF). The SOf00usesa single light emittingdiode(led)and a pair of photodiode detectors. coupled together, to isolate the output signal from the input. Figure 1 shows a simplified diagram of the amplifier. REF and REF~ are required ony for bipolar operation, t? generate a midscale reference. The LED and photodiodes (D and D2) are arranged such that the same amount of light falls on each photodiode. Thus, the currents generated by the diodes match very closely. As a result, the transfer function depends upon optical match, rather than absolute performance. Laser-trimming of the components improves matching and enhances accuracy, while degarive fedtrsok improves linearity. Negative feedback around A occurs through the optical path formed by the LED and D. The signal is transferred across the isolation barrier by the matched light path to D GAN ERROR VS TEMPERATURE AND SOLATON VOLTAGE O t65t75 t125 Ti Temperature ioci NOTES: Vi andti approximalatheihr(llhw for the indicated gain shift Ths C caused by the properties of im optical cavity. T~-+~~OC.VT~M)\DC.S~~R~~~ not occur for AC voltages. VM = solation-mode Volisgû Vi = Threshold Voltage Ti =Threshold Temperature The overall S0 amplifier is noninverting (a going input produces a positive going output).. NSTALLATON AND OPERATNG NSTRUCTONS UNPOLAR OPERATON n Figure, assume a current, N isofûû(i1n must benegativeinunipo SinceA2isdesigned forlow biascurrent(~l0na) all of the current flows through RF to the output output voltage then becomes; by a voltage source (VN) and series resistor ír the summing node of theop amp is essentiallyal Thus, N = VNRN. OLAR OPERATON aaimie the bipolar modc n in Figure. are attached amps. The input stage sta ar operation. Assuming 16 supply all the RFF c try. 101 = D*. Since hnf. ihe current generated mulis in no current flow When K c t node, the. Because equal to Vo!NR N can be i this point, Di supplies egative fn can be as ia maximum LED outpu the S0100 take thefoi plus their drifts with appears at the ot 1 see equation (2) islheaffsei curre the input necessa zero. t isequal tc the diíference bei ofal anda2and cwmm COMMOW CO~CT rims is ~ lte FM l eipoun ~ COWECT PNS 7 AHOB FOR EWU AWO PS E AD T mi uwiwun. AHO nns AMO o FOR UWPOLAR :GURE. Simplified Block Diagram of the 1SO100. connected to the operation. The t med, in the bipo the 10s hipalar error
. le output via D2.")
89 ~~ ~~~~~~ vosr--+-2mfl- ~ ~ ~~ ~ ~ ~~ NOTES. VT TT approximate me m 'or the ndicated gain thin T& 0 Caused by the properilea of th, optical cavlly TT-+65 C. VT'2OOVDC Shi not occur for AC voitsga VM = isoietlon-mode voltage VT = Threshold Voliage Tr = Threshold Tempereturn ier is noninverting (a Wjr ositive going output). le output via D2. Thu, Ai ment amplifier, and A2 ka r, as described below. wt either flow in:u A2 og bias current (-lona)alw ough RF to the eulpu:. ate the bipolar mode, reference currents as Figure, are attached to the input nodes of the The input stage stabilizes just as it did in 'ECJ. the current generated by D2 will equal REF~. KNS in no current flow in Rr, and the output F will be zero. When N either adds or substracts siftomtheinput node, thecurrent D wiìiadjust to fai= N + REF. Because R~F equals irlf2 and U 10:. a current equal to N will flow in R-. The roltageisthen VO= NRF. Therangeofallowable 'icptive N can be as large as that generated by h maximum LED output (recommended OpA, tad AZ. + -(-fi~) RF = NRF, (J see equation (2). : between Al and A2 bpt 'peration N can bercplsd id series resistor (RN) sim imp is essentiaiiyat grou& ke the form of offset currents and fts with temperature. These are are assumed to be ideal amplifiers. aretheinputoffsetvoltagesoftheoutput and input stage, respectively. VOW appears directly at the output, but. VOS appears at the output as s; VOSR, 7 'Some constrain RN is the offset current. This is the current at the input necessary to make the output zero. t isequal to thecombinedeffect of the difference between the bias currents of A and A2 and the matching errors in the optical components, in the unipolar mode. and jrffl: are the reference currents that, when connected to the inputs, enable bipolar operation The two currents are trimmed. in the bipolar mode. to minimize the 10s Dipo~ir error. hrnd & are the currents generated by each photodiode in response to the light from the LED. - A,: is the gain error. The output then becomes: VN * VOS1 VOF= Re[( --REF+os)( RN & = deal gain/ Actual gain - +A,)+ 1nt~z)~Voso The total input referred offset voltage of the S0100 can be simplified in the unipolar case by assuming that A, = O and VN = O VOUT RF [ fvos1 RN flos nnipoiar] *Vos0 (2) This voltage is then referred back to the input by dividing by R-/ RN Vos,KTL = (*Vosi) *RN (los unnpw) + VOSO/(RF/RN) (4) Example 1: (Refer to Figure 2 and Electrical Specifications Table) Given: los bipabr = +35nA RN = 100kR RF = 1 Mfì (gain = O) ~ vos0 = +200pV Find: The total offset voltage error referred to the input and output when VN = OV. VOS total RT = ([*VOS1 *RN(10s bipolar) - RN (REF )] [i + A,] + RN R~F 2) ~VOW/(RF/RN) = ([+2OOpV + 100kf1 (35nA) - 100kfi (12.5pA) [1.02] -t 100kfl (12.5pAl) + 200pV/ ( M fi/ 100kfì) = ([0.2mV + 3.5mV V [1.02] VJ mV = -21.2mV VOS total RTO = VOS total RT X R./ RN = -21.2mV X O = -212mV Note: This error is dominated by 10s blpolar and the reference current times the gain error (which appears as an offset). The error for unipolar operation is much lower. The error due to offset current can be zeroed using circuits shown in Figures 6 and 7. The gain error is adjusted by trimming either R- or RN. COMMON-MODE AND HGH VOLTAGE ERRORS figure3showsamodelofthes0100 thatcanbeused to analyze common-mode and high voltage behavior. Definltionr of CMR and MR 10s is defined as the input current required to make the SOOO'S output zero. CMRR and MRR in the S0100 are expressed as conductances. CMRR defines the relationship between a change in the applied commonmode voltage (VW) and the change in 10s required to maintain theamplifier's output at zero: (3) l 3-1 1
 = - - x inv/ Ví6) MRR defines the relationship between a change in the applied isolation mode voltage (V&*) and the change in los required to maintain the amplifier's output at")
90 J FGURE 3. High Voltage Error Model. ~SwiTOM BARRER CMRR (-mode)=alos/avcm in na/v (5) - AVERR CM. [,4],] CMRR (V-mode) = - - x inv/ Ví6) MRR defines the relationship between a change in the applied isolation mode voltage (V&*) and the change in los required to maintain the amplifier's output at iero: MRR(1-mode)= -'O' &VM np~v (7) CMRR & MRR in V/V are a function of RN. - VM is the voltage between input common and output common. - VcMis the common-mode voltage (noise that is present on both input lines, typically 6üHz). & is the equivalent error signal. applied in series with the input voltage. which produces an output error identical to that produced by application of VCM and VM. CMRRand MRR are thecommon-modeand isolationmode rejection ratios, respectively. TOTAL CAPACTANCE (C and CZ) is distributed along the isolation barrier. Most of the capacitance is coupled to low impedance or noncritical nodes and affects only the leakage current. Only a small capacitance (CZ) couples to the input of the second stage, and contributes to MRR. ~ ~~~- ~~~- ~~~ ~-~ -~ EXsmpk 2: Refer to Figure 3 and Electrical Specification Table) Given: VCM = 1 VAC peak at 60H7, VM = ZOOVDC, CMRR = 3nAV.MRR = 5pA/V, RN = 100kR. RF = MR (Gain = 10) Find: The error voltage referred to the input and output when VN = OV VERR RT = (VCM)(CMRR)(RN) + (VM) (M R R)(RiN) =iv(3na/v)(ûûkr)+200v (SpA/V)( 100kfì) = 0.3mV + O. mv zz û.4mv VERRRTO= VRR RT (RRN) = 0.4mV (O) = 4mV(with DC MRR) (Note. This error is dominated byihecm term) For purposes of comparing CMRR and MRR with dbspecifications, the following calculations performed: CMRR in V/V = CMRRfi-modeXRm = 3nA/V (look)= 0.3mV/V CMR = 20 LOG (0.3mV/V) = -70dB at 60H7 MRK in V/V = MRR (-mode)(r~) = 5pA/V(OûkR)=O.Jpl MR=20LOG(0.5 x O4V/V)=-26dBatDC Example 3: n Example 2, VM is an AC signal at 60H7 and 400pA l M R R = 7 V RR RT = VERR CM + VERR M = 0.3mV + 2M)V (400pA/V)jOûkfì) = 8.3mV V RR RO = 83mV (with AC MRR) Example 4 Given: Total error RTO from Examples and f 378mV worst case Find: Percent error of +OV full scale output = 3.78% NOSE ERRORS Noise errors in the unipolar mode are due prim the optical cavity When the full 60kH7 bandridihi c GURE 5. Circuit Technique for The Current Sources ii WONAL ADJUSTMENTS WC.TC two major sources of off!? and Ofkt current. Vost and Vt '@ut amplifiers can be adjusted wnal potentiometers. An exampl Nate that Vos0 1500uV. max) an Dui, but vos1 appears at the outp -r W. n generai, vos is small CO d isce Example ). To adjust f
 appears directly at the p.")
91 4! ;LRES. Circuit Technique for Reducing Noise from The Current Sources in the ADJUSTMENTS rn rn two major sources of offset error: offset voltud offset current. VOW and VOSO of the input and c amplifiers can be adjusted independently using nop poientiometers. An example is shown in Figure %S that VOSO (SûûpV, max) appears directly at the p. but VOL appears at the output multipled by gain -~~o,ger;erz!,alofissmeui eonipar.e&m tkexffecg ~ &*(sec Example ). To adjust for 10s use a circuit which intentionally unbalances the offset in one direction and then allows for adjustment back to zero. Figure 6 shows how to adjust unipolar errors at zero input. The unipolar amplifier can be used down to zero input if it is made to be slightly bipolar. By sampling the reference current with Rs and R6 the minimum current required to keep the input stage in the linear region of operation can be established. Rt and Re are adjusted to cancel the offset created in the input stage. This brings the output to zero, when the input is zero. Although the amplifier can now operate down to zero input voltage, it has only a small portion of the current drain and noise that the true bipolar configuration would have. Adjusting the bipolar errors is illustrated in Figure 7. Each of the errors are adjusted in turn. With VN = open:, 10s is trimmed by adjusting Rio to make the output zero. RG is then adjusted to trim the gain error. The effects of offset voltage are removed by adjusting R14. ; tl OPTONAL UNPOUR bs ADJUST R ioun nn R, Ra mn POT 1 Yair r -n - / P / - 14% SHFT DUE t TO R, li 88 - SHFT OUE TO Rs 6 Rs FGURE 7. Adjusting the Bipolar Errors. BASC CRCUT CONNECTONS +.+- pes for Reducing r Mode. LRE 6. Adjusting the Unipolar Amplifier Errors at Zero nput FGURE 8. Unipolar Noninverting.

92 3. Care should betaken to minimizeexternalcapa across the isolation barrier. 4 The distance across the isolation barrier. external components, and conductor patterns be maximized to reduce leakage and arcing 5. Although not an absolute requirement, thr conformally-coated printed circuit boards S mended. FGURE 9. Bipolar Noninverting. 6. When in the unipolar mode, the reference (pins 8 and 16) must be terminated ilh sh greater than 20nA to keep internal LED on 7. The noise contribution of the reference currccause the bipolar mode to be noisier thanthew mode FGURE 10. Unipolar nverting The maximum output voltage swing is detent N and RF. VFWM, = N,~~ X RF 9. A cadaoitor (about 3oF) can be connectedac- to compensate for peaking in the frequenq!i The peaking is caused by the polegenerafed bi the capacitance at the input of the output am Figures 12 through 18 show applications of the FGURE li. Bipolar inverting. APPLCATON NFORMATON
93 Bijlage 8 Technische gegevens van de OPA501
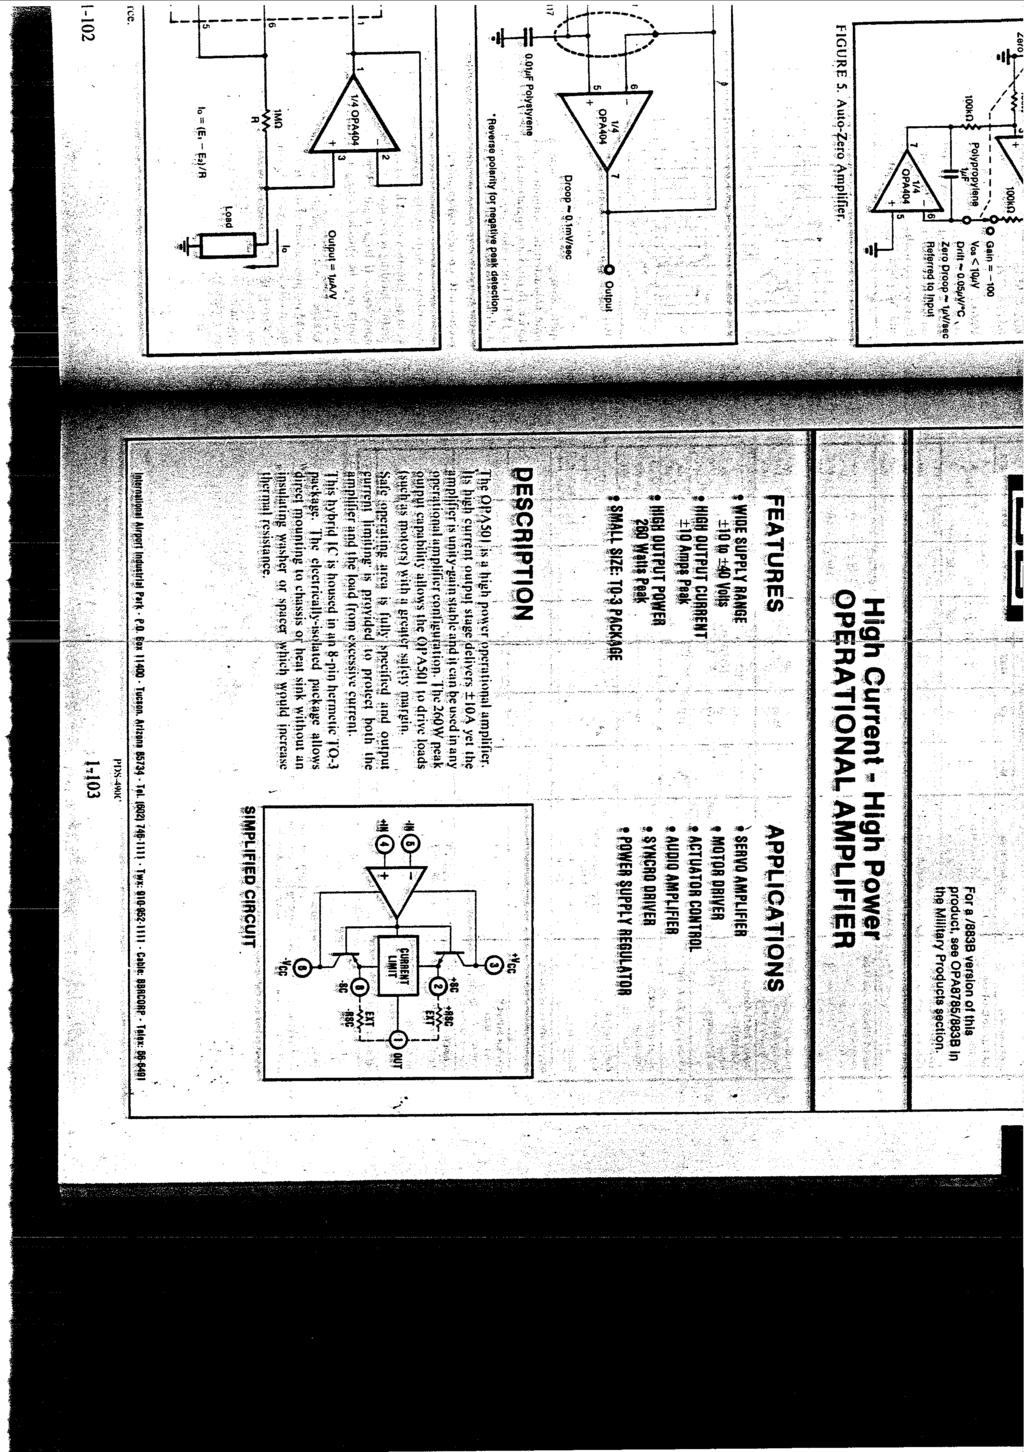
94 C m
95
96

97 TYPCAL PERFORMANCE CURVES

98

99

100 FGURE 6. Loa TEST r..o T andail other parametersareobserved. suchascase the OPA501 output transistorsas shown in Figure is designed to operate with electromotiveng loads such as servomotors. relays. and

101 ination of the po\\er cllipw indicates that thc instan- 4 4 O -4-8 AMOTOROSSPATOH "PNlUl2N4TNOTORNOWO =ML SNE WAVE 'U, :m. TC = a0 Au 40 FGURE.9. D.C. Servomotor Load Line. taneous power delivered to the motor exceeds the amplifier output transistor's safe operating area at a case icmpcrature of +2S C. '[he point at which the motor shows OV-at -h.ya is a prohlem. The voltage across the output transistor is 28V -OV = 2ûV. Checking the SOA slightly under Smsec. At 4Hzthis transient swing outside the DC SOA region is exceeded for much longer than 5msec. Continued operdtion under these conditions will result in failure. Peak junction tempraturcs should not exceed +200 C. Perhaps a motor with a higher impedance winding should he considered for this application. C'urrcnt limiting and lower supply voltapc can also reduce dissipation. Motors used in servo applications often required a surprisingly large current to accelerate quickly. Worst case conditions occur when the motor is operating at full speed and is suddenlyslammed into reverse ("plugging"). This condition is illustrated in Figurc 10 when a DC servomotor is driven by a bipolar square wave. As the motor reverses direction a large surge current flows. causing very high peak power dissipation in theamplifier. Biter severai time constants (determined by the inertia mmment) the current drops to a lower steddy-strite VdlUC. i.oariing ihc motor increases the motor average power and ~mplilierdissipati«n.soacurvc~sh<iuld hechecked for safe operation under thew surge conditions. The O'A50 current limita may he set to clip the high surge currents to a salc cvcl. This is shown in Figure. Sotc that thc current limit does limit the servo motor AMPUF PN DRV PM U t2m4tnotorm) LUM =4ik SOUARE WAVE =t FGJKE. Serromotor )ri\e With Current.irnit.
102
 END PLAY ALLOWANCE TTL COMPATBLE DGTAL OUTPUT SNGLE 5V SUPPLY WDE TEMPERATURE RANGE NDEX PULSE AVALABLE Description The HEDS-SOW series is a high resolution incremental optlcal encoder kit")
103 Features SMALL SZE - 28 mm DAMETER CYCLES/REVOLUTON AVALABLE MANY RESOLUTONS STANDARD LOW NERTA QUCK ASSEMBLY 0.25 mm (.O10 NCHES) END PLAY ALLOWANCE TTL COMPATBLE DGTAL OUTPUT SNGLE 5V SUPPLY WDE TEMPERATURE RANGE NDEX PULSE AVALABLE Description The HEDS-SOW series is a high resolution incremental optlcal encoder kit emphasizing reliabilityand ease of assembly The 28 mm diameter package consists of 3 parts the encoder body a metal code wheel. and an emitter end plate An LED source and lens transmit collivaled light from the emitter module through a precision metal code wheel and phase plate into a bifurcated detector lens The light is focused onto pairs of closely spaced integrated detc1ctors which output two square wave signals in quadrature and an optional index pulse Collimated light and a custom photodetector configuration increase long life reliability by reducing sensitivity to shaft end play shaft ecce.itricity and LEO degradation The outputs and the 5V supplf nnput of the HEDS-5000 are accessed through a 10 pin connector mounted on a 6 metre ribbon cable Outline Drawing TECHNCAL DATA HEDS-WOO SERES.- JHUUARY 19E A standard selection of shaft sizes and resolutions between 100 and 512 cycles per revotution are available Consult the factory for custom resolutions The part number for the standard 2 channel kit is HEOS-5000 while that for the 3 chamel device with index pulse. S HEDS-5010 See Ordering nformation for more details For additional design nformation see Application Note Applications Printers, Plotters. Tape Oribes. Positioning Tables. Auto matic Handlers. Robots. and any other servo loop where a small high performance encoder is required,phase PLATE i DA - ;1 ym EMTTER ENDPUTE -1 TYACAL DHENSiO(US N MLLMETRES AND NCHEQ

104 ~ N Block Diagram and Output Waveforms. 'CL..\!. jl Theory of Operation Definitions Eíectr,ca; dearees 1 siaft rota'ion ~ Cyzle Posiiion Eiroi a-gy!ar cerreai elecl-ica: cycles - 36C eier!rncai.j?;-o?s?he ahgular difference Se!ween!he acfgal sqa': pss'tion and its ~os~iio? as cai?bla:rd by cor :\e eq:.w'z cycles Cycl~ Error An!ndicatlon o! cycle :ir..!crmi:y The $fft=re?ce %:heer an observed shaf! angie which gwe: rise tcor,eeieit~.ca' cycie and!he nominal angular ivcrement oí 1 N of a redvtiac Phase The angle Se!weer, the center of Pglse A ai6 the center of Puise B ndex Phase For counie' coc4ivise rotation as ii!ustrated abwr the noex Phase is de!ined as *! -*i 4,, = is the angle. in electrical degrees between tbe fal!ing edge of i and fa!;ing edge D? B 6: is the angle in electrical degrees between the rising edge of A and the ristrrc edge of ndex Phsse Error. The ndex Phase Errar Ja), descrihes the change ir. the ndex Pulse pos:tion a!te. assernriy wit? respect io the A and B chánnels over the reco5:mended operating condi!.o~is 4-26

105 ... Absolute Maximum Ratings limited even under.. Recommended Operating Conditions Encoding Characteristics The specifications below apply within the recommended operating conditions and reflect performance at 500 cycles per revolution N = 5001 Some encoding characteristics improve with decreasing cycles LN) Consult Applicatlon Note 1011 or factory for additional details Pi.mtin Synsbd 1 WL Typ. Mu, U* ~otes*i~ee Definitions) Position Enor - A Minutes of Arc 1 Cycle = 43.2 Minutes Worst Error Full Rotation 1 Cycle Error - AC Electrical deg. Worst Enor Fut1, See Figure

106 ~ HEDS-WO r 1 Mechanical Characteristics 1 Pammeter Symbol Min. TYP. Max. UnA Notes Supply Current cc ma HEDS-5000 t2 Channel' i3 Channel1 4! High Level Output VOH 24 V Oh = -40pA Max l i Voltage low Level Output VOL G1 i V OL = 3.2 ma i Voltage Rise Time t 0.5 PS CL = 25 pf, R. = 11 K Püll-üpi Fall Time tf 0.2 See Note 6 j Cable Capacitance CCO 12 pf/metrea Output Lead to Ground i NOTES: 1 The structura! parts of the HEK-5000 have been tested to 209 and up to 5CQ Hz For use outside!his range, operat80n may be :miled af OU 1reque.ces hign displacevent by cable fat,gue and at high frequencies by code whee! resoria!ices Resolant f,eq;ency depends on Code Yhee! material and number of counts per re\ou!im Fa, lernperatures below -20 C!he ribbon cable becor'les britfie and sensative :c d!sp!acemeits Maxiqum operating and storage temperature includes the surface are2 o+ the encade, mounting Conszlt facwy for fwíhe: information See AppÍicetion Uo:e ' n a properly assetbied lot 99% o! the units when run al 25 C and 6 KHz should exhibit a pulse w!dth error less than 35 eiecîrcai degcees and a state width error less than 45 eiectricai deg'ees To caicu!ate errors at other speeds and temperatures add!he valdes spec!!!& i? Ftguws or 2 tc :he typrca! values speci!ieg under encoding characteristics or to the maximum 99% values swctf*ed tr tht5 note 3 n a properly asse,vsled lot. 99?? of the uni!s when run at 25'C and 0 KH should exhibit an index pulse wldth g:e?te. than 260 electrical degrees and less than 460 elect!ica' degrees To calculate index pulse widths at other speeds and temperatures add the valdes specif!ed in Figures 3 or 4 10 the typical 360' pulse width or to the maximum 99% values specifted in this note 4 After adjusting index phase at assembly, the index phase error specilication A+, indicates the expected shill in index pulse posit!oq with respect 1s channels A and B over the range of recommended operabng conditions and up!o 50 KHZ 5 When the lpder pulse is centered on the low-low states o! channels A and B as shown on page 2 a uniaue P@ can be defined once pe, revolutlor! w?iin the recommer,ded operating conditions and up to 25 KHz Figure 6 shows how Po can be derived from A. B. and i ou:p~ts The adjustment range inaicales how far from :he ceqter of the low-10% state ihbt the center 01 the index pulse may be sdps!ed 6 The :is? time 1s pr:mar.iy a fznctisi. of the F1C time constant of fli and C, 4 taste: rise time can be achievei with either 2 lower value of RL or C, Caw must be obsewed not to exceed the recommended value o' lai unde: the wors! case C3nCiit'OnS t i

107 ELECTRCAL DEGREES ELiiTi.CAL DEGREES 13: u ' w -u) m o 20.o w TEUPERTJRE h CESREES CE.ilGRA0E Figure 1 Typical Change in Pulse Widlh Error or in Slate Width Error due lo Speed and Tempetalure * a o 60 -u1-20 o m 40 a, BO ~DJ TEMPERATURE N DEÜHEES CENT.GRAûE Figure 2 Maximum Change n Pulse Widlh Error or in State Widlh Erior Due lo Speed and Temperature ELECTRCAL DEGREES a, 1 ELECTPCAL DEGREES." a- %- OC+.Xt,,,,, 1,,, 12' ca -u1 20 o 20 u) m 80 iw TEU?ERATJRE in DEGREES CEhTiGaiDE Figure 3 Typlcal Change in ndex Pulse Width Due to Speed and Temperature OC m -a 20 o 20 a EU ac 130 TEUPERATURE ).i DEGREES CEhT'GRiDE Figure 4 Maxtmum Change in index Pulse Width Due lo Speed and Temperalure M 45 a 15 a O O ü6 O1 O8 smfr EccENrRicirY -,i 1300 hchi MLLMETRES F 6 14LS14 1 i 4 -- GROUND OR DO 5 >- %OT CONNECT1 DASHED LNES REPRESENT AN OPTONdL NDEX SLMMNG CRCUT STANGARD 14 SER!ES COULD AL50 SE USED TO MPLEMENT THS CRCUT Figure 5. Position Error va. Sheit Eccentrlclly Flgure 6. Recommended nieriaca Clrcult 4-29

108 ~~ PNOUT PN i FUiiCilOh 1 CHNLL A 2 vci 3 GROUND 4 N C OR <;HO:ND 5 h C OU GfiUUNa 6 GHOL'NO 7 V'C 8 CHNNLLB 9 VCL BOTTOM VEW. 16 CHCYhEL NOTE REVERSE NSERTOL OF THE COP.!LClOR v*ll PERWNENTLV DYAGE THE CifTtCTOR C MThG CONNECTOR BERG OR EOUVALEiT Figure 7. Connector Specifications Figure 8 HEDS-5000 Series Encoder Kií L i DiHETfE L UNlTSnn. \ChES c_ 21; oi2 M..iMElD'L X. 5 X> ' li?.i!.chfs x,. 02 i'l w: Figure 9 Code Wheel Figure 10. Mouníinp Requi:emrnis Ordering nformation D CPR H-430CPR E CPR A-SWCPR F CPR CPR NOTE OTHER RESOLUTONS AVALABLE ON SPECAL REQUEST -i1 01-Zmm 02-3mm 03-1?8 in. 00 5/32 tn O5 3/16 in 06 1/4 in 11-4mm SHAFT DAMETER mm 14 5 mm W - USE WHEN ORDERNG ENCODER BODES 4,- ' i PROOUCT TYPE O - 28 mm COMPLETE KT 1-28 mm CODE WHEEL 3-28 mm ENTTER END PLATE' OUTPUTS O - 2 CHANNEL DGTAL 1-3 CHANNEL DGTAL MECHANCAL CONFGURATON O n, 124 n i CABLE 'NC, OPllOh S SPECÇrEii NHEh ORDERNG Eh:TTER Eh2 PLdlES OhLY i 4-3b

109 ;haft Encoder Kit Assembly See Appllcatlon Note 1011 for further dlrcurrion. The following assembly procedure represents a simple and reliable method for prototype encoder assembly High volume assembly may suggest modifications lo this pracedure using CustOrn designed tooling n certain high volume applications encoder assembly can be accomplished in ess than 30 seconds Consult factory for further details Note The code wheel to phase plate gap should be set oeiween O O15 in and O 045 in [WARNNG. THE ADHESVES USE0 MA Y Be HARMFUL CONSULT THE MANUFACTURERS RECOMMENDA TONS 1 READ THE NSTRUCTONS TO THE END BEFORE STARTNG ASSEMBLY. 1.0 SUGGESTED MATERALS 1.1 Encoder Paris Encoder Body Emitter End Plate Code Wheel 1.2 AssemMy Materisls RTV - General Electric Dow Corning 3145 Epoxy-Hysoi 1C Acetone Mounting Screws 3 RTV and Epoxy Applicators 1.3 Suggested Assembly Tod. a Holding Screwdriver b Torque Limiting Screwdriver, O 36 cm kg 5 O in 02 c, Depth Micrometer or HEOS-8922 Gap Setter da Oscilloscopeor Phase Meter DescribedinAN Either may be used tor twochannel phaseadlustment Anoscilloscope is required for index pulse phase adjustment 1.4 Suggested Clrculis a Suggested circuit tor tndex adjusmept HEOS ENCODER BODY ATTACHMENT 3 1 Place the encoder body on the mounting surface and slowly rotate the body to spread the adhesive Align the mounting screw holes with the holes in the body base 3 2 Place the screws in the holding screwdriver and thread them into the mounting holes, Tighten to approximately O 36 crn kg 5 O in OL using a torque limiting Screwdriver if available See notes a and b below Remove centering cone if used Notes: a At this torque value. the encoder body should slide on the mounting surface only with considerable thumb pressure b The torque limiting screwdriver should be periodically calibrated for proper torque EPOXY APPLCATON A OUTPUT ro OSCLLOSCOPE For optimal index phase, adjust encoder position to equalize Ti and T2 pulse widths b Phase Meter Circuit Recommended for volume assembly Please see Application Note 1011 for details 2.0 SURFACE PREPARATON CAUTON HANDLE THE CODE WHEEL WTH CARE 4 1 Collect a small dab of epoxy on an applicator 4 2 Spread the epoxy inside the lower part of the hub bore 4 3 Holding the code wheel by its hub. slide it down the shaft lust enough lo si1 it squarely About 3 mm 1~8' 5.0 CODE WHEEL POSTONNG \. THE ELAPSED TME BETWEEN THS STEP AND THE COMPLETON OF STEP8 SHOULD NOT EXCEED 112 HOUR 2 1 Clean and degrease with acetone the mounting surface and shaft making sure to keep the acetone away from the motor bearings 2 2 Load the syringe with RTV 2 3 Apply RTV into screw threads on mounting surface Apply more RTV on the surface by forming a daisy ring pattern connecting the screw holes as shown above CAUTON KEEP RTV AWAY FROM THE SHAFT BEARNG Take up any by lightly pullingdown on the shaft's load end 5 2 Using the gap setter or a depth micrometer. push the code wheel hub down to a depth of 1 65 mm c 065 in i below (he rim of the encoder body The registration holes in the gap setter will align with the snaps protruding from the encoder body near the cable 5 3 Check that the gap setter or micrometer is seated squarely on the body rim and maintains Contact with the code wheel hub 5 4 No epoxy should extrude through the shaft hole 1 DO NOT TOUCH THE CODE WHEEL AFTER ASSEMBLY 4-31

110 6.0 EMTTER END PLATE 8.0 NDEX PULSE ADJUSTMENT (HEDS-5010) 6 1 Vsually cnecm!nat the wtre pins ir, the encoaef bocy are stra~ghi and straighten if necessary 6 2 Had the end plate paiallei 13 the encoder body r:m Aiijrr the gutding pin on the end piate with the hole in ine encooer bsay and press the en3 piate straight down until ~t is locked rnlo?:ace 6 3 Visual!) CheCK 13 see i1 ihc end piale 1s prsp~:iy ~ ~aiig 7.0 PHASE ADJUSTMENT 4-32